It’s September. The obvious topic for the month in our family is…
Carrot Cake!
“Seriously?” you might ask. Yes, for real.
Mom did make desserts in the farm days. She was partial to pies, cream puffs and a French delicacy known as floating island-mounds of poached meringue floating in a sea of crème anglaise. The latter two sweets made great use of eggs, one might note. When she made a cake, it was usually angel food, a partnership between her and Duncan Hines. Followed inevitably by my grandmother bemoaning the hours of her cake mixless youth, spent beating all of those egg whites by hand. And while I loved baking cakes, it was one of those situations where the process was more fun than the product…
There was, however, always a cake on the table for family birthday parties. I remember requesting marble cake as a kid; later Mom made me big luscious coconut cakes with lemon filling, fluffy frosting and toasted coconut sprinkles. You know someone loves you when she tackles a whole fresh coconut for your birthday! Other popular choices included chocolate or Boston cream pie, which is actually cake. These were feathery, tender sponges, with butter or fluffy frosting.
When my husband joined the family, we discovered that his birthday cake of choice was…uh… carrot cake. No one in our kitchen had ever made a carrot cake-neither feathery nor fluffy! And while “carrots” had endowed it with a “health glow,” the typical carrot cake was actually fat and sugar laden as well. It fell to me to make the carrot cake each September-I was the one who married him, after all. My first try was dense and heavy, too many raisins and nuts, too much oil and sugar; a bit like fruitcake, without the saving grace of bourbon. (Actually, in retrospect, I should have tried that.) And the frosting? Sugar with a side of cream cheese. Need I say, it was not a popular cake with the fam, and each September I tried to fine-tune it. Using some whole grain flour; cutting the oil and sugar; fewer raisins and nuts; adding pineapple! While the family thought the pineapple was an improvement, the birthday boy nixed it. Pineapple did NOT belong in his carrot cake. In other words, there’s been a load of carrot pressed through the grater in search of a carrot cake recipe we could all happily eat.
I had settled recently on a recipe of my own devising, made with apple butter, when I opened my weekly Food 52 email missive and saw a link to “Donna Hay’s Food Processor Carrot Cake.” Now, while I had never heard of Donna Hay, I impulsively decided that if she was making carrot cake in the food processor, she could seriously become my new BFF. No grating! No chopping! Donna Hay, as it happens, appears to be an Australian one woman Food Network, having produced too many cookbooks, television shows and magazines to count. And she evidently knows her way around carrot cake. If Food 52 finds her trustworthy, I figured I could, as well.
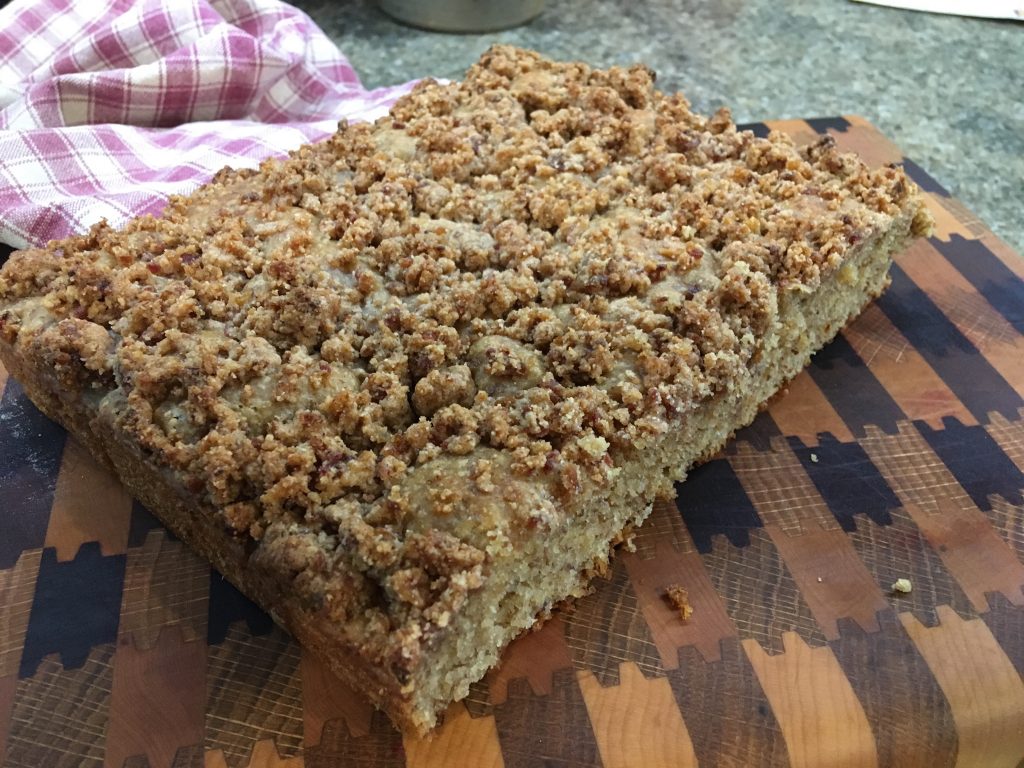
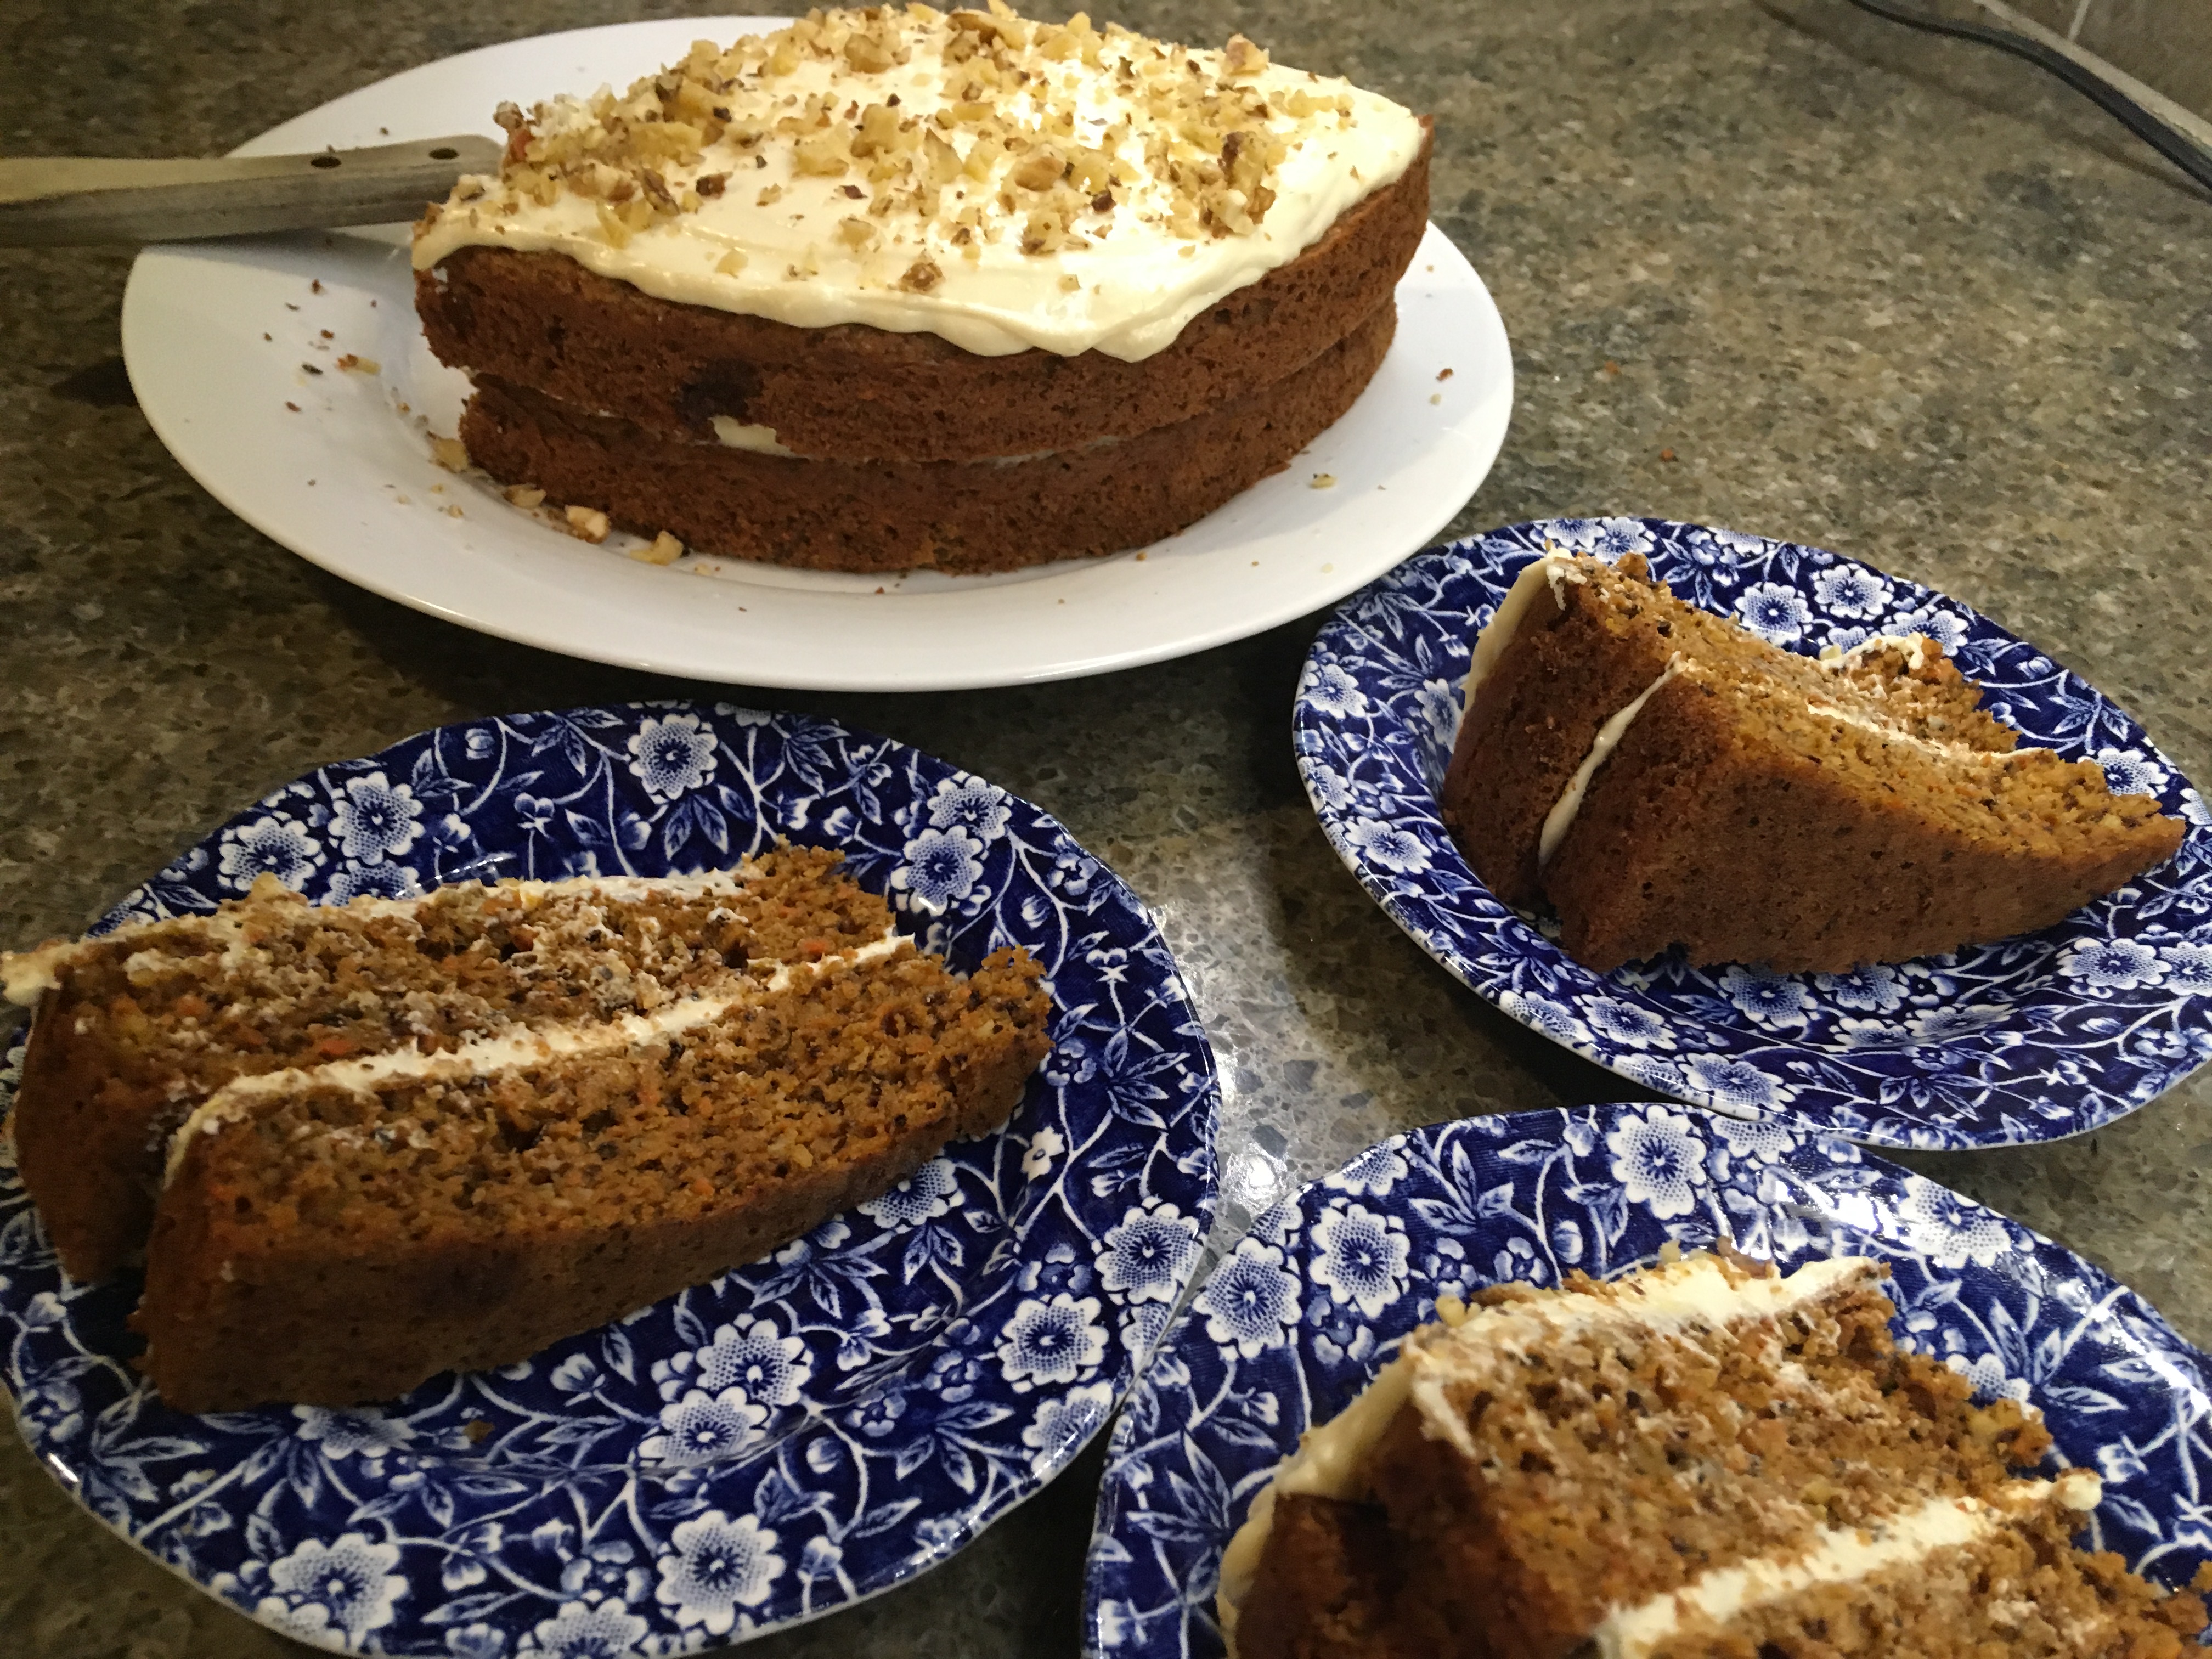
Not to say that I didn’t tweak the recipe, of course. The final cut here is a cross between Ms. Hay’s (https://www.donnahay.com.au/recipes/food-processor-carrot-cake) and my own recipe. Reduced sugar, whole sprouted and ancient grain flours, raisins (they just have to be there.) Chopped in the food processor, though, the smaller pieces distribute more evenly through the cake. I also added some almond milk, because the batter was simply too thick. Chalk it up to hard won carrot cake intuition developed from decades of struggling with this cake, I simply knew it needed more liquid. Ms. Hay’s frosting was so lightly sweetened that it actually tasted like cream cheese rather than a bag of confectioners sugar; I added a touch of butter and citrus peel for additional flavor. The resulting cake was moist and light- did you catch that? Light! And tasted precisely like carrot cake was probably always supposed to.
Living in Arizona, we are down to three local family members celebrating birthdays and don’t need a huge full size cake. So the recipe as written here is based on half the original. Donna (see, we’re on a first name basis now!) bakes a full size cake in a deep springform pan, while I make a single 9-inch layer. I typically cut the layer into halves and stack them with frosting between and on top, resulting in half of a typical double layer American style cake. A full sized two-layer cake can be make by doubling the recipe.
September no longer intimidates me with thoughts of carrot cake, and it’s a real shame my mom will never get the chance to try this new and improved offering. If only it hadn’t taken me 35 years to figure the darn thing out…

Food Processor Carrot Cake
Ingredients
- 2 large carrots cut into 1-inch pieces
- 1/4 cup walnut pieces
- 1/2 cup brown sugar packed
- 1/4 cup raisins
- 1 1/2 cups whole wheat pastry flour can substitute half white whole wheat, half all purpose
- 1/2 tsp baking powder
- 1/2 tsp baking soda
- 1 tsp cinnamon
- 1/2 tsp salt
- 1/4 cup vegetable oil I use avacado
- 2 tbsp Greek yogurt
- 1 large egg
- 1 tsp vanilla extract
- 1/2 cup almond milk milk of choice can be substituted
Cream Cheese Frosting
- 4 oz cream cheese I use Neufchatel
- 2 tbsp fresh ricotta or cottage cheese I use lactose free cottage cheese
- 1 tbsp butter softened
- 3 tbsp confectioner's sugar
- 1/2 tsp vanilla extract
- 1/2 tsp grated lemon zest
Instructions
- Preheat the oven to 325° F. Coat a 9-inch round cake pan with non-stick spray and line the bottom with a parchment paper round.
- Combine the carrots and nut pieces in the food processor and process until finely chopped.
- Add the remainder of the ingredients and process, scraping the work bowl as needed, until a well combined batter forms. This should take only seconds.
- Pour the batter into the prepared cake pan and bake for 25-30 minutes or until a toothpick inserted in the center comes out clean. The top of the cake should spring back when pressed.
- Cool the cake on a rack, still in the pan. Turn out when cool and peel away the parchment paper.
- To make the frosting, combine the cream cheese, fresh cheese, sugar, zest and vanilla in the food processor. Process until well mixed and creamy.
- The cake can be frosted and eaten as a single layer, or cut into two half circles and stacked with frosting to make a two-layer cake. Refrigerate leftovers.