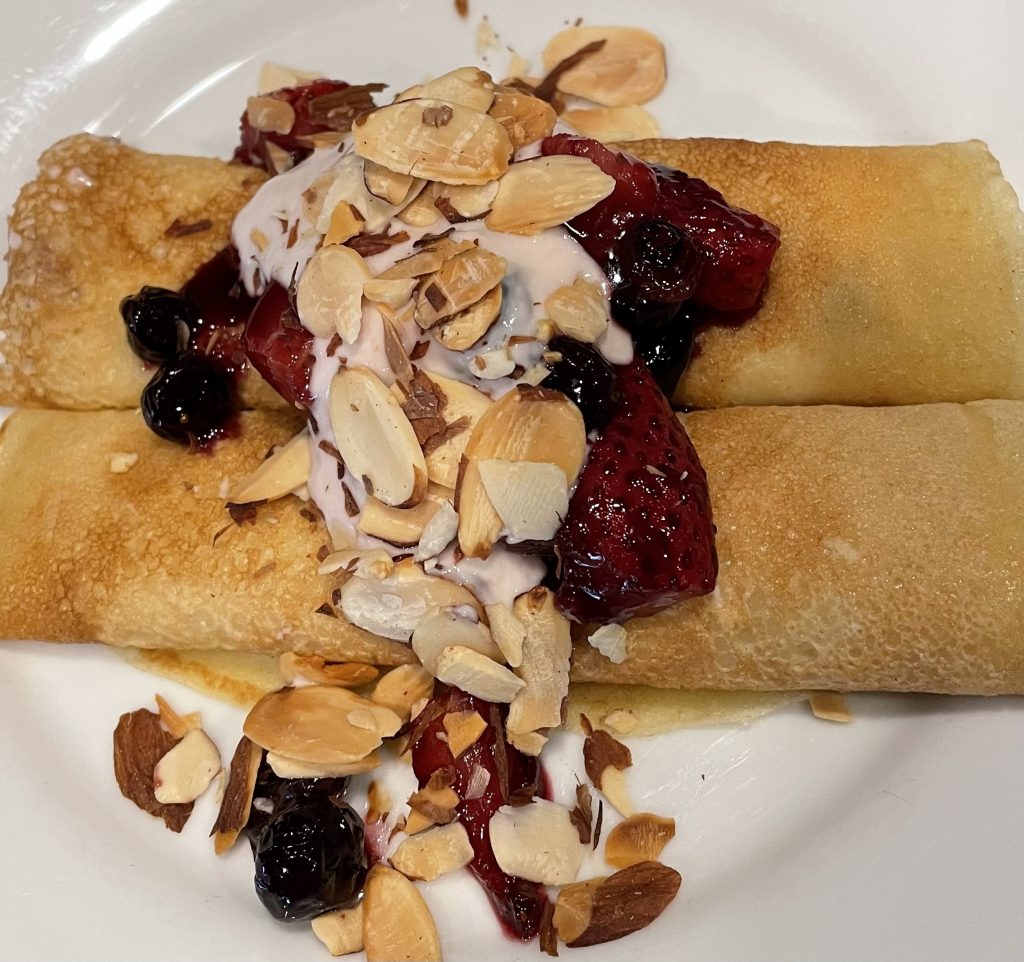
Almond Sugar Cream Pie

Almond Sugar Cream Pie

Okay. I hate messing with family recipes that are so unhealthy they show little potential for redemption. Whatever might that recipe be, you ask. “Sugar Pie” is pretty self-explanatory, wouldn’t you think? This pie basically consists of a sugar/flour/butter mixture with vanilla cream poured atop, then baked until set, but still richly creamy. A bit like the filling of a nut pie, just without the nuts. I gather that Mom justified the whole thing on her practice of substituting evaporated milk for the cream, since that would somewhat cut the fat. Like it needed more fat; it was basically streusel ensconced in fat laden piecrust… if only it wasn’t so damned delicious. Sigh.

Not only does it taste wonderful, it’s also a pie with great history. Also known as sugar cream pie, it has heritage with the Quakers, Shakers, Amish and even with the Quebecois. This pie definitely got around, though the state of Indiana claimed it in 2009 as its official state pie, renamed Hoosier Sugar Cream Pie. Supposedly the Amish and Shaker communities baking the pie were living in Indiana in the 1800s. How it got to Quebec is beyond me! (That version unsurprisingly uses maple syrup.) It does seem that the recipe might have originated just about anywhere, given that it was easily made with pantry staples and decidedly satisfied the sweet tooth. Yes, I suspect this innocent pie was probably at the root of more than a few cavities…

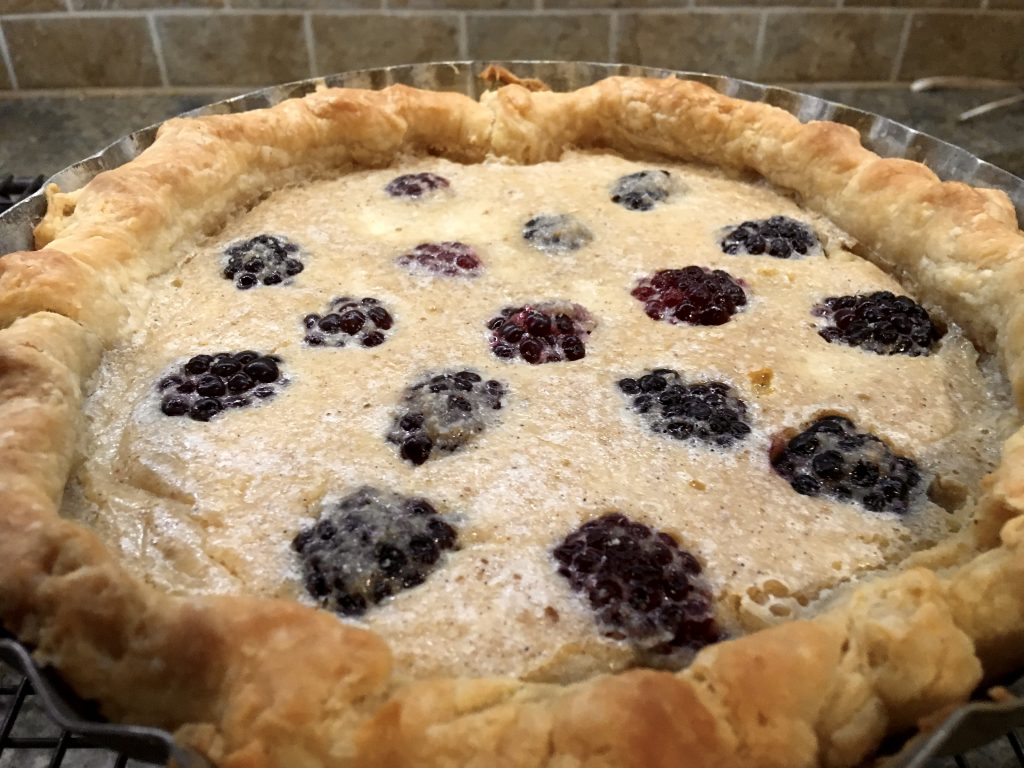
So all I really needed to do was cut the fat and sugar, right?? Problem is, that’s most of the pie… once done, the ingredient list is so short there’s no way for it to fill a piecrust. So-o-o, some substitutions were in order. Almond flour seemed a logical candidate to replace a major portion of the sugar, offering up a tasty balance of protein and healthier fat, while actually being a whole plant food. Cut both the butter and sugar by about two-thirds, bump up the flavor with spices and brandy, (you knew the booze would be in there somewhere) and finish it off with one’s choice of creamy milk product. While I tried lactose free half and half, options would include the aforementioned evaporated milk, light coconut milk and perhaps even oat milk. Getting a little carried away, I topped it with the blackberries I had in the fridge, and was amazed at what came out of the oven! Beautifully full and browned, with a lovely circular pattern of berries on top. Still rich in flavor, but lightly sweet with a moist crumbly texture and the tart sweetness of the fruit.

Was it anything like Mom’s sugar pie? Well, no, but this pie was something delectably new and different! Except it wasn’t, really. Delectable, yes. New and different? Uh…No. Somehow I later came to discover that I had actually baked an eggless French Frangipane tart, the British version being the Bakewell tart. https://en.wikipedia.org/wiki/Frangipane

I concluded there were two ways to look at this. One way would be to credit myself with the creativity to reinvent the wheel. The other would be to admit that it takes a clueless American to be so unfamiliar with said ethnic baked treasures from other cultures. But I figure in the big picture, it hardly matters. An almond sugar cream pie is still a mighty fine pie. As to the sugar pie recipe? It’s still peeking at me accusingly from the recipe box. Back to the drawing board. 

Sweet Almond Pie

Delicious almond pie, lightly sweet with a rich crumbly texture and flavor notes from spices and brandy.
Prep Time30 minutes
Cook Time35 minutes
Total Time1 hour 5 minutes
Course: Dessert
Cuisine: American, French
Keyword: almond, pie
Servings: 8 people

Ingredients

  • 2 tbsp flour, heaped
  • 1/2 cup almond flour
  • 1 tbsp butter
  • 1/3 cup sugar
  • 1/2 tsp anise seed
  • 1/4 tsp cinnamon
  • 7/8 cup light ½ and ½  3/4 cup + plus 2 tablespoons
  • 2 tbsp brandy
  • 1 tsp vanilla
  • 1/2 pint Blackberries, halved
  • 1 8-inch prepared pie shell

Instructions

  • Preheat the oven to 400° F. 
  • Mix the flours, butter, sugar, anise seed and cinnamon to fine crumbs, using a pastry cutter or food processor. Reserve 2 tablespoons, and spread the remainder in the 8-inch pie shell. Stir together the ½ and ½, brandy and vanilla. Carefully pour the liquid mixture over the filling in the pie shell. Spread lightly to cover. Press the berry halves lightly into the filling. Sprinkle reserved crumb mixture over top and bake for 8 minutes. Reduce the oven temperature to 350° F. and bake for an additional 25-30 minutes, til set and lightly browned on top.
  • Remove to a cooling rack and cool before slicing. 

White Vegetable Chili 

(With chicken… or not)

White Vegetable Chili

Unilever, a huge international food processing company, has released a report recommending people switch to a plant based diet. While the report says all the right things about health and sustainability, my suspicion is that we are approaching a tipping point. A point at which the market for plant based foods has grown so substantially that the future of big food might just have to include plants… albeit highly processed plants. As a plant predominant eater, I appreciate the occasional plant based burger or ice cream bar, but these processed foods are not my foundation dishes.

What are my mainstays? It appears that I’m a relatively new breed of plant based eater, since many of the plant based recipes I find tend toward the mushy and bland. Or leave me ravenous half an hour after I’ve eaten. I’m searching for well-developed recipes using primarily whole food plant ingredients. Said dishes must be delicious: balanced, harmonious in taste and well seasoned, with depth of flavor and pleasing texture. I’m also pretty insistent that they contain the balance of protein, complex carb and fat that I’ve always required in my dietary selections. We are admittedly foodies in this house-piling a few vegetables atop a bowl of grain, however whole it may be, is not going to cut it. 

Which has left me to my own recipe development devices… but I am slowly amassing a repertoire of recipes that make meal planning feel possible. The fact that we are still omnivores is quite helpful. A small amount of meat or cheese can make an amazing difference in the taste and texture of a dish, demonstrated by the “flip the ratio” strategy I’m using today. Most entrees contain hefty amounts of animal protein with a few token veggies. But if I adjust dishes such that the vegetables provide the heft and the meat or cheese is the token, these recipes can be real winners. 

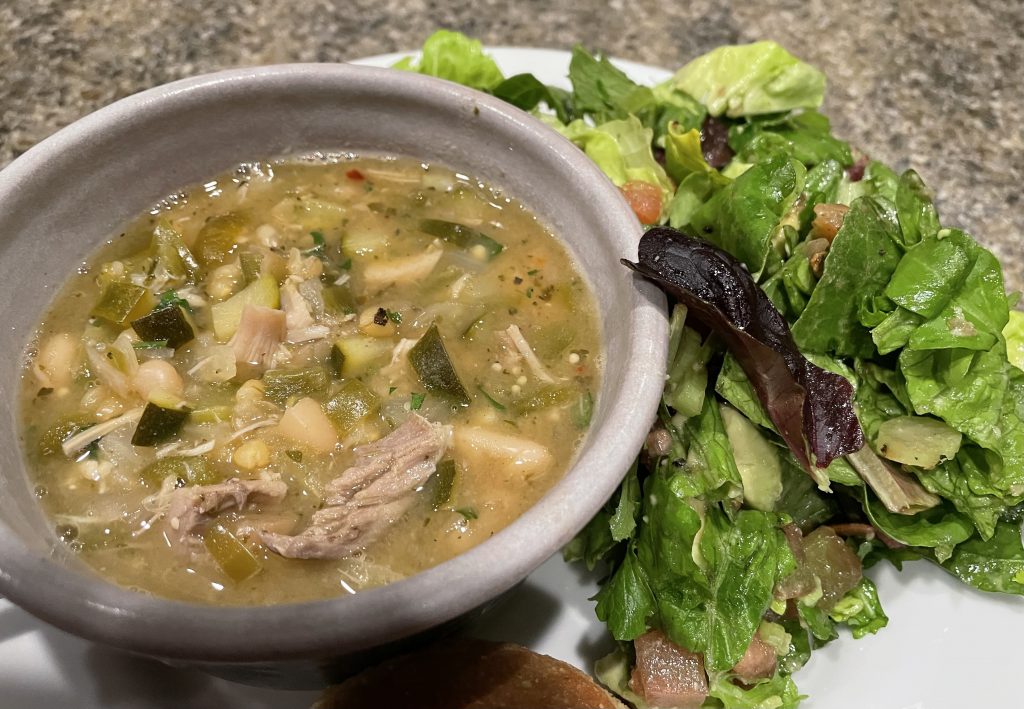
I love a good white chicken chili, but most feature large portions of chicken, a few white beans and a can of green chilies. My taste buds crave the particular essence of green chili, not the chicken. To flip the ratio, swap the chicken for onion, fennel, tomatillo and zucchini; increase the measure of creamy white beans, providing the protein heft; and wheat berries, to deliver both protein and a pop of texture. White miso and balsamic vinegar supply the depth.  When I want the chili to include chicken, I use chicken broth and add in a few ounces of cooked chicken. If not, we use “no-chicken broth” and skip the chicken. TBH, I’m happy with either version of white vegetable chili, as long as the smoky heat of green chili prevails.

 Before trying this, you should probably know that I crave the heat in just about everything I eat. What’s my desired level of heat on a scale of 1-5? 5. So I’ve been careful to moderate the heat in this recipe. Feel free to spice it up or down to your liking. I’m using a combination of fresh Hatch green chilies and Hatch chili powder. Hatch green chilies come quite specifically from Hatch, New Mexico, but they are basically the same as the Anaheim green chili, just with more heat. Anaheims are more readily available, and if need be, one can always use the little can of green chilies. The farmer’s market here has also spoiled my chili loving soul with the roasting stand, at which I can purchase freshly roasted chilies and chili powders of all varieties. However, Hatch green chili powder is available for order from various spice companies, and of course from the ever-ready Amazon. Increase the red pepper flakes if the Hatch powder doesn’t happen to reside in your spice drawer. 

I’ll be searching for hot weather dishes all too soon enough, but this soup warms me to my core on the chilly nights of a desert winter. I suspect it might do the same for you, wherever you happen to be spending your winter evenings.  

White Vegetable Chili
Print Recipe
5 from 1 vote

White Vegetable Chili

Warming white bean chili with vegetables and Hatch chilies
Prep Time45 minutes
Cook Time45 minutes
Total Time1 hour 30 minutes
Course: Entree, Soup
Cuisine: Southwestern
Keyword: Hatch green chili, vegetables
Calories: 233kcal

Ingredients

  • 1 tbsp garlic infused olive oil can add fresh garlic, if desired
  • 3/4 cup chopped onion
  • 3/4 cup chopped fennel
  • 1/2 cup chopped Hatch green chili can substitute Anaheim
  • 1 cup chopped tomatillo
  • 1 medium zucchini, chopped in 1/4-inch pieces
  • 1 tsp salt
  • 1/2 tsp pepper
  • 1 basil leaf
  • 1/2 tsp ground cumin
  • 1/2 tsp ground coriander
  • 3/4 tsp dried oregano
  • 1/2 tsp chili flake
  • 1 tsp Hatch green chili powder
  • 2 cups cooked white beans, home cooked or canned
  • 2 1/2 cups broth, Chicken or Vegetable
  • 3/4 cup cooked wheat berries could substitute farro or quinoa
  • 4 oz cooked, chopped chicken optional
  • 1 tsp white miso
  • 1 tsp white balsamic vinegar

Instructions

  • In a large soup pot, heat the olive oil over medium high heat. Stir in the onion, fennel and green chili to coat with oil. Sauté for several minutes, until the vegetables begin to soften. Add the tomatillo, zucchini, seasonings, beans and broth. Bring to boil, then reduce to simmer for 30 to 40 minutes to cook the vegetables and blend flavors. Mash a few of the beans in the pot to thicken, if desired. When the vegetables are tender, stir in the wheat berries and chicken, if using. Just prior to serving, mix the miso and vinegar, and stir into the soup. Heat through to serve. 
     

Notes

Total fat: 6 g
Cholesterol: 22 mg
Sodium: 683 mg
Total Carbohydrate: 31.4 g   Dietary fiber 8.9 g  Total sugars: 3.8 g
Protein: 16 g

Cranberry Walnut Chocolate Biscotti

Cranberry Walnut Chocolate Biscotti

“Don’t mind me, I’ll just be over here making everything magical and shit.”http://www.Tinybeans.com

Memes like this one are popular in the month of December. While sarcastically comical, I’m going to suggest that they hold a great deal of truth. They usually imply that Mom is the production manager for the holiday, but I’d argue that it’s dads, too. On the farm, Daddy was annually elected to head out and find a tree, then schlep it home using clips and ropes to “magically” hold it on the top of the car. And while Mom was the tree-side director, it was still his job to climb up the tree and evenly disperse and attach the Christmas lights prior to all of us hanging bulbs, Ivory Soap “snow,” and tinsel. No small feat, that.

Mom was the indisputable producer of Christmas kitchen magic, though. While this encompassed a wide range of rich and delicious dishes, today I’m looking at you, Christmas cookies. And some of these masterpieces weren’t even for consumption. We spent a raucous evening each year decorating cutout sugar cookies to be hung on a small tabletop Christmas tree. The competition for best cookie decorator of the year was intense. When it came to the cookies that would be eaten, there might have been one or two standards, but Mom was always up for trying the year’s new holiday trends in cookie baking. As I peruse her/my recipe file, I see classics like butterscotch shortbread, buttery thumbprints, molasses butterballs, Mexican wedding cakes, etc. etc. There is a theme here and it’s all about the butter… which my mom most decidedly loved.

Given that I’m trying to improve my blood test results, my use of butter in this past year has plummeted by about 75%. So at least some of the cookie joy this year had to come from a butterless cookie. Cue the olive oil… again…

I’ve raved about the virtues of the Italian cookie before, so I’ll spare you. But the history! Something else entirely. Biscotti are the great great grandmother of all Italian cookies. The word means literally “twice baked.” Because they bake twice, they become dry and crisp, allowing them to be stored for periods of time. The idea dates back to the Roman legions, which carried a twice-baked bread, probably similar to today’s rusk, on their various conquests. The sweetened biscuit I’m sharing today, however, is much more like the almond biscuits originating in the Tuscan city of Prato. But we are still talking 14th century. These crunchy little biscuits have been around for a while! Biscotti are sometimes baked using butter, sometimes with oil, and other times with no fat other than that included in the yolk of multiple eggs. But of course, I’m baking them with olive oil. 

This recipe makes a boatload of biscotti, which is fine by me, as they freeze beautifully and last a while. Prepared with all wheat flour they are more cookie like, made with part almond flour they are Italian to the core. The latter version produces crusty crunchy biscotti filled with little nooks and crannies. Some of those little spaces are filled with the fruit, nuts and chocolate. Pastry chefs might like to dip or coat their biscotti in melted chocolate, but let me think… do I need an additional task after I’ve baked these babies twice? No… I am just folding slivers of chocolate right into the dough. Once baked, these are my cookies of choice to dip into my daily post lunch cappuccino. Yes, I know; you can tell that retirement here is tough work. (Not.)

Given that it’s time for the New Year, you’ve most probably already overdosed on Christmas cookies; you may be preparing resolutions to rid yourself of this year’s accumulation, actually.  So clip/save this recipe for a time that you’d like to sit back and put your feet up with coffee and a cookie. That time will come ‘round before you know it. 

Cranberry Walnut Chocolate Biscotti

Crunchy Italian twice baked cookie with dried fruit, nuts and chocolate
Prep Time30 minutes
Cook Time35 minutes
Total Time1 hour 5 minutes
Course: Dessert
Cuisine: Italian
Keyword: biscotti, chocolate, cranberry, walnut
Servings: 4 dozen

Ingredients

  • 1/3 cup dried cranberries
  • 2 tbsp Grand Marnier or other orange liqueur
  • 1/3 cup olive oil
  • 1/2 tsp fiori di sicilia may substitute vanilla + 1 tsp orange zest
  • 2 large eggs
  • 1 3/4 cup whole wheat pastry flour or 1 1/4 cups flour + 1/2 cup almond meal
  • 1/4 tsp salt
  • 1 tsp baking powder
  • 1/2 cup finely chopped walnuts
  • 1 oz dark chocolate, finely shaved

Instructions

  • Preheat the oven to 350° F. Line a standard cookie sheet with parchment paper.
  • Macerate the cranberries in the Grand Marnier while preparing the dough.
  • Pour the olive oil into the work bowl of a stand mixer. With the mixer running medium low, gradually add the sugar and beat til well mixed. Add the extract, then the eggs, one at a time. Beat til well mixed and fluffy.
     
  • Combine the flour, salt and baking powder. With mixer at low speed, add gradually to the creamed mixture until soft dough forms. Mix in the cranberries, walnuts and slivers of shaved chocolate thoroughly. 
  • Using half the dough, shape into 2 logs on the cookie sheet, each approximately 2 ½ inches wide, and 10 inches long. Bake the biscotti for 20-25 minutes, til the logs are firm and beginning to brown. Remove from the oven and allow to cool for several minutes. Use a spatula to maneuver the logs, one at a time onto a cutting board. Slice the logs on the diagonal, making slices about 3/8 inch wide. Return the individual slices to the baking sheet as you cut them. When both logs are sliced and on the cookie sheet, return the sheet to the oven for about 10 minutes. Remove them from the oven and transfer to a cooling rack. 
     

Notes

Serving Size: 1 biscotti
Calories: 52
Total fat: 2.7 grams, .04 grams saturated
Total carb: 6 grams, .05 grams fiber, 4.1 grams added sugar
Protein: 1.1 grams

Spaghetti Squash with Fresh Herbs and Walnuts

Spaghetti Squash with Fresh Herbs and Walnuts

I trust that you all both survived and recovered from Thanksgiving 2021. 

Thanksgiving on the farm had a menu set in stone. Roast turkey, my grandmother’s Amish potato dressing, mashed potatoes, gravy, the token vegetable, jellied cranberries and pumpkin pie. While everyone and their brother appear to swoon over the side dishes, there were only five of us; one vegetable dish seemed plenty for which to be thankful. It was likely to be whatever Mom had in the freezer that would take the least effort-green beans, most likely. And after the dinner was no longer served at the farm, who was I to mess with family tradition? That menu was an institution unto itself and has lived on.

But over the past year, we have gradually transitioned to a more plant centric diet. No commitments, no deletions, just putting plant-based foods at the center of the plate with fewer animal products around it.  While my taste buds argue occasionally, my digestive system is exceedingly thankful. I knew there would have to be less turkey and dressing, and more vegetables on my particular plate this year.

We tried out varying vegetable side dishes in the weeks leading up to Thanksgiving, ultimately settling on braised collard greens and honey miso roasted root vegetables. One could simmer away on the cooktop while the other roasted in the oven alongside the dressing. When push came to shove, today’s spaghetti squash recipe didn’t make the cut for the big day, as it was a last minute diva. When one is slicing turkey, heating potatoes, making gravy, and serving wine, the veggies have to step up to the plate and take care of themselves! 

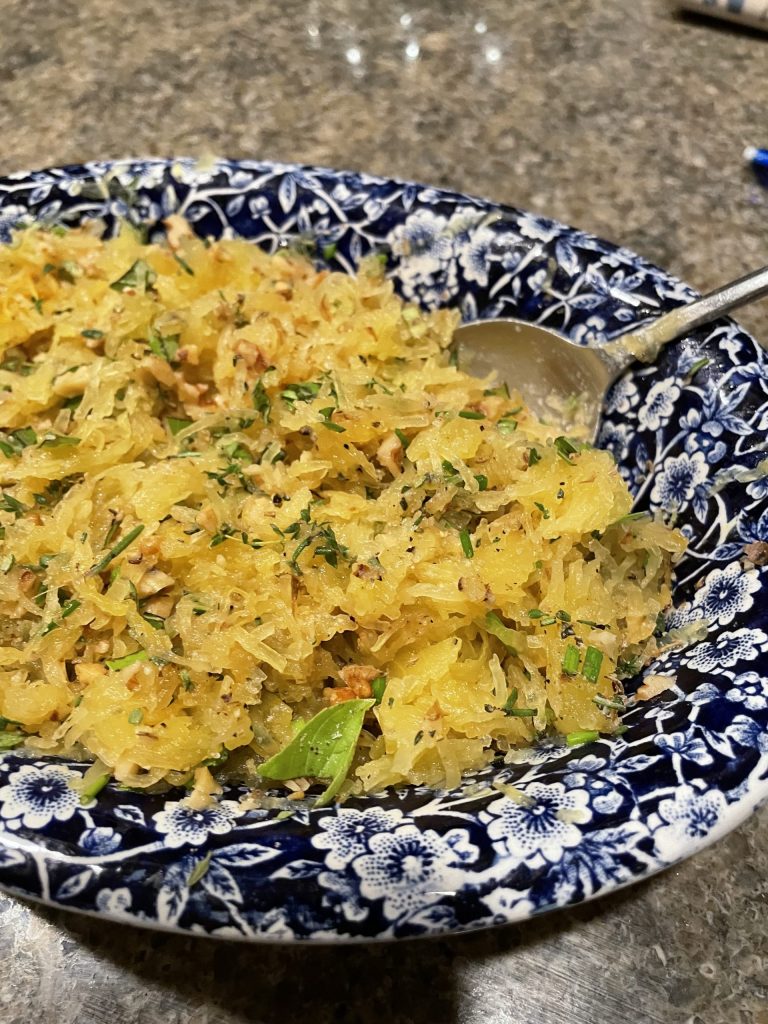
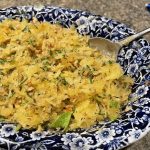
So while today’s squash recipe needed too much coddling to be served for Thanksgiving, it’s a fresh take on spaghetti squash that we enjoy with less demanding meals. We often receive spaghetti squash in our CSA share, and I generally find it a bit bland. Nor does it make a satisfactory substitute for pasta in my opinion-it’s not particularly filling, and the texture is nothing like spaghetti. But steamed just until tender yet crisp, shredded from the shell and dressed with a fresh miso laced herb mince, its personality shines. The lemon provides just enough acidity, such that each bite cleanses the palate in preparation for the next. Bring on the diva; it’s my current go-to recipe for spaghetti squash. 

We all need to be incorporating more plant foods into our diets. They feed our bodies in ways that animal foods food can’t. It matters not the role played by vegetables on your plate. Put them at the center, or serve them on the side, but do include them. Spaghetti Squash with Fresh Herbs and Walnuts is a tasty addition to the plate, wherever you decide to place it. 

Spaghetti Squash with Fresh Herbs and Walnuts

Crisp, tender shreds of spaghetti squash with a fresh herb mince and chopped walnuts.
Prep Time2 hours 30 minutes
Total Time2 hours 30 minutes
Course: Side Dish, Vegetable
Cuisine: American
Keyword: fresh herb mince
Servings: 4

Ingredients

  • 2 lb spaghetti squash
  • 1 tbsp extra virgin olive oil
  • 1 tbsp lemon juice
  • 1/2 tsp salt
  • 1/2 tsp freshly ground pepper
  • 1/2 small bunch parsley
  • 1 tsp fresh rosemary, diced
  • 1 tbsp fresh thyme leaves
  • 2 tbsp fresh basil leaves, chopped
  • 2 tsp white miso
  • 1/4 cup walnut pieces
  • 1 green onion, cut into 1-inch pieces

Instructions

  • Cut the spaghetti squash in half, lengthwise. Place half in a glass pie plate and pour 3/4-inch of water in the bottom. Cover with plastic wrap and steam in the microwave for 5-10 minutes, til tender. Remove first half from the plate and repeat with the second half of squash. Set squash aside while preparing the herbs.
  • Blend the olive oil, lemon juice, salt and pepper. Set aside.
  • Place the parsley, herbs, miso, walnuts and green onion in food processor and pulse til finely minced.
  • Scrape the shreds of squash into a medium bowl and toss evenly with the olive oil and lemon dressing. Sprinkle the herb mince over the squash and fold in. Serve immediately.

Homemade Applesauce

recipe image
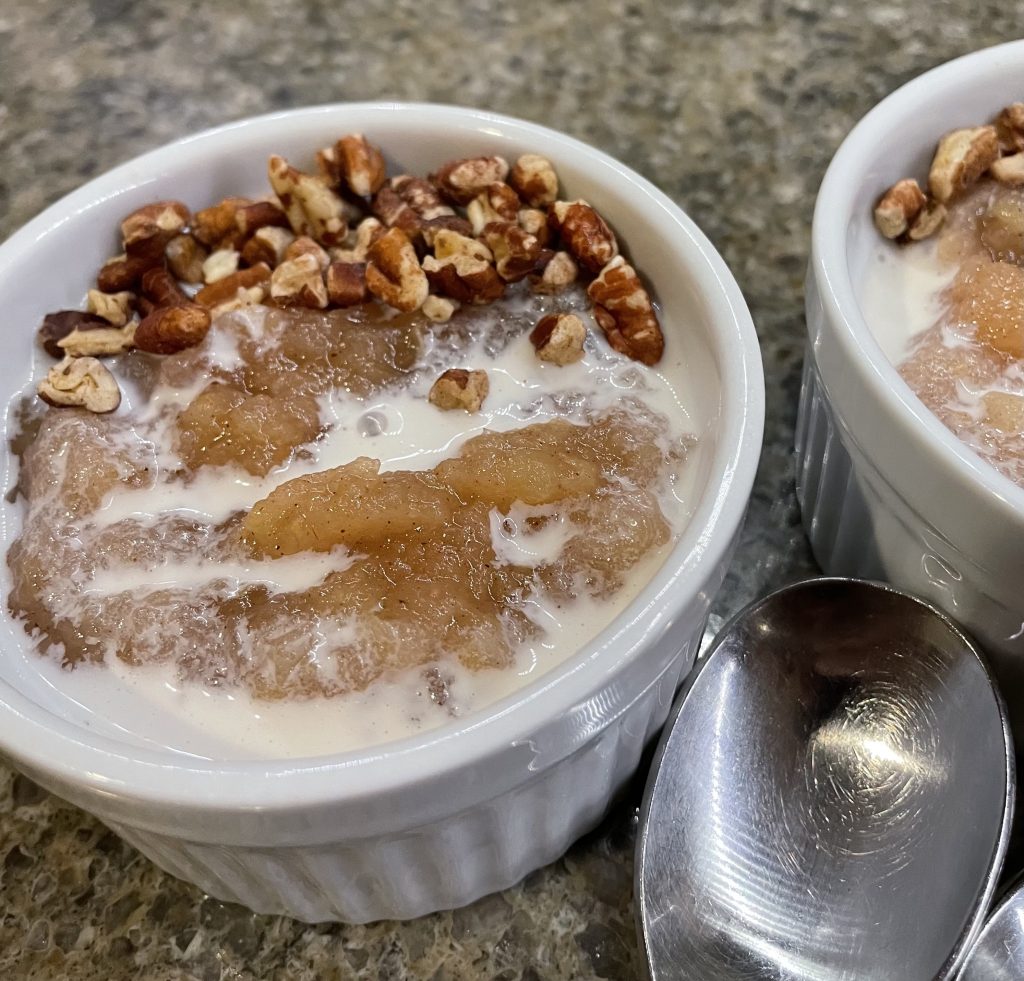
Applesauce with cream and chopped nuts

Early fall meant applesauce, an all-day epic endeavor.  It was the final hot, steamy preservation project of the year, thankfully. Mom was quite particular about her applesauce, made with yellow transparent apples. Don’t bother suggesting any other variety to her, it was yellow transparent or bust.  Fortunately, my Dad’s cousin Fran had a large grove of yellow transparent apple trees, or it would have been bust.  Fran was delighted to see us, for those trees produced more than they could possibly use.  

The transparent was the palest of green/yellow apple with a crisp white interior. High in acidity, these apples were decidedly not for eating raw, but made incredible applesauce. Mom had a vintage applesauce strainer with a long wooden pestle. The apples were washed, cut into pieces and cooked down to a creamy consistency in a bit of water. Once soft, they were reamed through the strainer, pressing all the pulp through, the peels and seeds left behind. The hot applesauce had to be sweetened just so, after which it was cooled. Packed into plastic bags and cardboard cartons, we filled the freezer, for it was one of our main sources of fruit in the winter. Mom’s favorite way of serving her applesauce was partially thawed, leaving it icy cold with frozen bits of sweetness. It was delicious.

Once off the farm, serving applesauce left me to the mercy of the grocery store…   

It obviously was someone’s job to search for the worst possible apple varieties, because while the label said “applesauce,” that stuff was decidedly mediocre. That’s actually giving it more credit that it was due… Its consumption was resigned to the years in which we were starting solid foods to our babies. Poor kids!

One of our babies grew enough to attend kindergarten at the local public school. Where his inspired teacher made applesauce with the kids, after which they wrote about the experience. By popular demand she sent the recipe with the students to make at home. Her name is withheld to protect the innocent, but the recipe was titled Mrs. _______’s Lumpy-Bumpy Applesauce. This sauce was absolutely nothing like Mom’s, yet it was absolutely yummy. Chunky rather than smooth, but well balanced and full of flavor, with no transparent apples in sight. 

Turns out the key is using a mix of several different varieties of apple. Since each combination is unique, it’s important to adjust the amount of sweetening to taste. I like to cook the apples with the peel, then strain it in my food mill, which keeps the lumpy bumpy consistency and provides a beautiful pink color, though if peeled the whole straining process can be skipped. Depth of flavor develops with the addition of cinnamon, citrus and a dollop of yes, brandy. Which I suppose you could omit, if you really need to. But I wouldn’t… While this applesauce is delicious on its own, drizzling with a spoonful of cream and a sprinkle of toasted nuts puts it in dessert territory.  Mom wouldn’t recognize it, I suppose, but she might still like it…

Sometimes I need to remind myself. Homemade is best. 

recipe image
Print Recipe
5 from 1 vote

Homemade Applesauce

Sweet-tart applesauce with notes of cinnamon and brandy.
Prep Time1 hour
Total Time1 hour
Course: Breakfast, Dessert, Side Dish, Snack
Cuisine: American
Keyword: apples
Servings: 6

Ingredients

  • 4 large apples  I like a mix of Gala, Fuji and Pink Lady
  • 3/4 tsp cinnamon
  • 1 tbsp brandy
  • 1 medium lemon, juice and zest
  • 1/2 tsp vanilla
  • 2-4 tbsp honey
  • 1/4 cup cream optional
  • 1/4 cup nuts, toasted and chopped optional

Instructions

  • Wash, quarter and core the apples. Cut the quarters into several pieces and place into a large saucepan with ½ cup water. Bring to a boil, cover and reduce heat to simmer. Cook the apples for 15-20 minutes, until soft. Allow to cool slightly.
     
  • Turn the apples and liquid into a reamer or food mill, turning until the pulp is strained through and peel is left behind. Return the apple puree to the saucepan and add the cinnamon, brandy, lemon juice and zest, and vanilla. Begin with 2 tablespoons of honey, stir and taste. If the sauce is too tart, continue to add honey and taste until desired level of sweetness is reached
  • To serve as dessert, drizzle each serving with the optional cream. Sprinkle with chopped nuts.

Notes

To skip the straining step, simply peel and core the apples prior to cooking.

Fresh Mediterranean Pasta

Fresh Mediterranean Pasta

TBH, I just never liked raw tomatoes. 

Yes, I know this is not a popular opinion.

Tomatoes were the highlight of my Dad’s huge garden. My folks would pore over the annual seed catalogs, weighing the supposed pros and cons of each heirloom or hybrid tomato before ordering seed packets. The progress of the plants and their fruits were monitored with great anticipation, with any potential problems promptly addressed. The tomatoes begin to set and next thing you know, Dad is eating the darn things warm, right off the vine. Most times, they were served at table simply sliced with salt and pepper. I passed, much to my parents’ chagrin.

And all these years later? Still not a fan. I’ll eat a few bites in a salad, then promptly push the remainder to the side of the plate, where my husband rescues their little hides. I make summer salads, heaping his with tomatoes and limiting mine to the smallest amount that appears somewhat respectable. There are coping mechanisms that allow me to eat them- dowsed in olive oil with copious amounts of fresh basil and pepper; even better dowsed in olive oil with basil and fresh mozzarella cheese. As a bruschetta topping, dowsed in olive oil and chopped basil. I believe I detect a theme here…

Fresh, room temperature pasta sauce is the most likely dish one will find me eating and actually enjoying fresh tomatoes. You guessed it: diced tomatoes, basil, fresh mozz and olive oil, tossed with pasta! Occasionally there might be a few cooked chilled shrimp chopped into it, but the theme endures. Until this summer…

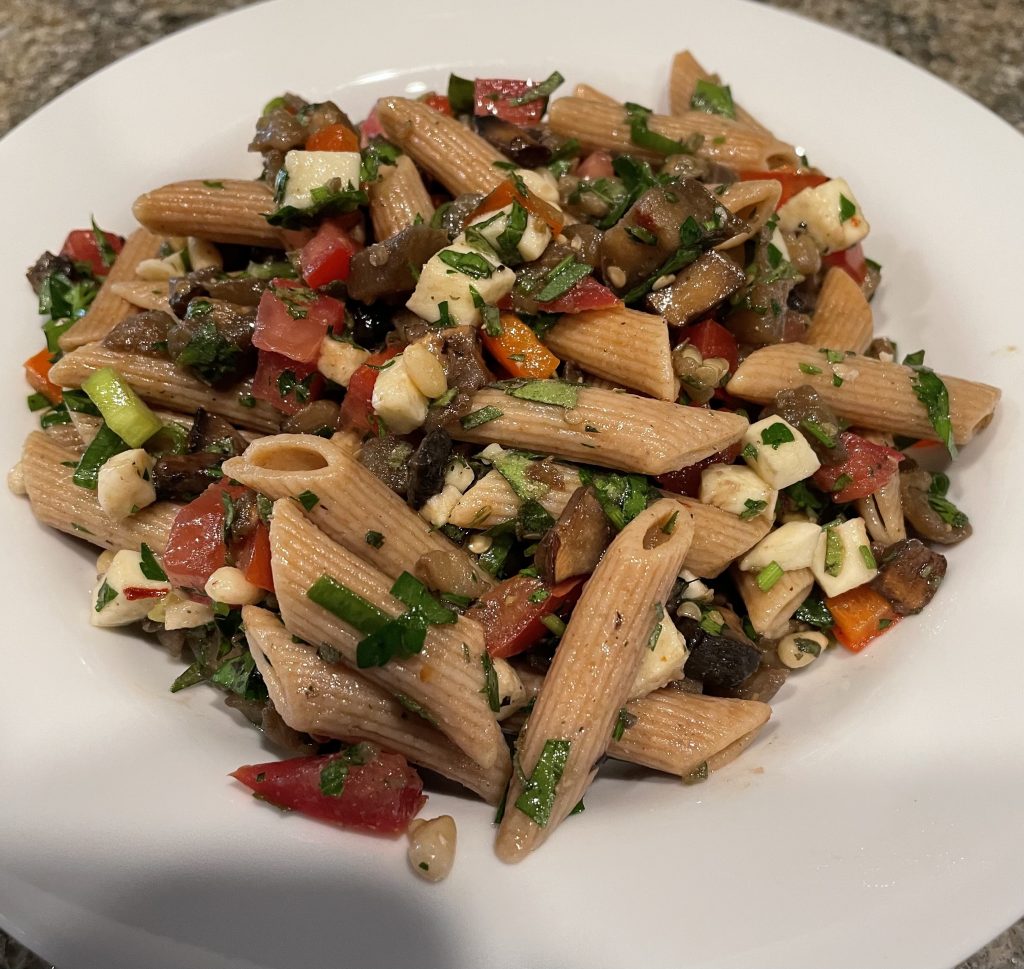
Basically, tomatoes need distraction; when one dilutes that tomato flavor with more favorable vegetables, herbs and spices, they become downright tasty. Which is what happens in this fresh Mediterranean sauce.  The tomatoes of choice for this sauce are not the weirdly misshapen yet beautiful heirlooms; no, I need a meaty tomato with very little inner seedy goo. (Can’t deal with the goo.) When all the eggplant, mushrooms, peppers, herbs, olives, pine nuts and yes-olive oil go in, why, those tomatoes become downright delicious.  Toss in some al dente pasta, a bit of diced fresh mozzarella and I’m all in. 

This is typically served mixed with whole grain einkorn penne, which adds some protein. Often I top it with a handful of crispy baked chickpeas, both for crunch and to increase the protein a bit more. One could certainly up the protein with a legume-based pasta, too. Need some meat? A package of small dice pancetta would fit just fine into the skillet with the mushrooms and eggplant. This has become a summer go-to meal for us with no heating of the oven required.

Would it have my parents’ approval? I suspect my mom would be okay with it. Dad?  Probably not. Not enough tomato, y’know?

Fresh Mediterranean Pasta

Room temperature pasta sauce, combining sauteed and fresh raw vegetables, served atop whole grain pasta.
Prep Time30 minutes
Cook Time10 minutes
Total Time40 minutes
Course: Entree
Cuisine: Italian
Keyword: fresh, pasta, vegetables, vegetarian
Servings: 4 people

Ingredients

Cooked Vegetables

  • 2 tbsp olive oil I use garlic infused
  • 1 small eggplant, peeled and cut to 1/4-inch dice
  • 1/2 lb mushrooms,cut to 1/4-inch dice
  • 1/2 cup red bell pepper, 1/4-inch dice
  • 1/2 tsp salt
  • 1/4 tsp chili flake or to taste
  • 1/4 tsp dried rosemary
  • 1/4 tsp fennel seed, ground lightly

Raw Vegetables

  • 1/2 cup chopped green onion
  • 1/2 lb Roma tomatoes, 1/4-inch dice
  • 1/4 cup chopped parsley
  • 3 tbsp chopped fresh basil
  • 3 tbsp chopped fresh oregano
  • 1/4 cup sliced Kalamata olives
  • 3 tbsp pine nuts I use toasted pine nuts
  • 2 tbsp olive oil
  • 1 tbsp balsamic vinegar
  • 1/4 tsp salt
  • 8 oz penne pasta cooked according to package directions
  • 4 oz fresh mozzarella, 1/4-inch dice
  • 1/2 cup bagged crunchy chickpeas optional

Instructions

  • Heat the 2 tablespoons garlic infused olive oil over medium heat in a large skillet. Saute the vegetables to be cooked lightly, then cover and cook til tender, about 10 minutes.
    Stir in the seasonings and set aside to cool.
  • Stir the tomatoes, raw green onion, herbs, olives, nuts, oil, vinegar and salt into the cooled cooked vegetable mixture. Toss with the cooked pasta. Cool to room temperature, then fold in the diced mozzarella. Top servings with crunchy chickpeas if desired. 

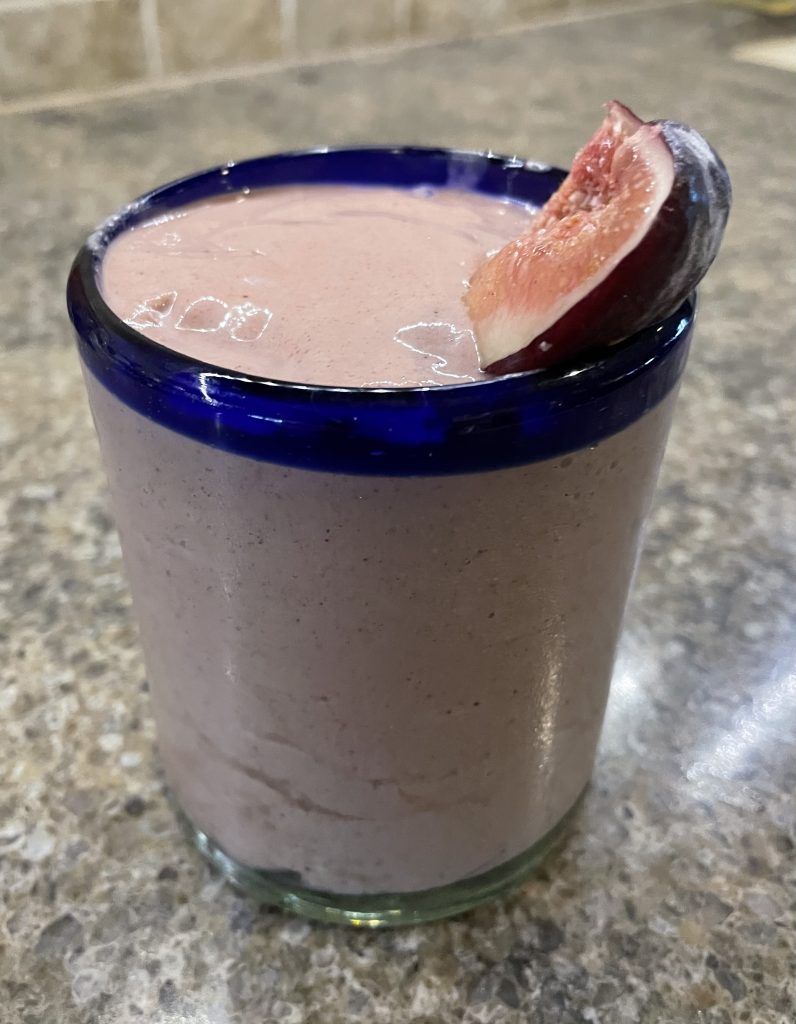
Chocolaty Fig Smoothie

Chocolaty Fig Smoothie

July brought its usual heat and humidity to the desert southwest. Given last summer’s “nonsoon,” thankfully it also brought satisfactory monsoon rains to a parched landscape. However, it appeared that it would not be bringing my figs. None at the farmer’s market… a few at Trader Joes. And then I heard the crunch of tires on gravel, announcing the arrival of my neighbor with a beautiful pound of fresh-from-the-tree figs. Fresh figs with goat cheese and honey. Yum. A new batch of fig frozen yogurt. Delish. And then the crunch of tires again. And again, each time my neighbor bringing several pounds of figs in quick succession. We went from fig famine to fig feast in a matter of hours- about six pounds worth. Now should you be a fig neophyte (which you shouldn’t be, as I’ve been raving about them for years) you might not know how perishable they are. As in they should be used within several days of acquisition. Six pounds is a hefty amount of figs to be consumed very quickly. We ate them daily, ignoring all the fruit I had purchased at the store. Fig and fennel salad went to a friend’s dinner party. I pureed some to make a fig tweaked oatmeal muffin, but these babies were on the downhill slide…

I have always fought preserving figs, because they are so delicious in their fresh state, and I still refuse to dry them. But six pounds of figs called for drastic measures, so the figs now lie in frozen repose in my refrigerator freezer. As I consider the best way to use frozen figs, my breakfast smoothie comes to mind. We have a breakfast smoothie once a week during the heat of summer, typically. I’m a relative newcomer to making smoothies. I’m not even sure when they became so popular. Perhaps I thought it was a requirement that some green thing like spinach had to be sneaked into them. While people swear that those few leaves of green will never be noticed, I beg to differ. Maybe it had to do with the fact that I’m not a huge fan of bananas. Not much in the way of smoothies in my years on the farm, either. There was seldom a shortage of ice cream in the freezer, usually vanilla and my dad’s favorite vanilla fudge marble. Both of which made thick and rich milkshakes. But fruit smoothies? Not so much. 

My base recipe is chocolate, and it comes from Marco Canora’s health revelation book, A Good Food Day.  https://www.penguinrandomhouse.com/books/223199/a-good-food-day-by-marco-canora-with-tammy-walker-with-a-foreword-by-tim-ferriss/ The cacao powder and nut butter in Marco’s recipe somewhat disguises the banana, which is fine by me, and I often substitute frozen dark cherries for half of the banana anyway, so why not figs? I love the flavor combination of figs with honey and pistachio, but they also combine quite delightfully with chocolate. A nutritious breakfast smoothie combines complex carb from the fruit with protein, fiber and healthy fat. Figs are high fiber fruit, supplemented by flax meal for Omega-3 fats, hemp hearts for protein and a bit of vanilla. The sweetness of figs cancels any need for extra sweetening. This recipe makes one large, or two medium-ish smoothies. We enjoy the smaller size with a slice of toast alongside. 

The recipe is quick and easy, though the fruit has to be frozen in advance. And should your kitchen not be overflowing with figs, there are other options. Trader Joe’s carries a semi-dried fig in their freezer case. And my go-to smoothie substitutes frozen dark cherries for half of the banana, producing a frosty drink reminiscent of dark forest cake. Whichever one you try, this smoothie makes a refreshing and satisfying breakfast in the heat of summer. Quick and easy breakfast- don’t leave home without it. 

Chocolaty Fig Smoothie

Frosty cold fruit smoothie with figs and banana.
Prep Time10 minutes
Total Time10 minutes
Course: Breakfast
Cuisine: American
Keyword: figs, smoothie
Servings: 2 people

Ingredients

  • 1 1/2 cups milk I use almond milk
  • 3 tbsp hemp hearts
  • 1 tbsp ground flax meal
  • 1/2 large banana, sliced and frozen
  • 3-4 plump figs, stemmed, quartered and frozen
  • 1 1/2 tbsp cacao powder
  • 1/2 tsp cinnamon
  • 1/2 tsp vanilla
  • 1 cup crushed ice optional

Instructions

  • Place the ingredients into the blender, in the order given. Blend on high until smooth. The time required will vary with the speed of the blender. If you like the smoothie to be extra frosty and thick, stop the blender and add the crushed ice, then blend again until the mixture is smooth. Pour into 2 glasses and serve.

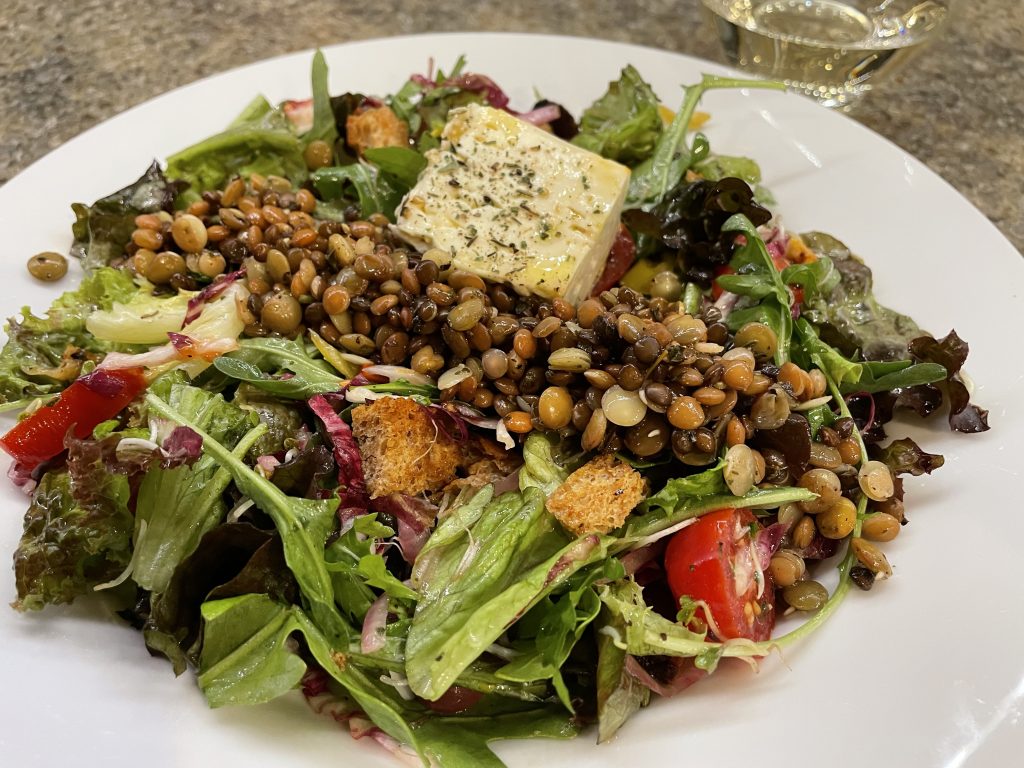
My Big Fat Greek-ish Salad

Greek-ish Salad

I think of briny, salty feta as a gateway cheese. In my farm days, Cheddar slices with the occasional Swiss or Muenster were the norm, but then feta hit my tongue, and wham! Suddenly cheeses with names like Manchego, Sartori and Pecorino took up residence in my fridge’s cheese drawer. I’m not sure where I met feta, or when I experienced my first Greek salad. It was probably on my senior class trip, for which my rebellious graduating class insisted on planning a trip to Atlanta, rather than settling for the principal’s annual canned trip to New York City. There we were, several girlfriends and I, in an Underground Atlanta Greek restaurant. Given our small town upbringing, both the menu and the belly dancing were pretty much Greek to us! I have to admit to being a foodie even at the ripe old age of 18 though, for the lasting impression I carried from that experience was the lusciousness of the cheesy pastitsio I ordered for dinner.  

Cheese is evidently somewhat addicting. Casein, the dairy protein in cheese, is broken down by the body into casomorphins, which bind to the dopamine receptors in the brain. Pleasurable sensations result, causing one to want more and more cheese. While I have little difficulty passing by on the meat, cheese is a different matter entirely. However, soft cheeses like feta are high in lactose, the milk sugar that I struggle to digest. Cheese is also high in saturated fat… Soooo, I find myself attempting to minimize it a bit. I am trying to include cheese in my cooking as I do meat-using just a little to flavor and enhance the plant-based foods that are becoming the mainstays of our meals. 

Greek salad is a delicious, cooling and substantial summer salad, starring olives, pepperoncini, tomatoes and cucumbers, but usually heavy on the feta.  My Greek salad is a reinvention, adding marinated lentils for healthy protein and sautéed lemon for acidity, while reducing the amount of feta. I also nixed the cucumber, another ingredient that challenges the digestion.  Admittedly no self-respecting Greek would allow such an omission, but fortunately I’m not Greek.  You can keep it in the salad if you must. Hang onto the tomatoes, pepperoncini and red onion, and add a few croutons or toasted walnuts for crunch. Greek style vinaigrette, seasoned with thyme and oregano binds all the ingredients together.   While I prefer to bake the feta until golden and soft, we avoid turning on the oven at dinnertime because it’s already hot as hell in the kitchen here in the desert summer.  It’s microwaved in short bursts, just ‘til warm and softened. 

The finished salad is balanced, satisfying and beautiful on the plate. The components can all be made ahead and combined when ready to serve. My Greek-ish salad joins our collection of hot weather dinner salads that whet the appetite on hot days.  Sizzling weather is no longer confined to the desert southwest, you know; it’s pretty much everywhere. Next time it’s too hot to cook, put this salad on the menu. The belly dancing, however, is optional…

My Big Greek-ish Salad

Cool crisp Greek style salad with sauteed lemon, marinated lentils and warm feta.
Prep Time45 minutes
Total Time45 minutes
Course: Entree, Entree Salad
Cuisine: Greek
Keyword: feta, salad
Servings: 4 people

Ingredients

Salad

  • 1 lemon, sliced paper thin
  • Olive oil
  • 1 cup cooked lentils 1/2 cup dry, or from a can
  • 8 cups salad greens I use a mix of arugula and spring mix
  • 1/2 cup Kalamata olives, sliced
  • 1/2 cup sliced jarred pepperoncini
  • 1 cup halved grape tomatoes
  • 4 thin slices red onion, separated into rings
  • 1/4 cup toasted walnut pieces can substitute crisp croutons
  • 6 ounces feta cheese

Dressing

  • 1/3 cup quality extra virgin olive oil
  • 2 1/2 Tbsp lemon juice
  • 1/4 tsp salt
  • 1/8 tsp freshly ground pepper
  • 1 tsp dried oregano
  • 1 tsp dried thyme
  • 1/2 tsp crushed red pepper

Instructions

  • Heat a non-stick skillet over medium high heat. Brush the lemon slices with olive oil, then brown lightly on each side. Remove and set aside. Cool, then cut slices into quarters. 
  • Whisk the dressing ingredients together and add 1 tablespoon of the dressing to the prepared lentils.  Stir through and set aside to marinate. 
  • When ready to serve, toss the lettuces, olives, pepperoncini, tomatoes, red onion, walnuts and reserved lemon slices together. Place the feta squares onto a plate and microwave for 10-second bursts until warmed. Drizzle 1 teaspoon of dressing over the feta, then toss the remaining with the salad. Portion salad evenly onto four plates. Arrange the lentils over the salad, and top each with a square of feta. 

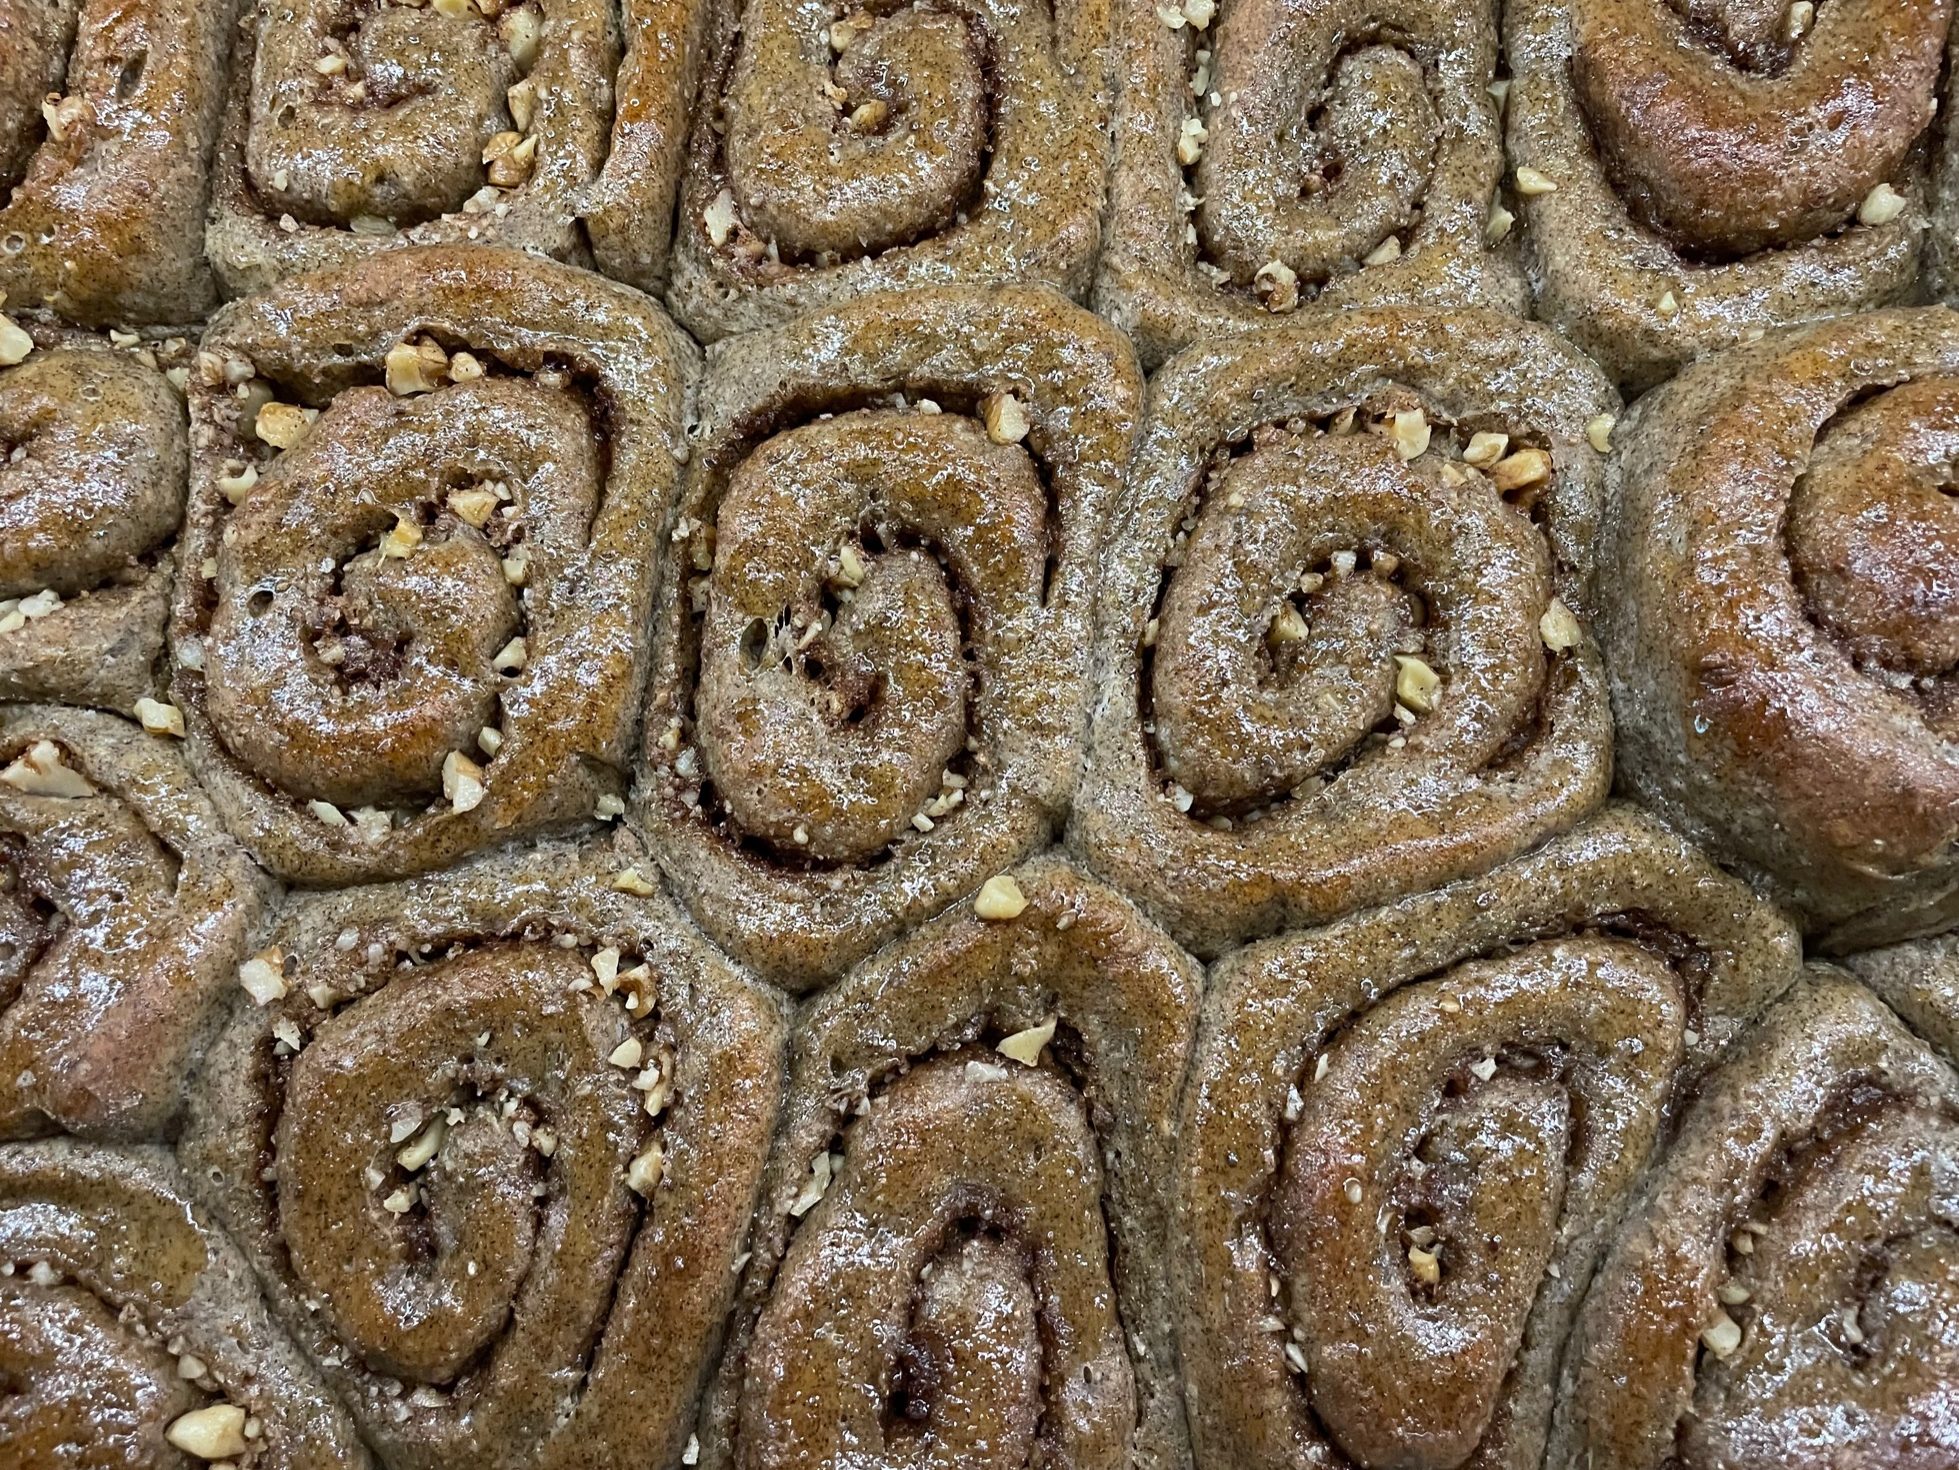
Every Day Cinnamon Rolls

Every Day Buckwheat Cinnamon Rolls

We all know that the Pillsbury Doughboy was not particularly welcome in my mom’s farm kitchen…But you know, it was that whole Poppin’ Fresh thing that got to me. Something about cracking the cylinder on the counter’s edge, the roll dough springing out from its tight confinement. The dough, pre-portioned into rolls with their minute perforations. The pre-made icing in its own tiny cup! I am, of course, referring to cinnamon rolls in a tube, one of Big Food’s most ingenious inventions.

My grandmother was probably the one who sneaked the doughboy’s cinnamon rolls into her kitchen for me. (It was at times hard to believe that she was the mother of my nutrition minded mother!) It’s not like we could make a healthier homemade version either; we didn’t make them from scratch at home. TV commercials portrayed the perfect family sitting down to quick breakfast cinnamon rolls, as though rolls were required to make warm family memories. We certainly had great family breakfasts, just without cinnamon rolls. My kid’s cookbook had a quick cinnamon roll recipe using biscuit dough, rather than yeast dough, which I did make sometimes.  There were also whole wheat versions, but the whole wheat flour available at that time made one dense cinnamon roll!

I was an adult before it occurred to me that I could bake all the darn cinnamon rolls I wanted!  Real yeast-raised authentic cinnamon rolls. They were good, fluffy white dough with buttery, gooey cinnamon filling and a thin layer of icing.  Not great, just good. Not nearly as delicious as one might expect, actually. By the time giant, ooey-gooey cinnamon rolls had invaded the mall, wafting their warm scent of cinnamon right up one’s nose, the jig was up and I was finished. They were over the top. Because after all my childhood longings, cinnamon rolls never quite lived up to all the hype. What? Mom was right yet again? Yep-they were a little too doughy, a touch under baked, too gooey, too white bread and dare I say it? perhaps too sweet… it was hard to justify baking them. 

Sooo… a while back I began working on a cinnamon roll recipe with an improved nutrition profile whose consumption didn’t inspire guilt. It’s what I call the every day cinnamon roll, a roll that I can enjoy more often.  A cinnamon roll that while still fluffy has the taste and nutrition of whole grain flours. A cinnamon roll with less saturated fat, more fiber and protein. Let’s be clear: this is still a sweet roll, but offers more taste and nutrition, without concerns about putting it into the breakfast rotation. These rolls melt in my mouth, the classic flavor combo of maple, buckwheat and cinnamon mingling in every bite, with a tiny bit of crunch from the chia seeds. The tannins in the buckwheat balance the sweetness of the maple syrup deliciously. No icing, just a rich drizzle, brushed over the tops, one of the tricks I learned from Mom when baking rolls.  

This is quite honestly the cinnamon roll I’ve always wanted. Do these dare to be different, to challenge cinnamon roll tradition? Well, yes. But they are delectable. My only regret is that they don’t pop out of a tube. 

Every Day Buckwheat Cinnamon Rolls

Fluffy whole grain roll dough swirled with maple, cinnamon and walnuts.
Prep Time3 hours 30 minutes
Cook Time1 hour 19 minutes
Total Time4 hours 49 minutes
Course: Breakfast
Cuisine: American
Keyword: Buckwheat, Cinnamon Roll
Servings: 18 rolls

Ingredients

Dough

  • 1 cup water
  • 2 tbsp. chia seeds
  • 2 1/4 tsp. instant yeast
  • 1 1/2 cups white whole wheat flour whole wheat pastry flour is desireable.
  • 1 cup buckwheat flour
  • 1 1/4 cups un-cleached all-purpose flour
  • 1 1/2 tsp. cinnamon
  • 1 tsp. salt
  • 1/2 tsp. grated orange zest
  • 1 lge. egg
  • 1/4 cup real maple syrup
  • 1 1/2 tsp. vanilla extract
  • 1/2 cup whole milk yogurt not Greek yogurt
  • 1/4 cup neutral vegetable oil I use avacado oil

Filling

  • 1/4 cup butter softened
  • 1/4 cup brown sugar
  • 1 tsp. cinnamon
  • 1/2 cup walnuts finely chopped

Glaze

  • 1 tbsp. milk
  • 2 tsp. butter
  • 2 tsp. real maple syrup

Instructions

  • Stir the chia seeds into the water and set aside to soften. 
  • In large stand mixer bowl, combine the instant yeast with the flours, then stir in the cinnamon, salt and orange zest. 
  • To the dry ingredients add the chia seed gel, egg, maple syrup, vanilla extract, yogurt and oil. Using the paddle attachment, mix thoroughly on low speed. The dough will be soft. Scrape down the sides of the bowl and switch to the dough hook attachment. Knead the dough at medium low for three minutes. 
  • Turn out onto a lightly floured surface and knead by hand for several minutes until very smooth. Place dough in a bowl sprayed with pan spray. Spray the top of the dough to prevent drying.  Cover and set aside to rise for 1 to 1-½ hours, until dough has almost doubled in size. Rising time will vary with the temperature of the room.
  • While dough rises, combine the ¼ cup butter with brown sugar and 1 teaspoon cinnamon for the filling. 
  • When dough has risen, scoop onto lightly floured surface. Lightly deflate and let rest for 10 minutes. Preheat the oven to 375° F. and lightly grease a 9×13-inch baking pan. Roll the dough evenly into an 18”x12” rectangle. Spread with the prepared filling, to within ½-inch of the edges.  Sprinkle evenly with walnuts. Roll into a log from the long side.  Slice into 18 rolls.  Place the rolls in the prepared baking pan. Flatten slightly with fingers and cover loosely with a dry kitchen towel. Set aside to rise for 1 to 1-½ hours, until puffy and light. 
  • Bake in preheated oven for 15-20 minutes. While rolls bake, combine and heat the milk, butter and syrup, just to melt the butter. When browned and fully baked, remove the rolls and immediately brush with the glaze. Remove to cooling rack. 

Shoofly Cheesecake

Shoofly Cheesecake

Sooo… I was asked to develop a recipe for Shoofly Cheesecake quite some time ago, for a birthday celebration. The cheesecake also had to be relatively diabetic friendly. Good thing birthdays are annual events, so the cheesecake might get a second shot at being the birthday dessert. I actually got right on it, and only needed several kitchen test sessions to produce a delicious cheesecake. So why the delay? I’d love to give you a fabulous excuse… you know, I got a great job, had a unique travel opportunity, or Covid!!! Because Covid can excuse just about anything these days, right? But the truth is I lost the recipe notes. What, you didn’t quite catch that? I’ll repeat it. I lost the recipe notes. Ok, I LOST THE RECIPE NOTES. But miraculously they presented themselves several weeks ago, hiding under a pile of papers on the bookshelf… 

Shoofly pie, for the uninitiated, is a layered pie with molasses on the bottom and brown sugar streusel on the top. It’s a Pennsylvania Dutch specialty, apparently a takeoff of the British treacle tart, made with the staple ingredients available to the American settlers at the time. This pie was another example of our having a “family recipe” with its origins in the Amish community. My maternal grandmother was of German ancestry, so who knows? She might have had a few secrets… Mom made shoofly pie often, and we all enjoyed its sweet molasses goodness.  But to be honest, shoofly cheesecake was not a mash up I would have dreamed up on my own. Which just goes to show that I should think outside the box more often, for this dessert is delicious.

It starts with baking a tin of “shoofly cake.” It’s important to use the type of pan specified in the recipe, else one might make “shoofly goo.” Don’t ask me how I know this.  A portion of the shoofly cake is added to almond meal to create a crumb crust, which is quite delicious all on its own. However, I don’t recommend too much tasting if you actually wish to end up with a cheesecake. Don’t ask me how I know this, either. From there, a basic lightened up cheesecake mixture is made in the food processor, with the remaining shoofly mixture folded in. Bake! And the reward is a delicious rich tasting cheesecake marbled with the sweet, golden flavor of molasses. 

With the recipe neatly transcribed in my folder of blog recipes, I know it won’t get lost again. And I do hope that the birthday girl actually gets to try it on her next birthday. I’ll be making it for just about any occasion, and hope that you’ll try it, too!

Shoofly Cheesecake

Rich, creamy cheesecake with the golden flavor of molasses.
Prep Time30 minutes
Cook Time40 minutes
Total Time1 hour 10 minutes
Course: Dessert
Cuisine: American, Amish
Keyword: Molasses, Shoofly
Servings: 8

Ingredients

Shoofly Cake

  • 1/3 c white whole wheat flour
  • 1/4 c brown sugar, packed
  • 1/2 tsp cinnamon
  • 2 1/2 Tbsp butter
  • 2 Tbsp dark molasses
  • 1/4 c boiling water
  • 1/2 tsp vanilla extract
  • scant 1/4 tsp baking soda
  • 1/2 tsp vinegar

Crust

  • 1 1/4 c almond meal/flour
  • 1 Tbsp butter
  • Pinch salt

Filling

  • 8 oz Neufchatel cheese
  • 2 Tbsp brown sugar
  • 2 Tbsp white whole wheat flour
  • 1 1/2 tsp cornstarch
  • 1/2 tsp vanilla extract
  • Pinch salt
  • 3 Tbsp Greek yogurt
  • 1 large egg
  • 1/4 c milk

Instructions

  • Preheat the oven to 400 degrees F.

Shoofly Cake

  • Combine the 1/3 cup flour, 1/4 cup brown sugar, and cinnamon in the work bowl of food processor. Add the butter and pulse to fine crumbs. Alternately, cut in using a pastry blender. Spread this mix in an 8-inch pie pan or other shallow baking pan. Mix the molasses, boiling water, vanilla and baking soda. Add the vinegar, which will cause the mixture to foam. Quickly pour over the crumb mixture in the pie pan and dsitribute evenly. Bake for 5-7 minutes, or until the cake on top is set. Watch carefully, as it will burn easily. Remove and cool slightly. Reduce the oven temperature to 325 degrees F.

Crust

  • Pour the almond meal and salt into the work bowl of food processor, pulse to combine, then pulse the 1 tablespoon of butter to very fine crumbs. Scoop one quarter of the baked shoofly cake into the food processor and process to crumbs. Butter a 9-inch pie pan, then press the crumb mixture in firmly. Bake at 325 degrees F. for 15 minutes. Remove and cool slightly. Reduce the oven temperature to 300 degrees F.

Filling

  • Combine all ingredients in workbowl of food processor and process to combine. Alternately, mix well in a large mixing bowl. Scoop the remainder of the shoofly cake into the work bowl and pulse to distribute throughout the filling mixture. If mixing by hand, fold the shoofly cake into the filling until it is distributed well. Pour the filling into the crust and bake at 300 degrees for 35-40 minutes, till set in the center. Remove to cooling rack. Cool, then chill for several hours before slicing.

Notes

Prepared as written, one 1/8 slice of cheesecake is approximately 24 grams of carbohydrate.