
Steaks, chops, burgers, sausage, BACON! Yes, considerable quantities of meat were served on the farm. In the early years, the folks raised both cattle and hogs. Daddy was comfortable enough with the whole mess to butcher a hog himself, memorable because I was permitted to poke around in what would later become the cracklins…which my mother didn’t let us eat anyway; perhaps because I had poked around in them, more likely because they were fried and contained copious amounts of fat. Or because they were actually intestines presented under the much happier moniker of “pork rinds,“ perhaps? And Daddy certainly knew his way around butchering chickens, tying several by their feet onto the clothesline, before giving them the Marie Antoinette treatment. Cattle were sent out to a processing house, returning home in innocent, neatly labeled butcher paper packages to reside in the freezer until eaten.
Given this background, it’s a bit of a shock that I am… well… somewhat squeamish about preparing meat. I suspect there would be many more vegetarians if meat had to be raised and killed in order to eat it. As a home economics teacher, it always cracked me up that students did not know that meat is the muscle of an actual animal; several vegetarians were born each year during the “meat unit.”
I ate a largely vegetarian diet for several years; not a particularly good one, relying substantially on pasta, cheese and eggs. Might have been a few veggies mixed in there somewhere… And no one was fooled-my husband and kids chowed down on meat in any situation in which it was offered. Like, for instance, my husband’s clandestine visits to the Taco Bell on the route home from work. We returned to a meatier diet on the advice of the dietician after my daughter’s diagnosis of Type 1 diabetes.
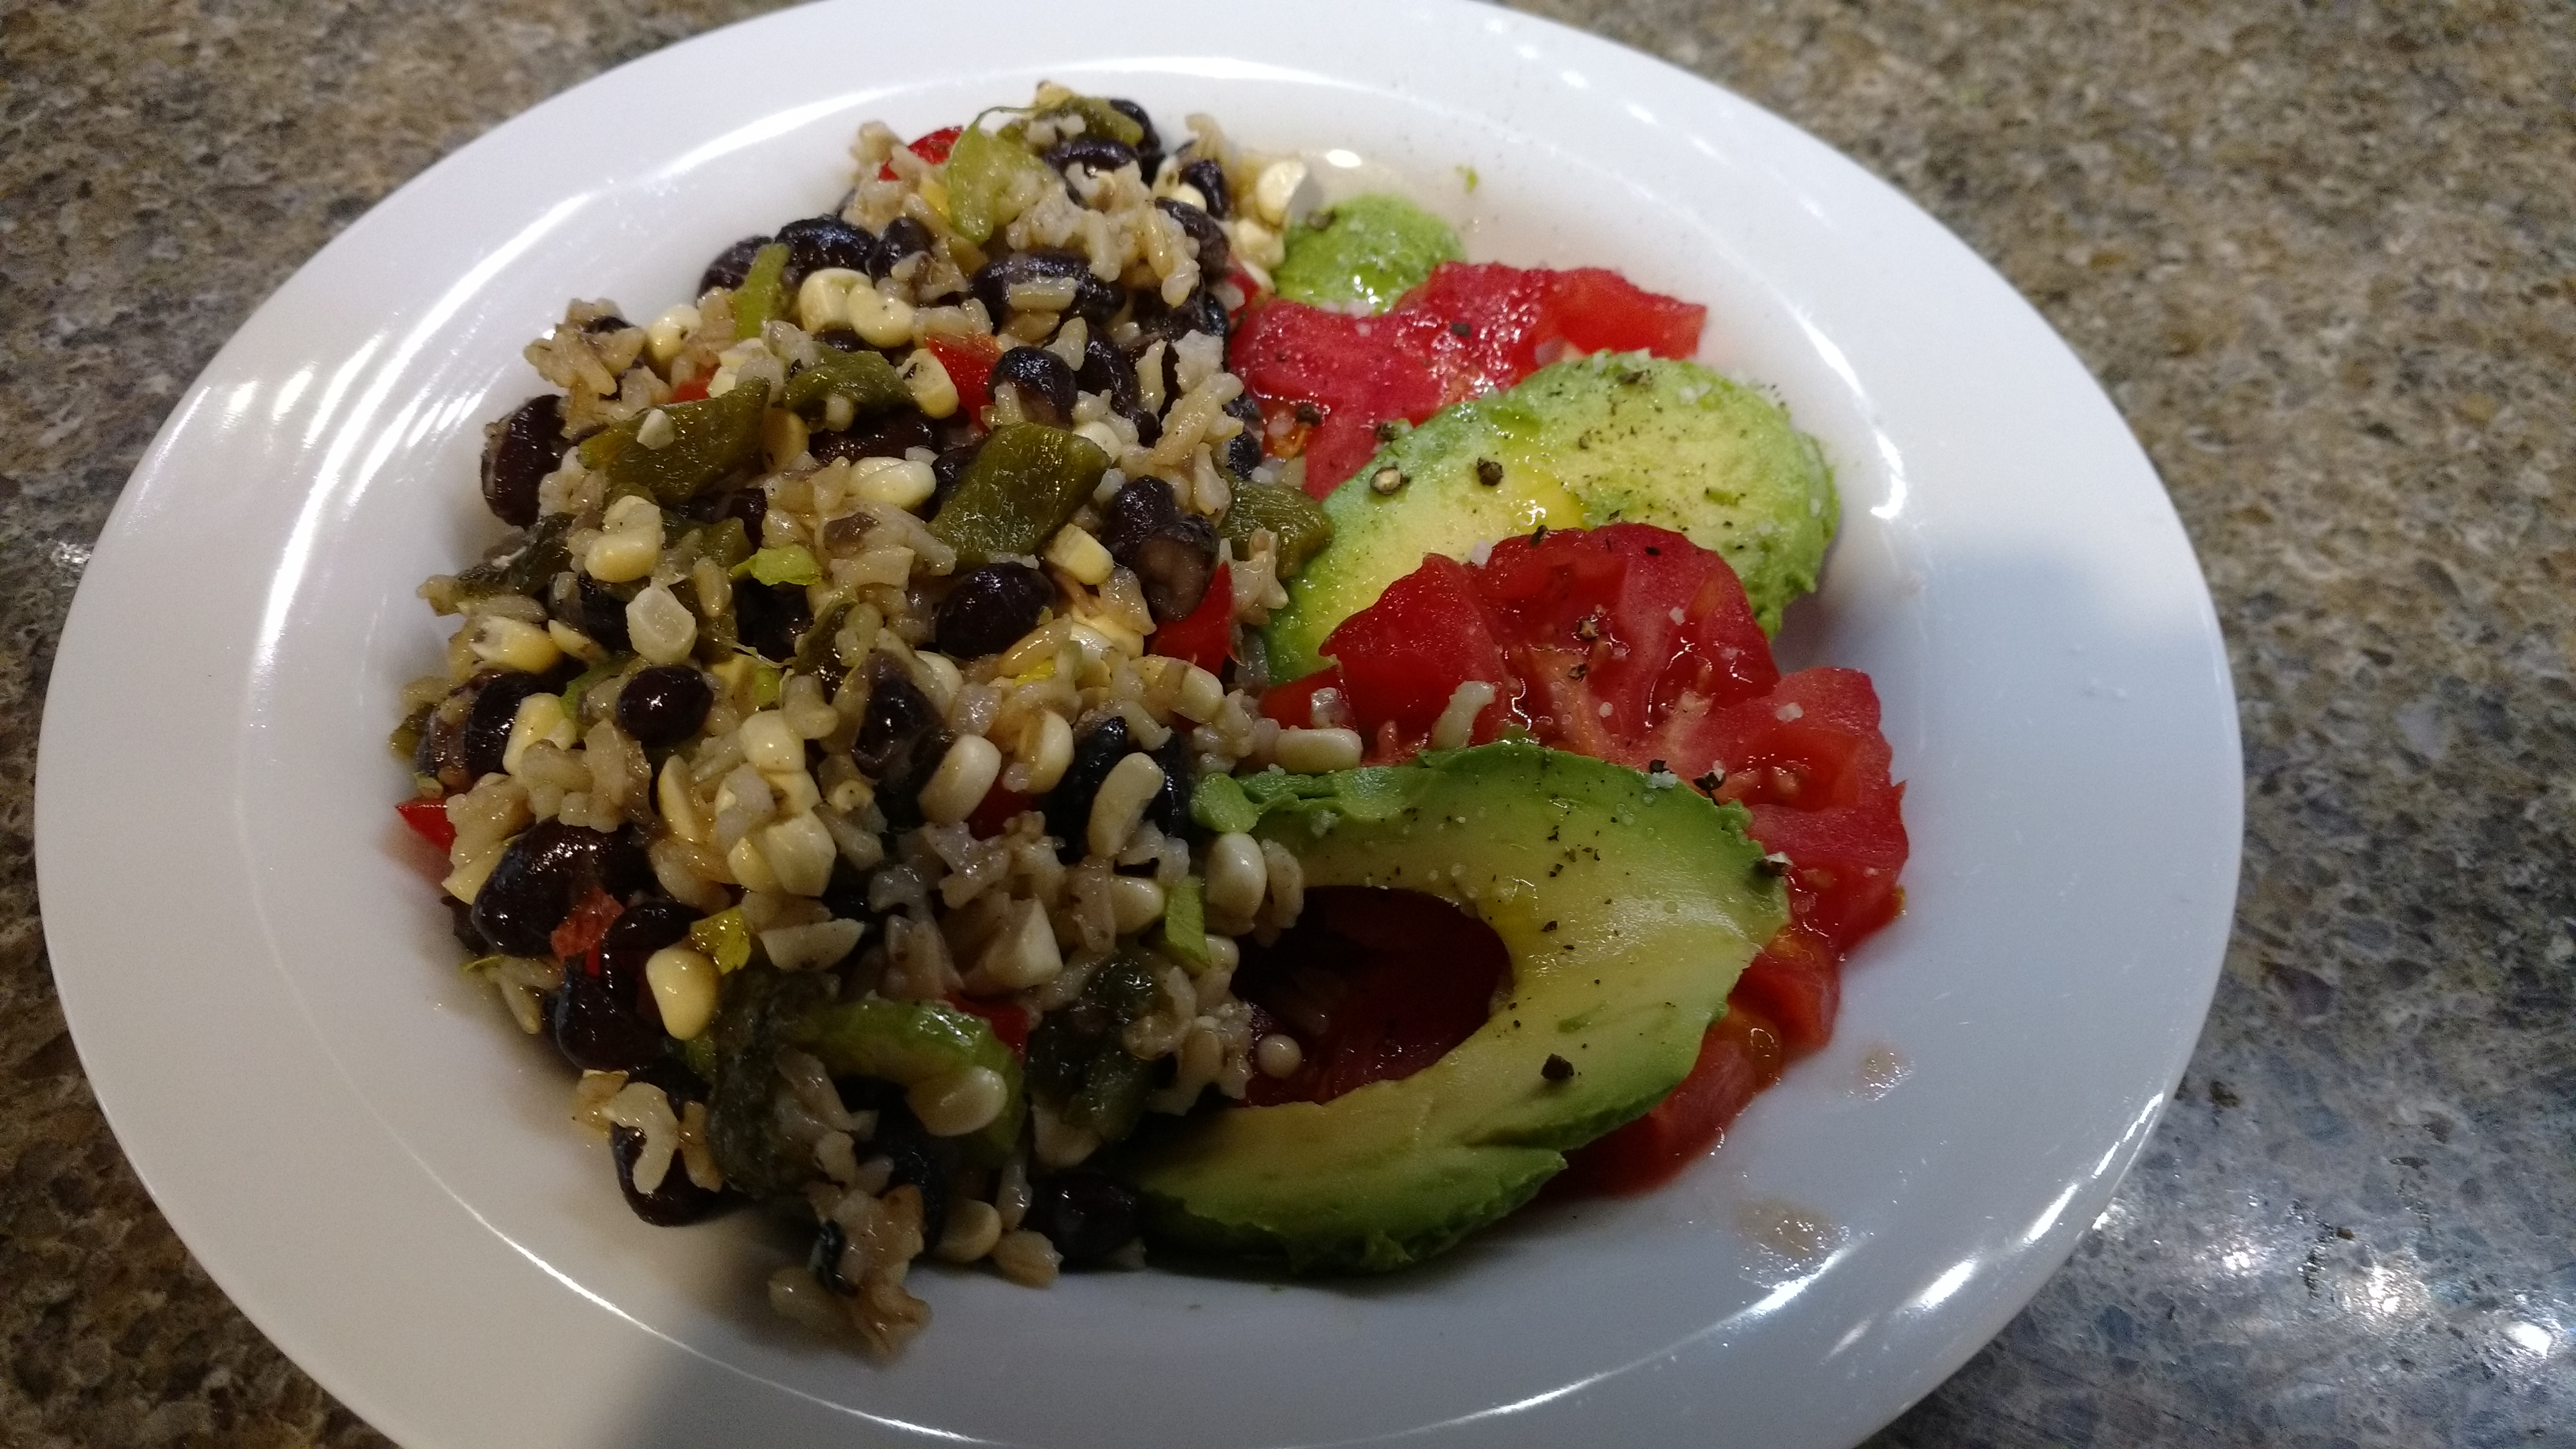
Today? Plant based diets are everywhere. While one group questions the carbs, others question the meat. The issues of health, agriculture and sustainability have juxtaposed at this unique moment, causing people to more closely examine what they are eating. Meatless meals have grown beyond fad status-they are now downright chic. Several restaurants in our city offer only vegetarian or vegan menus. Heaven help us, even fast food purveyors are filling buns with realistic meatless patties doused in special sauce. Personally, we have come to a place where we eat two or three meatless dinners a week, this time featuring more whole grains, legumes, nuts and seeds, along with the requisite vegetables. Often, small amounts of meat or cheese are used, primarily as a condiment rather than as entrée.
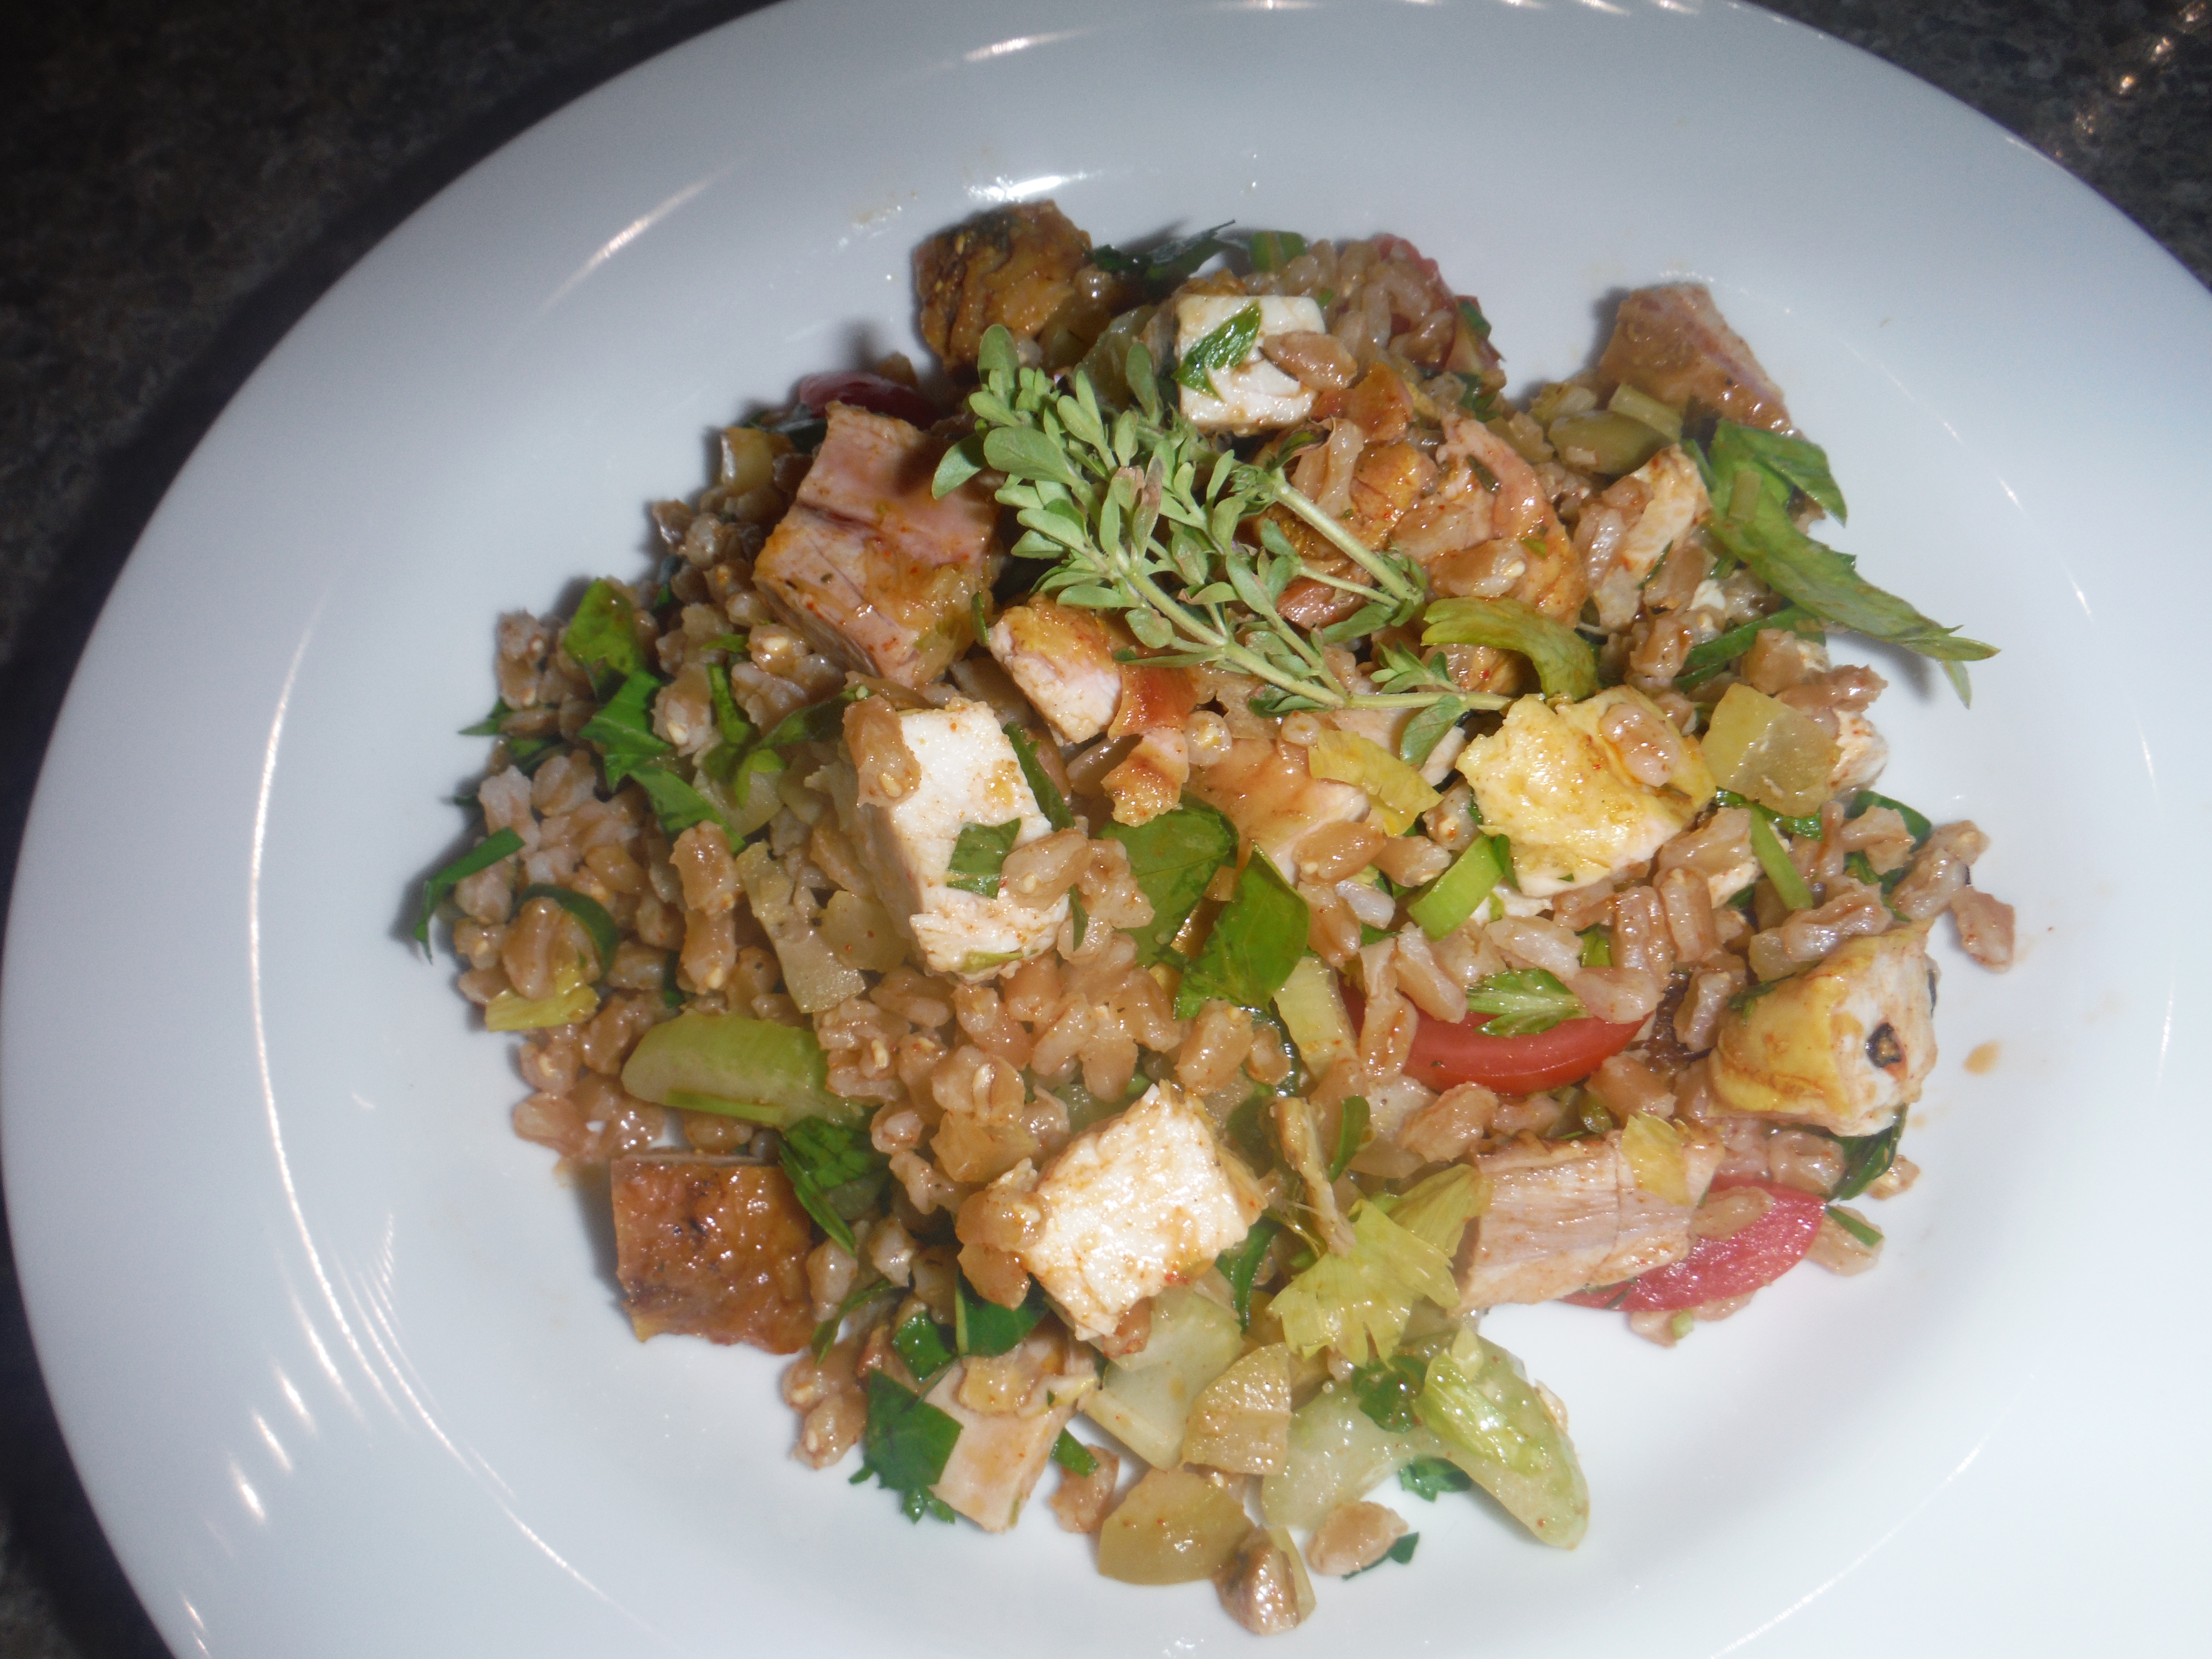
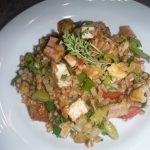
One meatless dish we prepare that was greeted with enthusiasm by the whole family was simple grilled vegetables with sliced cheese and good bread. A variety of vegetables to suit everyone’s taste could be included, and the veggies developed a delicious smoky char from the grill. This recipe is an adult take, vegetables marinated with abundant herbs and topped with an olive chermoula. The browned Haloumi cheese cubes become chewy croutons, and the crispy chickpeas offer up the perfect crunch. This is a versatile dish, which can be served on its own, over a whole grain of choice, or with good bread on the side. It’s a great late summer meal.
While we still eat meat, the husband does much of the knife wielding. I might add though, that I continue to chop a mean vegetable.
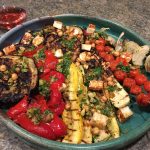
Smoky Grilled Vegetables with Haloumi and Olive Chermoula
Ingredients
- 1/2 cup garlic infused olive oil
- 1/4 cup fresh lemon juice
- 2 tsp freshly grated lemon zest
- 1 tsp dried oregano
- 1 tsp ground coriander
- 1/2 tsp thyme leaves
- 3/4 tsp salt
- 1/2 tsp freshly ground pepper
- 1 tsp chili flake
- 3 lbs. vegetables, sliced for grilling; eggplant, red bell pepper, zucchini, red onion, portobello mushroom
- 3 tbsp chopped green olives
- 1/4 cup chopped cilantro
- 2 tbsp chopped parsley
- 6 oz Haloumi cheese
- 1/4 cup crispy chickpeas
Instructions
- Combine olive oil through chili flake in a
medium bowl and whisk until well blended.
Remove and reserve 1/3 cup of the mixture to make the
chermoula, and brush/pour the remainder over the sliced vegetables. Marinate up
to several hours.
Combine the reserved marinade with the olives, cilantro, parsley
and 2 tablespoons water to make the chermoula.
Prepare a gas or charcoal grill for the vegetables. Start
them over the hottest area to char, then move around to the edges of the grill
to soften and become tender.
Slice the Haloumi into ½-inch and brown on all sides in a medium
hot skillet.
Arrange the vegetables attractively on a platter and spoon
the chermoula over them. Place the
browned cubes of Haloumi randomly over the vegetables. Sprinkle with the crunchy chickpeas and serve.