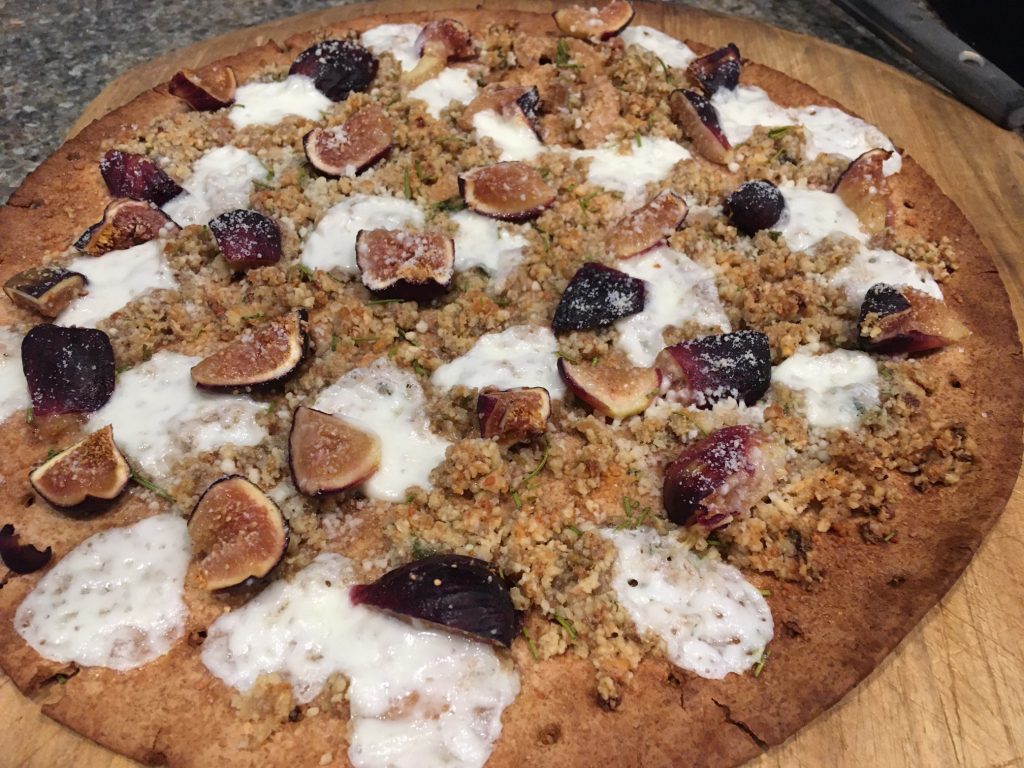
Fig and Walnut Pizza

Fig and Walnut Pizza

Fig Pizza.  You knew it had to happen. If only it had been my idea…. 

My first taste of such a pizza came at Time Market, http://www.timemarket.xyz a terrific little local market/café. And of course, these fine folks use long fermented pizza dough…in a wood fired pizza oven… with which my home oven cannot compete.  But I still try, because this pizza is scrumptious. 

Pizza was an unknown entity in my early days on the farm, until these little boxes appeared in the grocery store, labeled “Appian Way.” Sounded very Italian!  I’m amazed to discover that this product is still produced today, because it was, um, not exactly a pizza to write home about. A little packet of dough ingredients, can of sauce and envelope of cheese. What came out of the oven? Overly sweet tomato sauce on a biscuit-y crust topped with oddly powdered “parmesan.” By the time I was in high school, there was a pizza place in town; we’ll leave it at that. 

Having now experienced true Neapolitan pizza on Italy’s Amalfi coast, I can assure you it is amazing. Thin chewy crust, puffy edges dotted with crispy charred spots from the wood fired pizza oven. Fresh mozzarella combined with authentic parmigiana-reggiana. I can only hope the cooks in heaven are Italian. We have several shops here in the city that come close, using naturally leavened crust in big beautiful wood fired ovens. Since none of them are exactly around the corner, I make it at home more often than taking it out. 

On ambitious days, long fermented dough is rolled and flipped on the charcoal grill. Topped in the kitchen and quickly broiled, this comes closest to authentic pizza, with the delicious char that only a fire can bring. More often, the same dough is topped and oven baked on a pizza stone, in the hottest temperature I can crank up. Then there are the days like today, when there isn’t really even time enough to eat! Out comes the packaged pre-baked sprouted wheat crust… the point being that we can make homemade pizza fit just about any occasion. 

My first experience of fruit on pizza was the whole pineapple-and-ham thing. I find it amazing that this combination still exists; it’s just a nonstarter for me-pineapple is too juicy, too sweet, too…in the wrong place. While figs are sweet, they are enthusiastic participants in the whole sweet-salty-savory thing. (Yes, I know I am a bit biased, but figs are the most versatile fruit ever!) The savory is provided by the onion and fennel sauté. The salty comes from the cheeses and the walnut sauce brings the richness. While I call for fresh mozz and real parmigiana, goat cheese or feta would be a great combination with the figs, too.  Should you happen to be the pizza-has-to-have-meat type, a few strips of prosciutto will snuggle up to those figs just fine. 

As I mention every July, fig season is fleeting.  If you find a package calling your name, grab them and fire up the oven or light the grill. I made two pizzas, both disappearing in about half the time it took to make them. Bring home the figs and it will happen for you, too!

Fig and Walnut Pizza

Sweet, salty and savory pizza, topped with caramelized vegetables, walnuts, figs and fresh mozzarella.
Prep Time40 minutes
Cook Time12 minutes
Total Time52 minutes
Course: Appetizer, Entree
Cuisine: Italian
Keyword: figs, pizza
Servings: 8

Ingredients

  • 2 tbsp olive oil
  • 3/4 cup diced onion
  • 1/2 cup diced fennel bulb
  • 1/2 tsp fennel seed
  • 2 tsp diced fresh rosemary 1 tsp if using dried rosemary
  • chile flakes to taste
  • salt and pepper to taste
  • 1 cup walnut pieces
  • 1/4 cup grated parmesan cheese
  • 12 medium figs sliced or cut into chunks
  • 8 oz fresh mozzarella cheese sliced and drained on paper towels
  • Pizza dough for 2 12-inch pizzas, or 2 premade 12-inch crusts 

Instructions

  • Heat the olive oil in a small skillet over medium heat. Add the onions and fennel, stirring to coat with the oil. Brown for several minutes, then turn down the heat and cover, allowing the vegetables to cook slowly till soft, about 20-30 minutes. Stir in the fennel seeds, rosemary and chili flake, if using. Season lightly with salt and pepper, then set aside to cool. 
     
  • If a baking stone is available, place it in the oven and preheat to 450° F. In a food processor, combine the vegetable mixture with the walnuts, and process to a chunky paste. Add a tablespoon or two of water and process to achieve a spreadable texture, but don’t make it too smooth.  There should still be tiny chunks of walnut remaining. Alternately, the mixture can be ground using mortar and pestle, or simply chopped together on a cutting board. 
  • Press the dough out into a 12-inch circle on a piece of parchment paper. If using a baking sheet, transfer the parchment to the pan. If using the baking stone, transfer the parchment to a pizza peel or pan for sliding onto the stone. Spread half the walnut sauce over each crust. Sprinkle each pizza with 2 tablespoons parmigiana cheese. Press the fig pieces into the sauce, then dot the fresh mozzarella over the top. Side the parchment onto the baking stone, or place the baking sheet in the oven. Bake until the crust browns and cheese is bubbly, about 10-12 minutes.  

Pasta with Prosciutto and Chevre

Pasta with Prosciutto and Chevre

This is your chance to escape the news and use up some of those hoarded pantry staples, all in one fell swoop!  You know, the boxes upon bags of pasta, beans and such you were highly advised to amass in preparation for the corona virus quarantine? You might have long familiarity with them, or perhaps stockpiling food is a more recent experience. 

Mom always had a ready supply of such items in her pantry, because when living on a farm, one did not just stop into the market to pick up a needed item.  In fact, she designed a large pantry cupboard with pull out shelves long before cabinet companies offered them to make the pantry items more accessible.  Noodles were served more often than pasta; a pasta dinner usually meant something on the heavy side, like spaghetti or macaroni. The selection at our small town grocer’s was not vast; either long thin strands or elbows. Mom made spaghetti with meatballs. My grandmother made a dish with the elbows she called Johnny Marzetti, which I adored as a child.  In retrospect, it was a fresher, homemade version of Chef-Boyardee, baked ‘til browned and bubbly. Very child friendly. Once Mom returned to full-time employment, the health food standards relaxed a bit and the occasional box of mac with the envelope of neon orange cheese could be found on the shelf. (This probably occurred when my teenage self took on doing the family grocery shopping…) Melt yourself a lump of butter, toss with the shells, a pour of milk and that fluorescent orange powder and voila! Mac-n-cheese! I loved that stuff for more years than I want to admit. Pasta in that time was definitely boxed in by both tradition and  lack of imagination. 

As a young newlywed, my pasta world exploded with the arrival of my July 1981 issue of Bon Appetit magazine. While I remember next to nothing else from the subscription, this particular issue still sits on my shelf, because it featured an entire article on summer pasta sauces, developed to save the poor harassed and overheated cook from hours of stirring sauce in the swelter of a summer kitchen. These were easy, lighter recipes using fresh vegetables, olives, tinned tuna, fresh cheeses. Most of them didn’t require cooking! Well, yeah, you still had to cook the pasta, but this could be done in advance, because all of these recipes were basically served at room temperature.  Suddenly the boundaries were broken and the way I viewed pasta changed for evermore. 

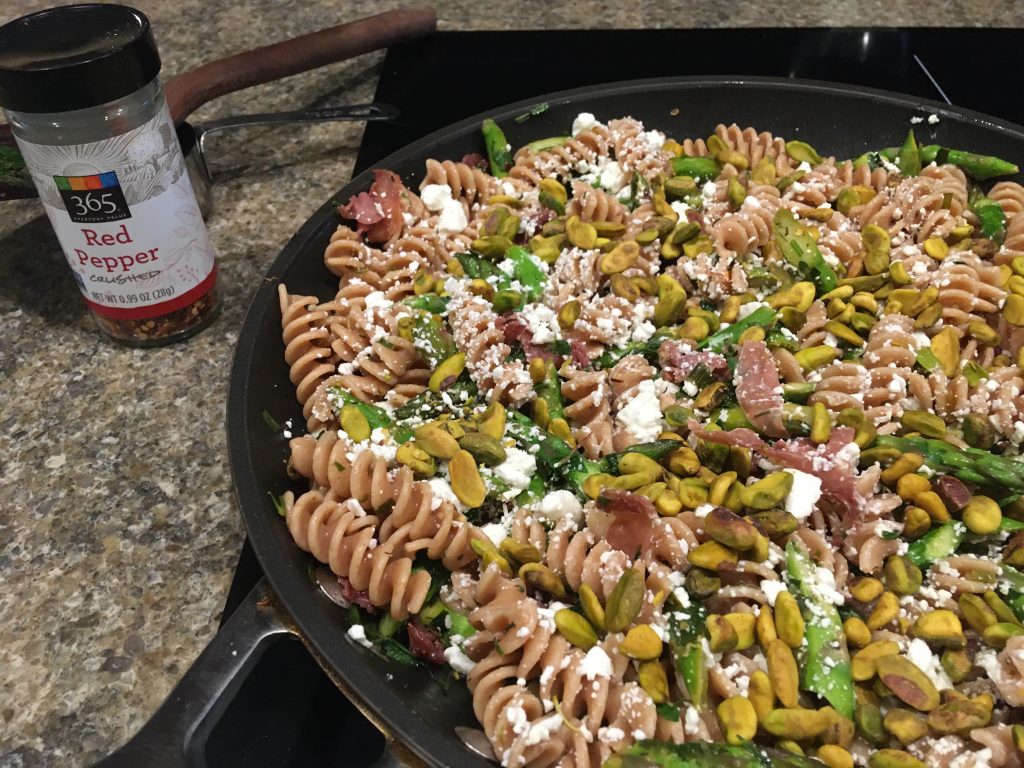
Pasta has come a long way, baby. Today the shelf holds a multitude of shapes, gluten-free and gluten-full. While we do make it from scratch occasionally, I am fortunate that a local grocer carries the dry einkorn pasta that I find easily digestible.  I have come to depend on relatively quick pasta dishes, not just for summer, but year round. An amalgam of vegetables and nuts (sometimes with meat, sometimes not,) gets tossed around quickly with a glug of olive oil and condiments, then mixed with al dente pasta. A bit of the starchy pasta water brings the whole thing together, with some type of grated or crumbled cheese typically topping it off. The concept is ultra flexible and the combinations are endless.  Pasta with Prosciutto and Chevre is one such favorite. The sauce can be made quickly while the pasta is cooking. Fresh asparagus combined with creamy goat cheese and rich pistachios, seasoned with herbs de Provence and a zip of acidity from lemon. Prosciutto provides the crisp saltiness. 

Long about now, a quick and easy pasta recipe might be just what you need, both for the heat of summer and to make a bit of space on that well stocked pantry shelf… this one fits the bill on both counts!

Pasta with Prosciutto and Chevre

Light, quick and easy summer pasta dish with asparagus, prosciutto and chevre.
Prep Time30 minutes
Cook Time15 minutes
Total Time45 minutes
Course: Entree
Cuisine: American
Keyword: pasta
Servings: 4 people

Ingredients

  • 1 tbsp olive oil I use garlic infused olive oil
  • 3 oz package sliced prosciutto
  • 1 clove garlic, minced I omit this, for digestibility
  • 2 green onions, chopped
  • 1 bunch asparagus, trimmed and sliced into 1-inch pieces
  • 1/2 cup parsley, chopped
  • zest of 1 lemon
  • 2 tbsp lemon juice
  • 4 oz chevre/goat cheese crumbles
  • 1/2 cup toasted pistachios, coarsely chopped
  • broth, as needed
  • 8 oz penne or spiral pasta
  • 1 tsp herbs de Provence

Instructions

  • Cook the pasta according to package directions. Drain the pasta, reserving ¼ cup starchy cooking water. 
  • Heat the oil over medium high heat and sauté prosciutto slices till crisped. Remove to drain and then slice into ½-inch pieces. Add garlic, asparagus and green onion to the skillet and sauté till asparagus is crisp tender, adding broth as needed to prevent sticking. Stir in parsley, lemon zest, juice and herbs. Toss the vegetables, pasta, prosciutto, pistachios and reserved cooking water together. Top with goat cheese crumbles, and serve. 
     

Jerk Halibut with Fruit Salsa

We grew, raised and harvested beautiful produce, meats and poultry on the farm. While none of us could truly be considered a forager, my dad did enjoy hunting game birds. He relished the time spent with his brothers and his various hunting dogs, and our plates were occasionally graced with quail and pheasant. No one in any fairness though, could be called a fisherman. I vaguely remember one family reunion held at Kentucky Lake. After a long day spent on the lake bristling with poles, bait, and boasting, fish landed at the kitchen door, suspiciously cleaned and wrapped professionally in butcher paper…

The fact that we lacked fresh fish did not deter my mother in any way. Now, this was the sixties. I cannot imagine that anyone was prattling on about Omega-3s and the need to eat fish on a regular basis, yet somehow this belief was firmly fixed in my mother’s menu planning philosophy. (Along with liver on a weekly basis, which is another story.) Most of the time I consider my mom to be a fairly inspired cook for the era. Her preparation of fish was not one of those shining moments.

Neither was the frozen fish available at the grocer’s anything like today’s frozen fish. No flash freezing on the boat or vacuum sealing for this catch. It was harvested, delivered ashore at some point, and eventually transported to a processing facility. No matter the variety, it all came out in identical cardboard packages, long and rectangular, with a stylized image of supposedly whatever fish was inside. When thawed, it was limp and soggy, any semblance of firm cellular structure long gone. In retrospect, how inspired could a dinner be which starred this sad protein?

The weekly preparation was always the same. The fillets were baked in the oven with a bit of butter, lemon, dried herb and sliced olives. That was it. It’s pretty easy to understand how a Midwestern farm girl could decide that seafood wasn’t really food worth eating. Which was the attitude I carried with me when I left the farm for the big wide world. Save the ocean-don’t eat fish!

Fortunately the seafood menu offered by the big wide world considerably expanded my view of how delicious fish could be. From the eastern seaboard to the coasts of Oregon, California, Mexico and Italy; from the isles of Fiji, New Zealand and Thailand, I’ve enjoyed freshly prepared seafood in a multitude of preparations. Now when eating out, a firm menu choice must wait until I hear a description of the daily seafood special. More often than not, that will be what I order.

While I live in a desert, large bodies of fish bearing saltwater are closer to me now than when growing up on the farm. I am lucky indeed to have several high quality fishmongers within fifteen minutes of my home, with firm, plump selections of fresh seafood. Fish and/or seafood are now on the menu at least once, sometimes twice, in the week. Grilled, broiled, pan sautéed, and steamed, but uh… not baked. While baking fish could perhaps be successful, my memory of baked fish leaves something to be desired…

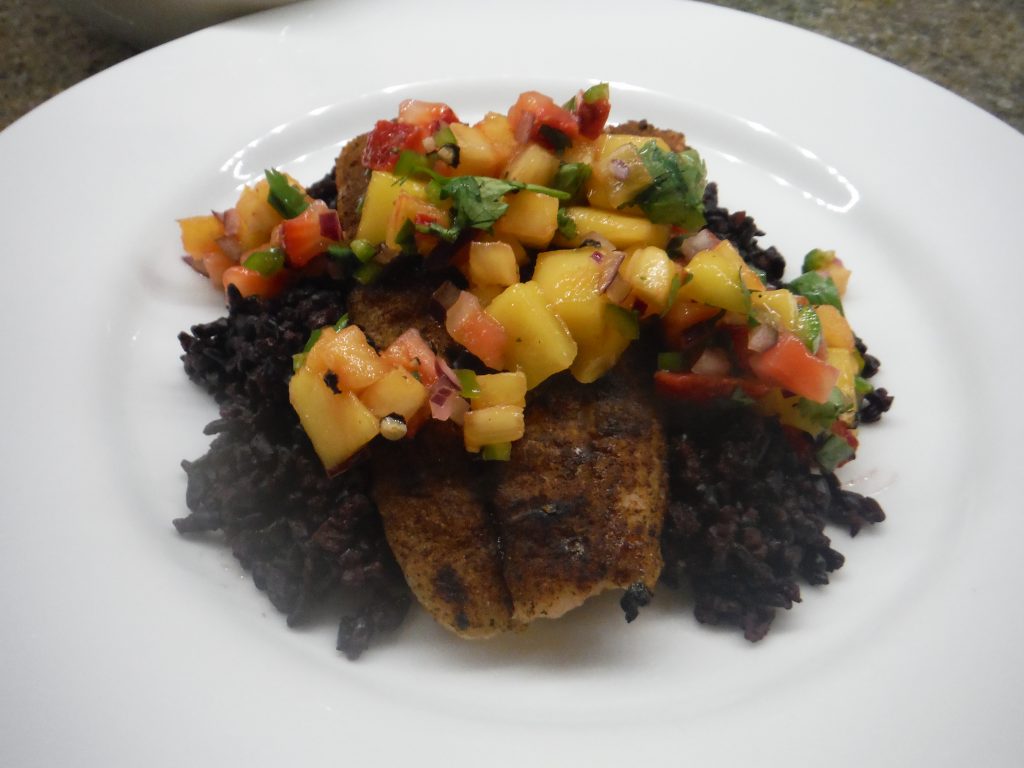
Which brings me to the fish we are serving this evening. White fish like halibut are like blank canvasses, just waiting for someone to spice them up. Which is precisely what jerk seasoning does. And of course once you’ve gone the jerked route, hot and sweet salsa on top is an absolute necessity. The black rice underneath is the perfect complement, nutty and chewy.

While grilling is a year round option in the southwest, this recipe is traditional hot weather fare in most locales. The fruits used in the salsa are classic summer varieties too, so now is the time to get grilling. You can catch it or buy it, just don’t bake it!

Jerk Halibut with Fruit Salsa

Prep Time30 minutes
Cook Time15 minutes
Total Time45 minutes
Course: Entree
Servings: 4 servings
Author: Mary Kay Allen

Ingredients

  • 1 ½ lb. halibut filets/steaks or other meaty fish suitable for the grill
  • 2 teaspoons jerk seasoning purchased or homemade
  • Fruit Salsa
  • 1 cup diced fresh pineapple
  • 1 ripe mango peeled and diced
  • 2 Kiwi fruit peeled and diced
  • 4 large strawberries hulled and diced
  • ½ cup diced red onion
  • 3 tablespoons chopped cilantro
  • ½ jalapeno pepper seeded and diced (leave the seeds in if more heat is desired)
  • Salt and pepper to taste
  • 1 cup forbidden black rice or other rice of choice

Instructions

  • Prepare a gas or charcoal grill to a medium hot flame. Sprinkle the fish with the jerk seasoning and rub in. Store in refrigerator until ready to grill.
  • Prepare the rice according to package directions.
  • Combine all ingredients for the fruit salsa in a medium bowl, stirring well. Set aside until ready to serve.
  • When the rice is done, set aside to steam in the pan while the fish is cooked. Place the pieces of fish on the grill grate directly over the fire. Grill to doneness preferred. A general rule for cooking fish is to allow ten minutes per inch of thickness. If the surface appears grilled before the center is done to your liking, move the fish to the edges of the grill to slow the cooking.
  • To serve, plate individual servings of rice. Place a fish filet atop each serving of rice and ladle on generous spoonsful of fruit salsa.


Farm Girl Goes Urban


For a young farm girl, traveling 25 miles down the road to the city of Dayton was a significant venture. A small distance by today’s standards, but surface streets of that day weren’t designed for efficiency. In actuality though, the principal expanse of the day’s journey was not about physical distance; it was about cultural distance. Life on the farm was insular; isolated in many ways. There was a vast multitude of people as well as happenings in the world, both of which were totally outside my experience. Which, I suppose, is one of the reasons my folks decided to raise us on the farm. Must maintain the innocence…

Every now and again though, Mom and Grandma would dress me to the nines in dress, hat, gloves and patent leather shoes for a trip “downtown.” I have no memory of why we were going, probably shopping. I was too busy gawking at all the lofty ornate buildings, along with every person whose appearance was different from my own. Of which there were many. The experience was honestly scary, due to my ignorance of where the heck all these different people came from. It never occurred to me to ask any questions concerning these thoughts, perhaps because I subconsciously understood that the times didn’t encourage such inquiries…

I could forget my concerns though when we arrived at the decidedly upscale dining room of Rike’s Department Store for lunch. At which I perpetually ordered the “little chicken.” This item from the kid’s menu was served in a ceramic ramekin, shaped like a chicken. The head and wings formed the lid. I never tired of lifting it off to reveal a little mound of steaming hot mashed potatoes covered with creamed chicken. If only such simple delights made my day today!

There was, though, a different sort of downtown trip that we made with just Mom, who I tend to forget had experienced a more sophisticated life before moving to the farm. Forget dress up and upscale. We would duck into an exotic dark little stairwell, and descend into a kitschy underground Chinese restaurant, complete with gaudy paper lanterns and stylized Chinese wall characters. In retrospect, there was absolutely nothing authentic about this spot, but it was my proper introduction to some of those different people, and to food that wasn’t meat, potatoes, and vegetable, each confined to their assigned space on the plate. I was eating egg foo young, basically scrambled eggs with some canned bean sprouts and soy sauce and feeling pretty darn worldly for a little farm kid.

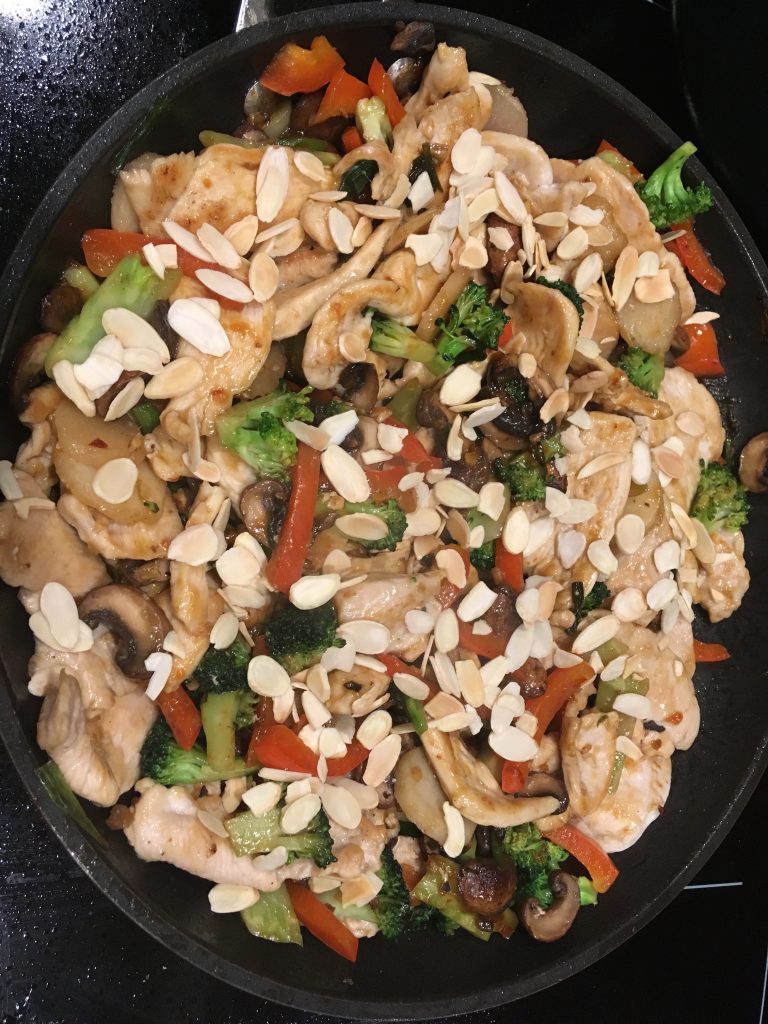
In our farm kitchen, stir-frying came into vogue sometime in the late sixties-early seventies. Mom did not invest in a wok; she just used her electric skillet. Her claim to fame in Chinese cuisine was a dish she called chicken velvet, which she often prepared for guests. No idea where she got the recipe. In fact, I’m amazed to learn that “velveting chicken” is actually an authentic Chinese cooking method used to lock in the juices and keep the chicken moist and tender. Who knew? The strips of cooked chicken were combined with canned bamboo shoots, water chestnuts, candied ginger and green beans. While the only authentic thing about it was the cooking method, it made a delicious meat and vegetable entrée fit for company.

My version today offers a nod to Mom’s, though I eschew the “Chinese” vegetables for fresh seasonal vegetables. If a can of water chestnuts just happens to be residing in my pantry, I toss them in for old times’ sake, but they are completely optional. Her recipe didn’t include a sauce either, which I’ve added. One should feel free to tinker with the proportions of meat to vegetables, too. Given my current practice of less meat, more vegetables, I’ll be reducing the amount of chicken and increasing the amount of vegetables the next time I prepare it.

I can say honestly now that I’m a world traveler who has met numerous peoples and experienced many cultures and cuisines of the world. I can drive ten minutes from my home today and order what is probably a much more authentic Chinese meal. But I wish that little Chinese restaurant still lived underground in Dayton, and that Mom and I could duck in one more time. That is not to be, so I guess I’ll head to the kitchen to “velvet” some chicken

Chicken Velvet

Prep Time30 minutes
Cook Time15 minutes
Total Time45 minutes
Course: Entree
Cuisine: Asian
Servings: 4 servings
Author: Mary Kay Allen

Ingredients

  • 1 lb. chicken breast sliced on the horizontal into 1/8-inch thick pieces
  • 2- tablespoon cornstarch divided
  • 1- tablespoon dry sherry
  • 2- tablespoons water
  • ½ teaspoon salt
  • 2 tablespoons soy sauce
  • 1- tablespoon sherry
  • 1- teaspoon sambal oelek
  • 1- teaspoon sesame oil
  • 3 green onions split lengthwise and sliced into 1-inch long strips
  • 1- tablespoon minced fresh ginger
  • 3 to 4 cups stir-fry vegetables cut into 1-inch pieces (good choices include red bell peppers, asparagus, mushrooms, fresh green beans, broccoli, carrots, celery, etc.)
  • 1 can sliced water chestnuts drained (optional)
  • 3 tablespoons avocado oil or other oil with high smoke point
  • ½ cup chicken broth
  • ¼ cup sliced almonds
  • Cooked rice for serving

Instructions

  • In a medium bowl, combine the chicken slices, 1 tablespoon of cornstarch, sherry, water and salt. Set aside. In a small bowl, combine the soy sauce, sherry, re3maining cornstarch, sambal oelek, and sesame oil. Set aside. Have all vegetables prepared and ready for stir-frying.
  • Heat 1 tablespoon of the oil over high heat in a wok or large skillet. Add half the chicken and cook, stirring constantly, until the chicken loses its raw appearance. Remove to a large bowl. Repeat with additional tablespoon of oil and remaining half of chicken.
  • Heat remaining tablespoon of oil over high heat and add the green onions and ginger. Stir-fry for 30 seconds, and then add the remaining vegetables. Stir-fry for 3 to 4 minutes, adding the broth midway through. When vegetables are just crisp tender and broth reduced by half, add the chicken back to the skillet. Pour the reserved sauce mixture over and stir until the sauce thickens and becomes translucent. Sprinkle with the almonds and serve over rice.


Trade in the Cabbage, Please!


My farm boy dad was an experienced gardener, having been raised on a farm with nine siblings to be fed. He was never happier than when in his vegetable garden, and he brought produce into the kitchen with great satisfaction. I do believe, though, that he took the ultimate pride in the firm heads of cabbage, with their tightly furled leaves and bright green color. Dad loved cabbage, but it was an unrequited love, as cabbage was particularly tough to digest for someone with his gut issues. Long before terms like IBS and fodmaps were part of the vernacular, eating cabbage kicked him to the curb repeatedly. But he ate it and other items that caused him pain and bloating, because… well, I guess because that’s just what we did in those days.

By the time I was a young adult, the beginnings of my own IBS had emerged. Unlike my dad, I had the whole cabbage thing figured out, along with legumes, and avoided them like the plague. So, driving with my husband last week to pick up our CSA veggie share, it should not have been a surprise when I mentioned that we would be hitting the produce-trading table with the week’s cabbage share. Suddenly, he began to wax nostalgic about… cabbage rolls. For those not familiar with cabbage rolls, they consist of a blanched cabbage leaf stuffed with ground meat, rice and seasonings, which is cooked long and slow in a bath of tomatoes and their juices. I believe they originated in Eastern Europe, but they are quite popular in the Midwestern United States. From my perspective, they are little bloat balls of doom.

Now my husband is regretfully tolerant of my dietary adjustments, but I have learned that when the longing for a forbidden item hits, I need to nip it in the bud, pronto. Attempting to snatch victory from the jaws of cabbage roll defeat, I suggested that we could make meat-and-veggie rolls by stuffing a more acceptable vegetable, like maybe chard. It actually had the advantage of being a softer leaf that would not require the extra step of blanching to relax it; he’d never know the difference, they’d be even more delicious than cabbage rolls, etc., etc. This appeared to work, so now I had to actually make chard rolls.

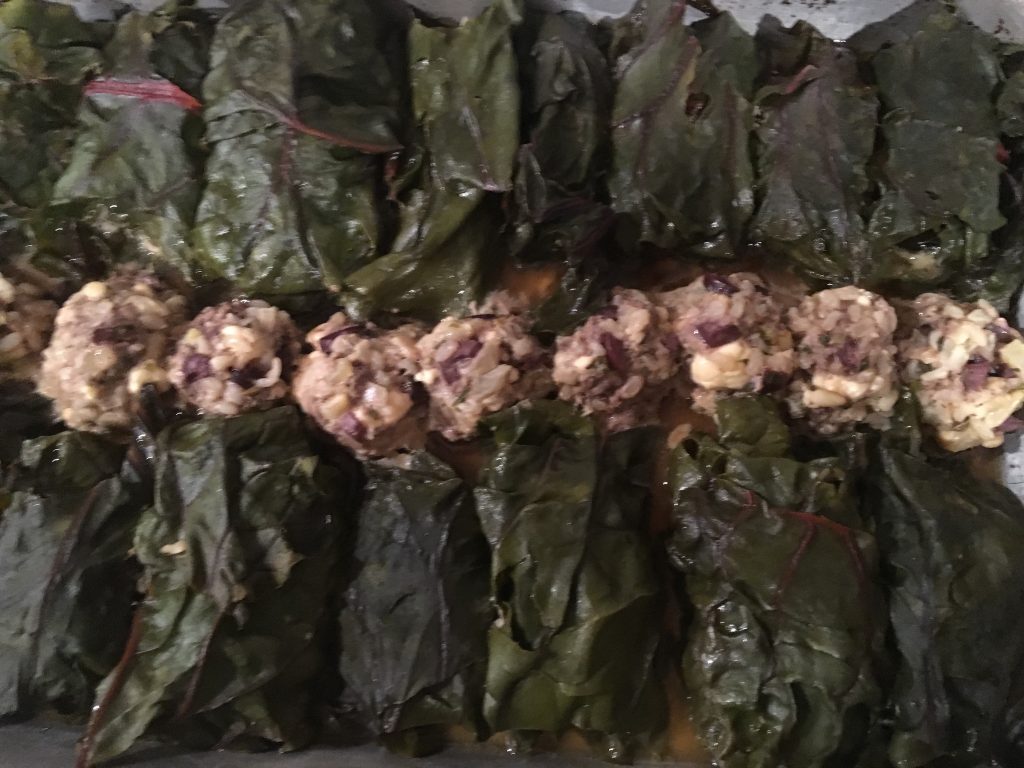
So who knows what goes into a chard roll? I decided to think more like a Greek than an Eastern European. Chard shares similarity in taste to spinach, which goes well with lemon, and feta might be good tucked in there somewhere. Heck, I like lamb better than beef, and yummy things like olives and pine nuts would be right at home in a vegetable meat roll. Right? Luckily, this proved to be true, because the chard rolls turned out to be so-o-o much better than cabbage rolls! The chard leaves became silky, imbued with the lush flavors of broth and lemon. The meat stuffing had the richness of lamb and pine nuts, with tang provided by olives and feta. These rolls, conceived in desperation, were the best meat rolls I could imagine. It matters not whether you are an aficionado of cabbage rolls; you should try these. BTW, I don’t fool myself that the cabbage roll craving won’t show its face again, but I will worry about that when it happens. In the meantime, I’ll be making these…

Greek Style Chard Rolls

Prep Time45 minutes
Cook Time45 minutes
Total Time1 hour 30 minutes
Course: Entree
Servings: 4 servings
Author: Mary Kay Allen

Ingredients

  • 1/3- cup rice parboiled in 1 cup water: 10 minutes for white rice, 20 for brown rice
  • 1 Tbsp. garlic infused olive oil or 1 clove diced garlic with 1 tablespoon olive oil
  • ½ cup diced fennel
  • ½ cup diced onion
  • 2 Tbsp. pine nuts
  • ¼ cup finely chopped Kalamata olives
  • ½ cup chopped parsley
  • ¾ tsp. salt
  • ¾ tsp. pepper
  • ½ tsp. dried oregano
  • ½ tsp. fennel seed
  • 1 Tbsp. dried dill
  • ½ cup crumbled feta cheese
  • 1 lb. ground lamb 85% lean
  • 1 egg beaten
  • 2 bunches chard
  • 1-½ cups chicken broth
  • 2 Tbsp. lemon juice

Instructions

  • Preheat the oven to 350° F.
  • Heat the olive oil in a large skillet over medium high heat. Add the fennel, onion, pine nuts and garlic, if using. Sauté, stirring occasionally until the vegetables begin to soften and the pine nuts begin to toast. Stir in the olives, parsley, salt, pepper and spices. Remove from heat to cool while you prepare the chard.
  • Wash the chard leaves, then slice out the part of the stem beneath the leaf, leaving just the leaf. Spray a 9x13-inch baking pan with cooking spray. Stir the feta cheese crumbles and egg into the cooled vegetable mixture, then combine thoroughly with the ground lamb. Place several tablespoons of the meat mixture at the top of a chard leaf. Fold in the sides of the leaf over the meat, then roll up to enclose the meat. Repeat with remaining chard leaves and meat mixture until chard leaves are used. Make any remaining meat mixture into small meatballs. Arrange the chard rolls and meatballs in the prepared pan, pushing them tightly together as pictured. Combine the broth and lemon juice and pour over the rolls. Cover the pan tightly with foil and bake in preheated oven for 45 to 60 minutes, until chard is done and meat mixture has expanded to fill the rolls. Serve hot.

Pasta Class


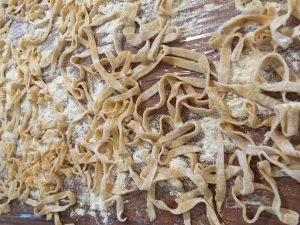
For most folk, the image of a kid in a candy shop would not be a child in a big ol’ farm kitchen, festooned with oodles of noodles. But it fits my story as a young kid on the farm. Homemade hand cut egg noodles, which my mother had hung to dry over every free surface in the room-counters, tables and chair backs.  Now this just happened to leave the neatly cut ends of the l-o-n-g noodles at about the height of a small farm girl… While I’m sure she cautioned me to leave them alone, inevitably I’d manage to sneak in unseen to tweak off the yummy ends of that soft dough, leaving a row of ragged edges like a set of snaggle teeth. Was I in trouble? Probably. But not so much so that I recall ending the error of my ways…

Noodles were a staple on the Midwestern dinner table, usually served as part of “something and noodles,” such as chicken and noodles or beef and noodles. I never learned to make them; by the time I was old enough, Mom was too busy on the farm or had returned to full-time work. She simply didn’t make them any longer. And what was never mentioned was the fact that egg noodles are actually pasta.

Italian American food was not a particularly familiar cuisine on the farm. My mom did make a basic spaghetti sauce, but it was always served on the long dried strands of pasta found in a box on the grocery store shelf.  But after leaving the farm for the wider world, and as that world began to offer a broader selection of cuisines, I came to know fresh pasta as a highly desirable commodity. I simply never connected the simple egg noodles of my childhood with fresh pasta, because we didn’t eat it that way. And the idea of making it at home seemed quite daunting…

The fact that my husband had spent his early childhood in the south of Italy only multiplied the intimidation factor. His nickname as a kid was “the spaghetti boy.”  We acquired an Italian pasta machine years ago and he would on occasion make fresh pasta. That seemed to suffice until several months ago when I saw a class being offered at Hayden Flour Mills https://www.haydenflourmills.com where I purchase many of my grain products. The company mills an ancient variety of wheat known as Sonoran white wheat, originally brought to the area by the Spaniards as they moved north through Mexico to claim land and establish missions. Highly digestible, I use it in many of my baked goods.

A life-long need to make pasta suddenly bloomed, so I registered for the class. Picture a gaggle of multi-aged women around a big wooden baking station. Gab and flour were both flying freely; eggs were breaking and dough was kneaded. We took turns learning how to thin and cut the dough, feeding through the pasta machine.  We cut and stamped tortellini and used a cavarola board to make cavatelli. My fear melted away, as I discovered this process was actually pretty easy, particularly for someone who has baked for years.  I was also reminded that camaraderie makes learning reinforcing. Many kudos to Emma and Jill, our instructors at the mill, for making the afternoon both fun and functional.  

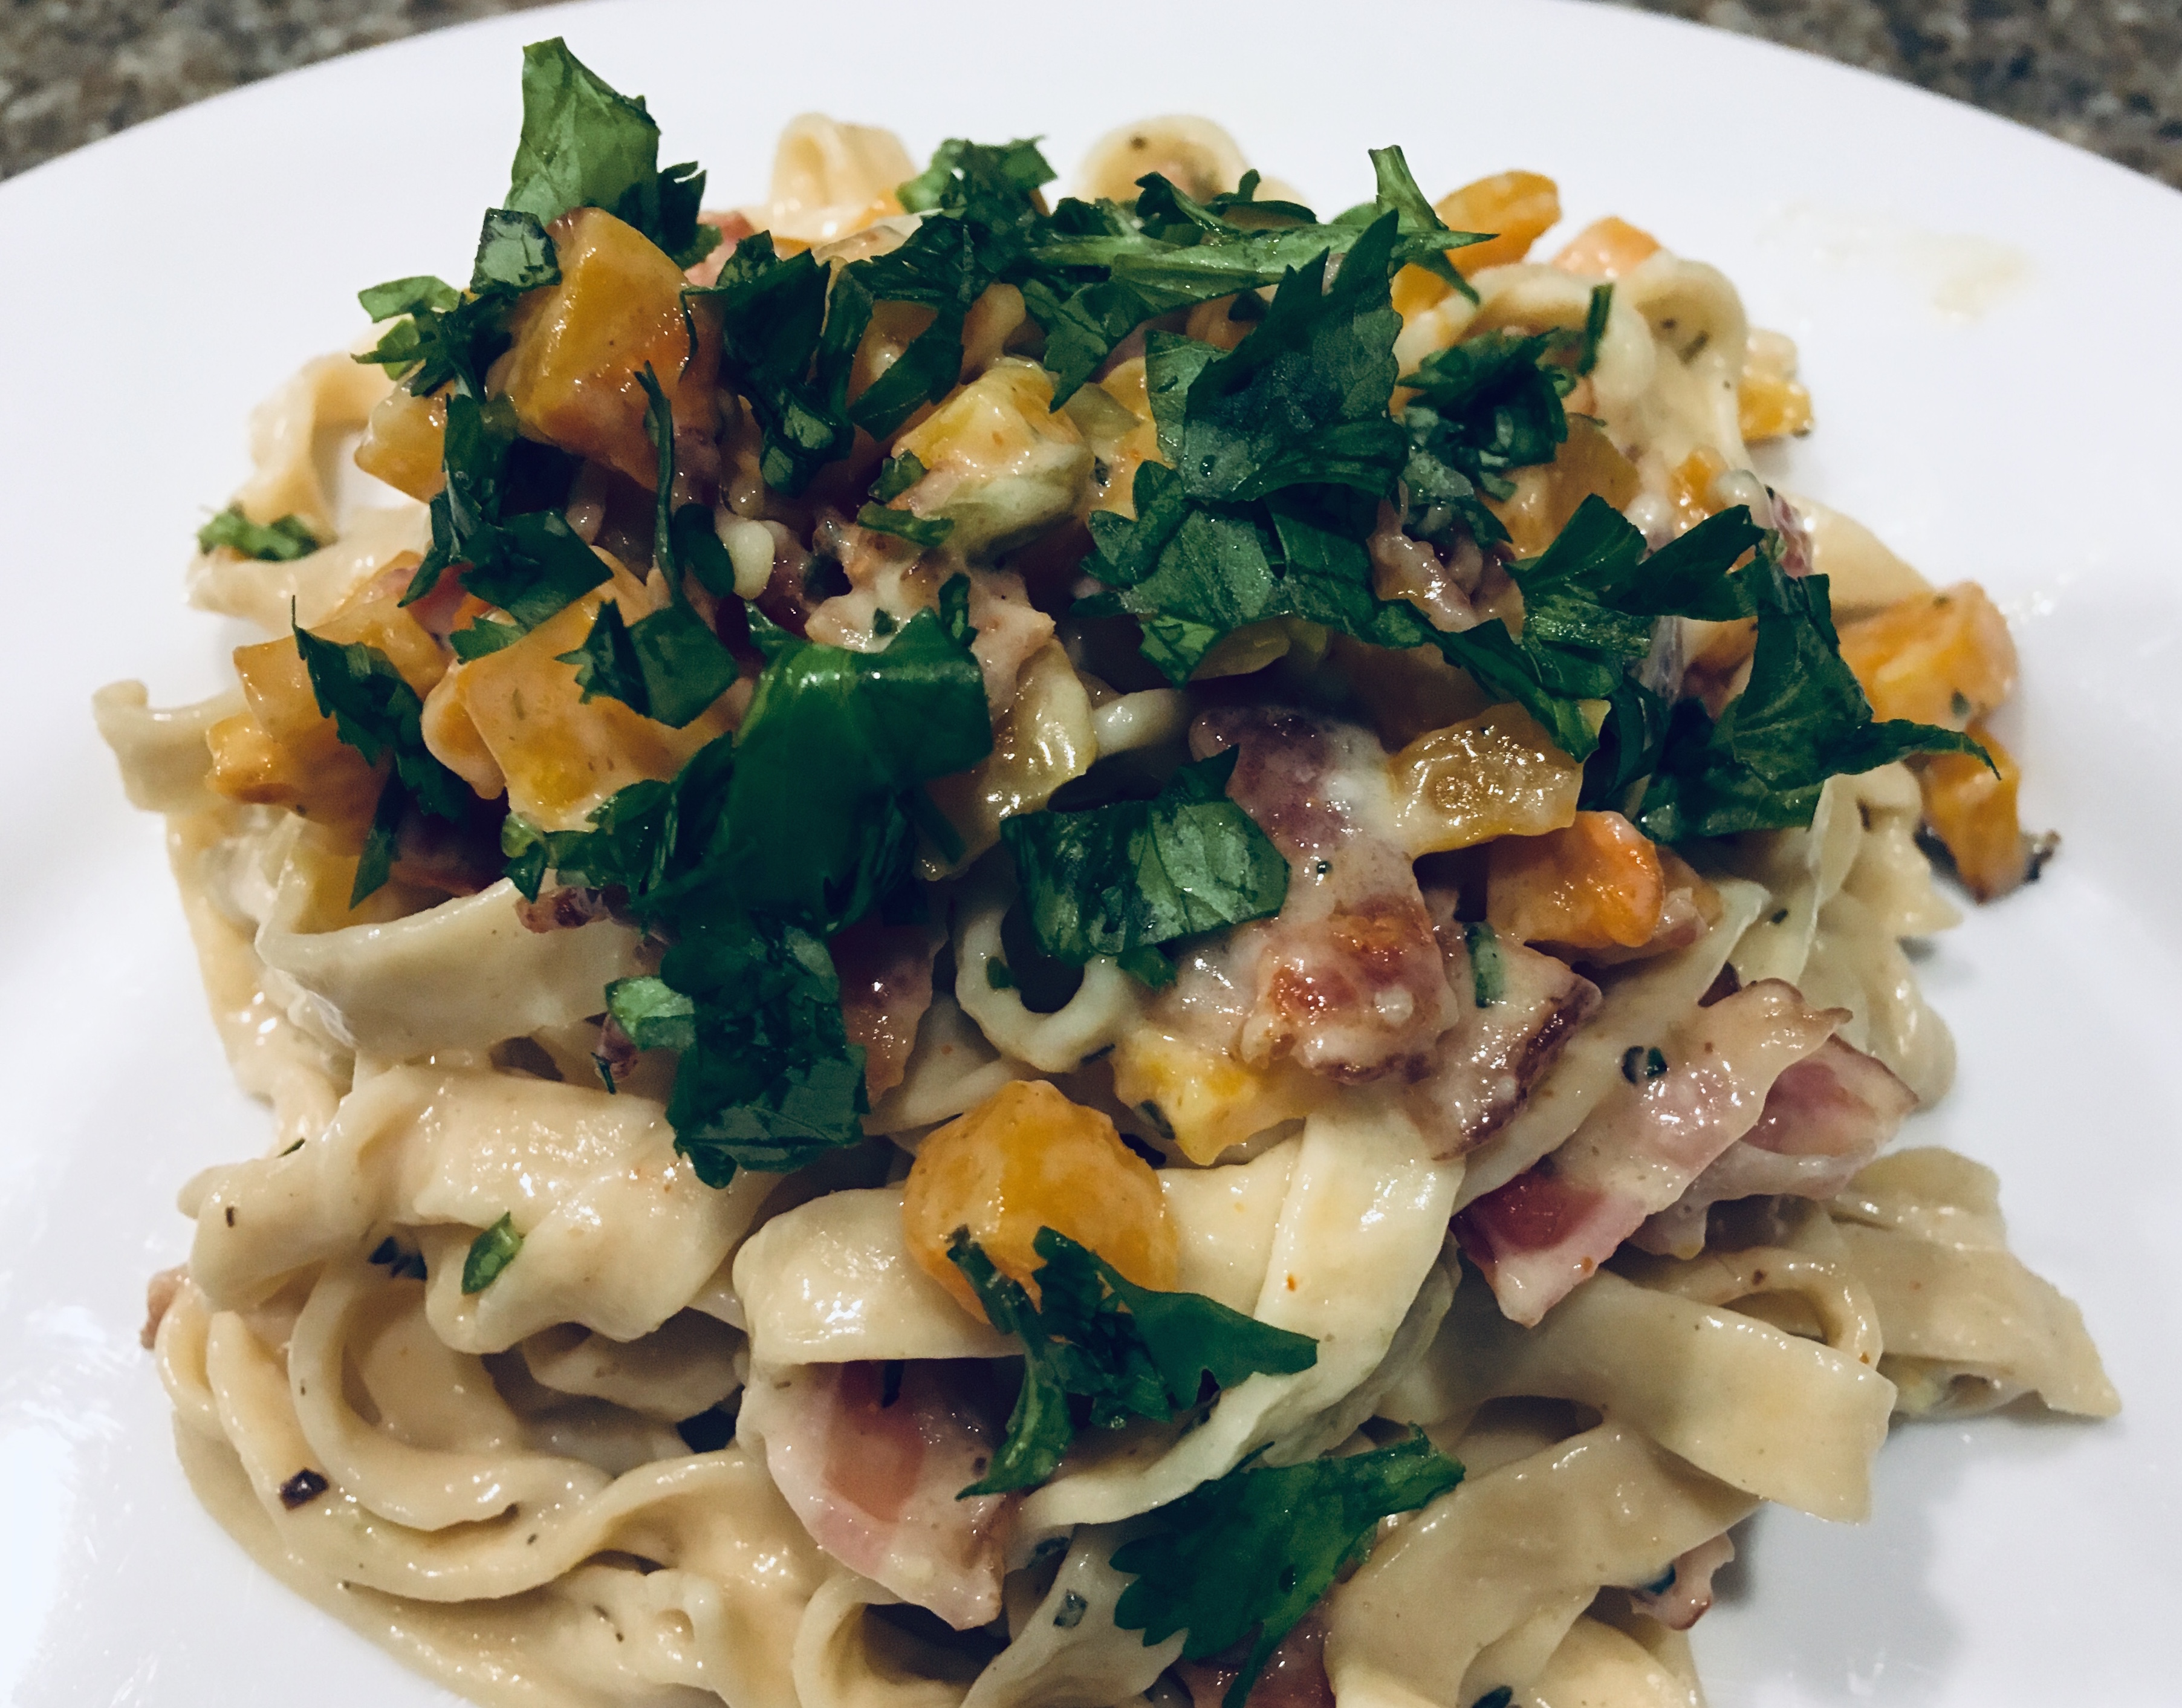
I drove home with a pound of various shapes of pasta, including half a pound of yes; you guessed it, egg noodles. Checked out the pantry, finding the ingredients to turn those scrumptious strands of dough into this recipe. So as we head into a new year, do I think you should make this pasta dish or even make your own pasta? Sure if either of those appeal to you. You can certainly make the dish with convenient fresh pasta from the refrigerated section of the grocery, or even dried pasta. But more importantly, try something you’ve always wanted to do, but thought you couldn’t. Accomplishment feels pretty satisfying.

Pasta with Butternut and Bacon

Prep Time45 minutes
Total Time45 minutes
Course: Entree
Servings: 4 servings
Author: Mary Kay Allen

Ingredients

  • 1 poblano pepper
  • 2 cups diced butternut squash
  • 2 teaspoons olive oil
  • 3/4 teaspoon salt
  • ¼ teaspoon pepper
  • ¼ teaspoon dried oregano
  • 1/8 teaspoon cayenne pepper
  • ¼ teaspoon cumin
  • ½ teaspoon dried rosemary crushed
  • 5 slices bacon
  • 8 ounces fresh or dried pasta of choice
  • 1 tablespoon flour
  • ½ teaspoon salt
  • pinch pepper
  • 1 cup milk or alt milk
  • ¼ cup grated pecorino or parmesan cheese
  • ¼ cup chopped cilantro

Instructions

  • Turn the oven on to broil. Place the poblano pepper on a baking pan and broil until blackened, turning to broil all sides. Remove from the heat and place in a paper bag to steam. Once cooled, scrape off the blackened skin, remove seeds and dice the flesh. Set aside.
  • Heat the oven to 425° F. Toss the butternut squash with olive oil, salt, pepper, oregano, cayenne, cumin and rosemary. Spread out on a baking pan either sprayed with cooking spray or covered with parchment. Bake for 20 minutes, stirring once, or until browned and tender. Set aside.
  • Begin heating a large pot of water with 2 to 3 quarts of generously salted water. Slice the bacon in ½ inch strips and sauté in a medium skillet until browned and crisp. Remove to a paper towel to drain. Pour off the bacon fat, leaving one tablespoon in the skillet. When ready to make the sauce, heat the bacon fat over medium high heat until sizzling, then stir in the flour until smooth. Gradually add the milk, stirring constantly until it comes to a boil. Turn heat down and simmer sauce for 1 minute. Add the grated cheese and season to taste. Stir in the diced poblano.
  • When the water is boiling, cook the pasta according to the recipe or package directions. When al dente drain the pasta, reserving ½ cup starchy cooking water. Toss pasta with the sauce, butternut squash and bacon slices, adding starchy cooking water as needed to thin the sauce.

Of Picnics, Hot Coals, and Grilled Chicken


Our farm had a broad swath of front lawn, peppered with long-standing shady elm trees. An old-fashioned wooden picnic table lived under one of these leafy umbrellas. “Having a picnic” simply meant taking our meal outdoors. Given that this was an earlier time and we raised our own meat, the dinner usually featured a slab of grilled meat known as the “set piece,” or main dish. It became a grand celebration on the evenings when my dad brought home a watermelon or we all strained muscles on the hand-crank ice cream machine.

I always had my own private celebration when the grill made its entrance from the garage out onto the driveway. I have no idea how my mother developed her skills on the charcoal grill. While she had a small repertoire of recipes, the dishes she grilled were masterpieces. Crisp crusted yet rare steaks. An incredible foil wrapped, slow grilled chuck roast with a succulent sauce of grilled onions and tomatoes. Juicy Asian marinated grilled chicken. Thick rosemary infused pork chops. There were soaked wood chips for smoking, drip pans, direct and indirect sides to the grill- you get the picture. She was not one to fling a hunk of meat over the fire, give it a squirt and hope for the best. (That is actually my style, as I did not follow in her footsteps on the whole grilling routine…)

Mom’s grill was no prize, either. It was an ancient metal event, boxy and black, encrusted with years of grease and BBQ goo, whatever that may have been… I suspect that it was actually those dicey substances that were holding the metal together. BBQ cement of a sort. I don’t know where it came from, but she used it for many years with delicious results. Sadly, while I loved the products, I never learned how to cook them myself. While I might season or marinate today, my husband mans the charcoal around here. For which we are all exceedingly thankful.

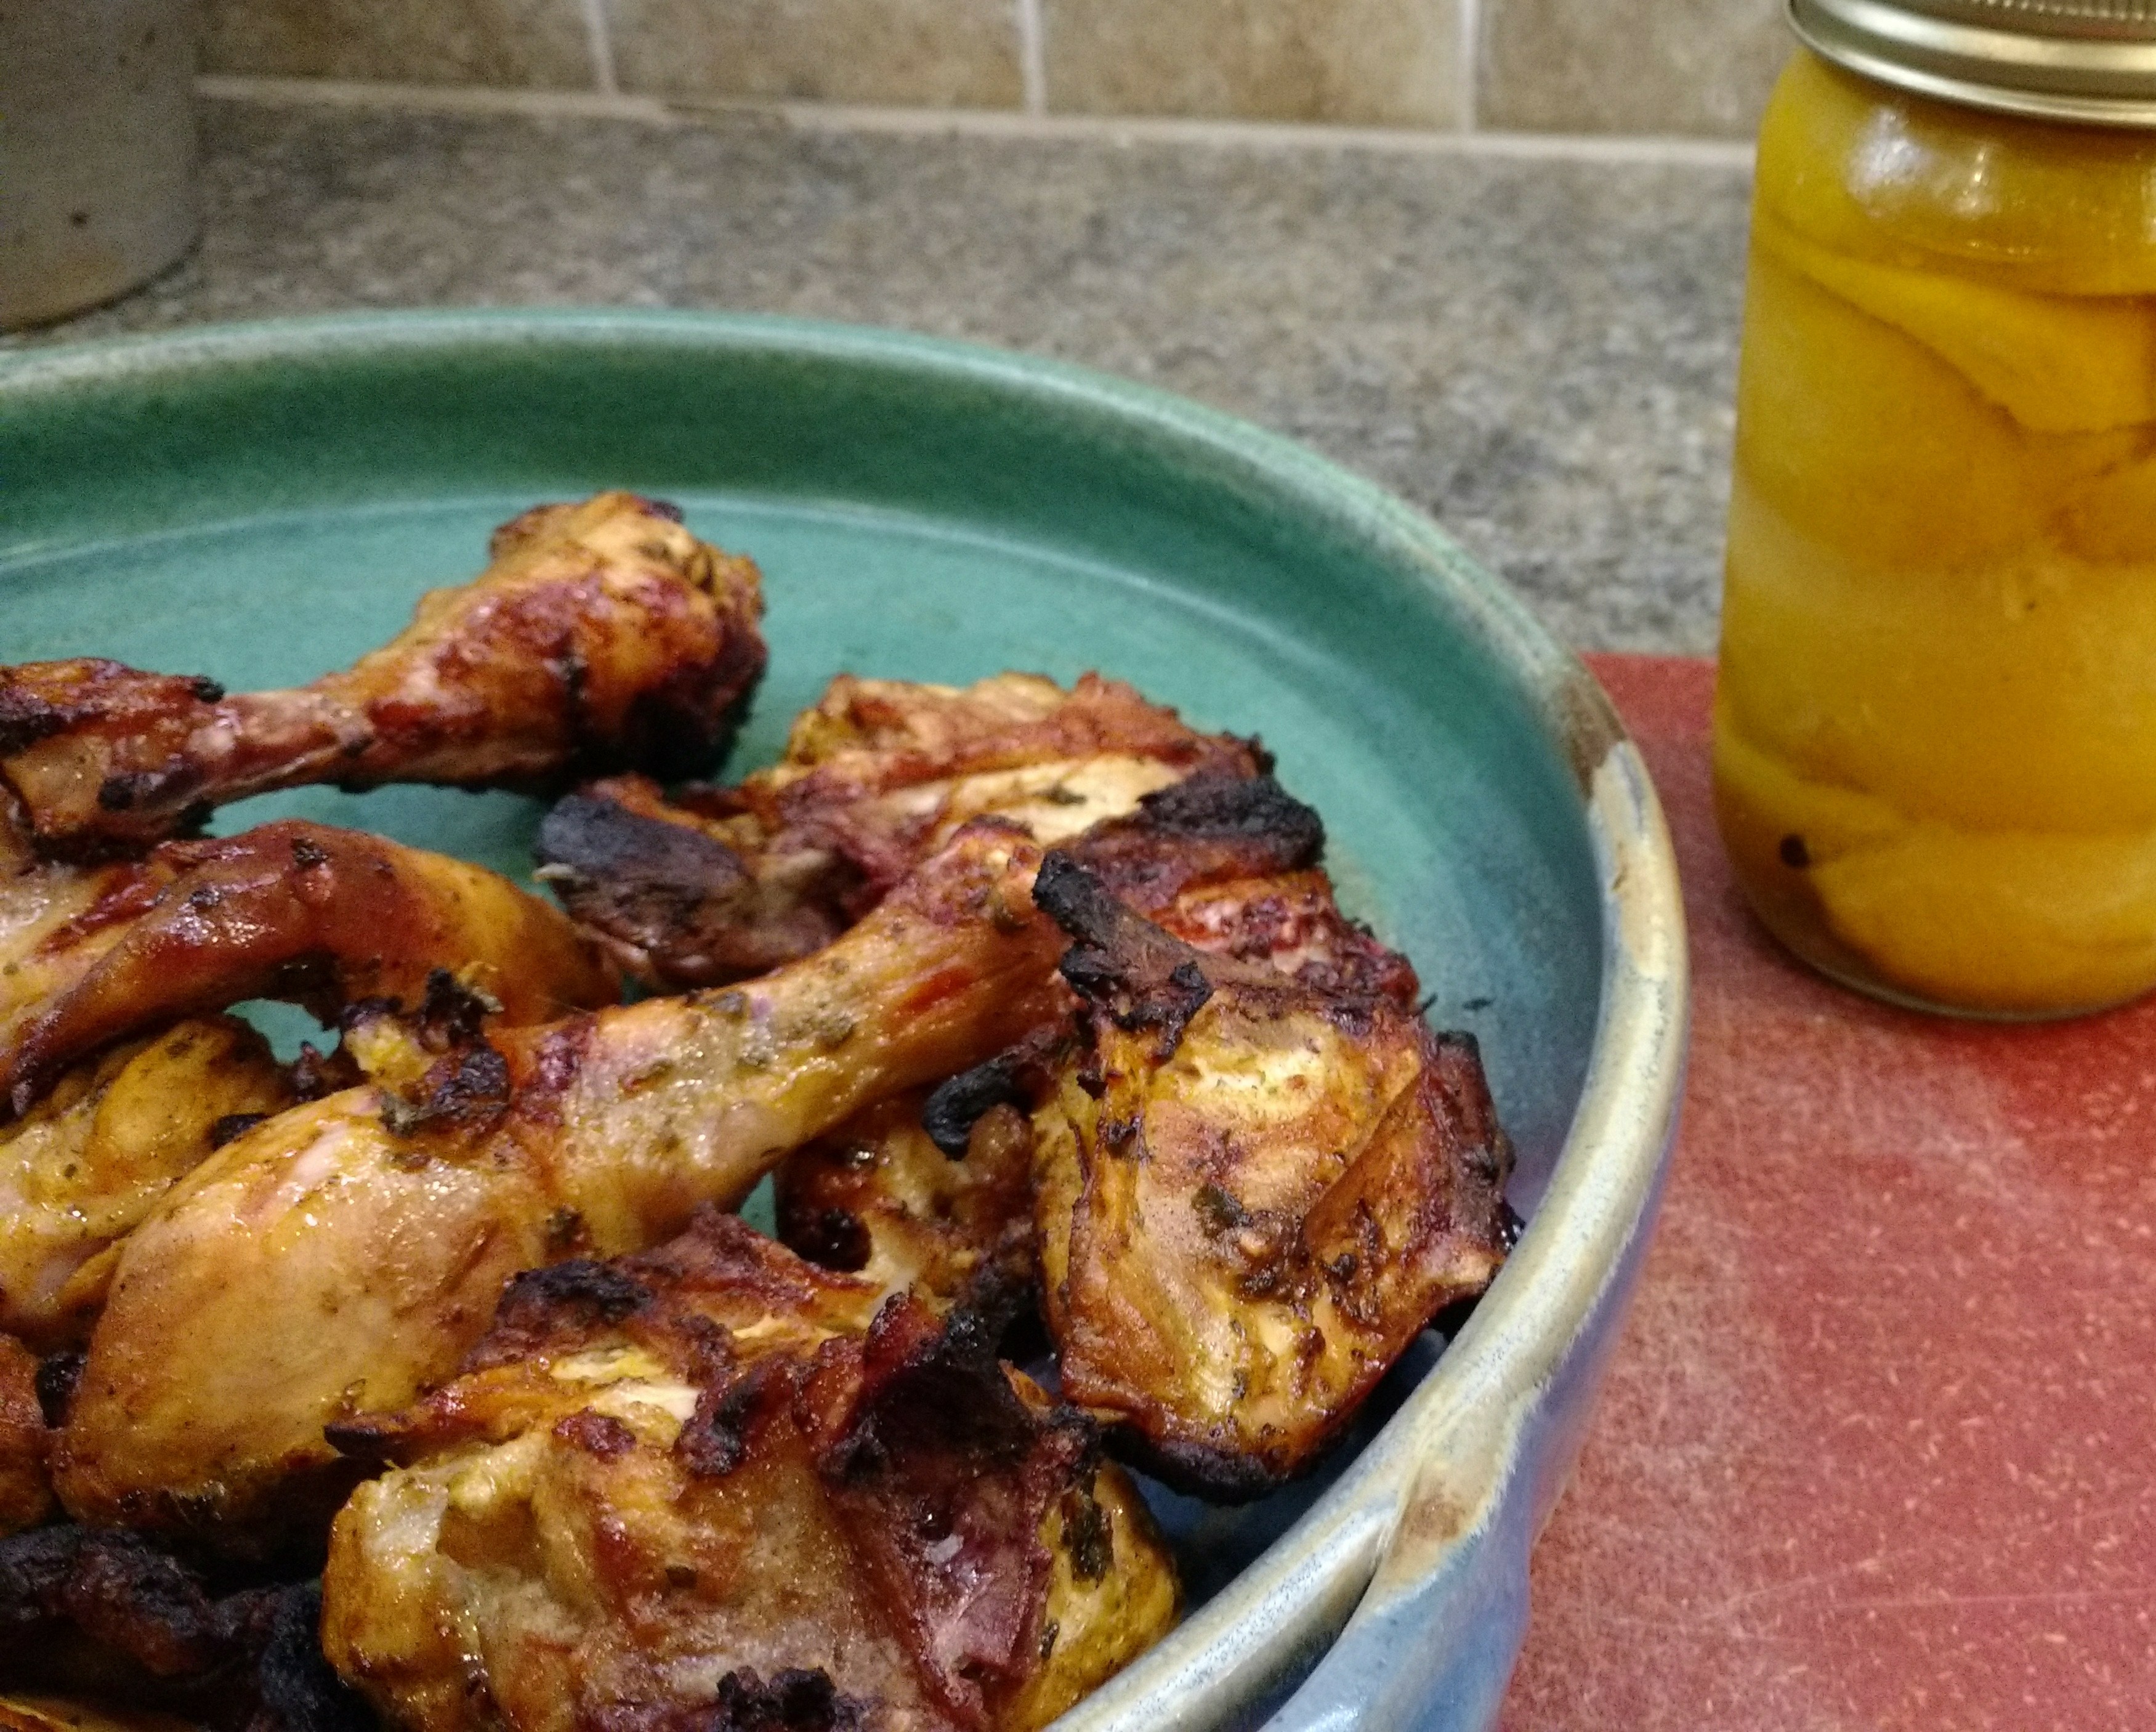
We are stalwart year-round grillers, no matter our locale of the moment. Midwestern rain and snow were overcome to grill throughout the winter months. Here in the desert southwest, the neighbors regard us with great suspicion in the mercilessly hot summer as my husband trudges out to start the fire.  He prays that it kindles into coals that will actually cook something, then races back inside until time to put the to-be-grilled items over the coals. Since our meat consumption has been reined in considerably, this is usually fish or vegetables; occasionally steak, which we portion out into a summer salad. Grilled chicken also makes the cut, remaining one of my favorites from summers on the farm. While my mother’s recipe had a very simple soy based marinade, my usual grilled chicken marinates in a more complex Middle Eastern style marinade that features my preserved lemons. Yeah, still pushin’ the lemons. Somebody around here has to do it.

Moroccan Spiced Grilled Chicken

Juicy grilled chicken with Middle Eastern spices and the tang of preserved lemons.
Prep Time20 minutes
Cook Time45 minutes
Total Time1 hour 5 minutes
Course: meat entree
Servings: 6 servings
Author: Mary Kay Allen

Ingredients

  • 2 tablespoons diced preserved lemon peel
  • 2 tablespoons lemon brine from preserved lemons
  • ¼ cup lemon juice
  • ¼ cup olive oil
  • 3 green onions chopped
  • ¼ cup chopped parsley
  • ½ teaspoon coriander
  • ½ teaspoon turmeric
  • 1- teaspoon sesame oil
  • 1 teaspoon dried oregano
  • ½ teaspoon salt
  • ½ teaspoon pepper
  • 2 teaspoons Sambal Oelek
  • 1 whole chicken cut into serving sized pieces

Instructions

  • Combine all ingredients except chicken and blend well. Pour over the chicken pieces and marinate, refrigerated for at least 4 hours, or up to overnight.
  • Remove chicken from marinade and grill over medium hot gas or charcoal fire until cooked through and juices run clear.


Mexican Rice and Black Bean Salad


More and final musings on “Why Cook?”

I have been a lifelong cook, primarily because I enjoy it. I enjoy being creative with flavors; when I am playing with my food, one never knows-could be tremendous, could be horrendous…I am thankful that I can cook, though, because over the years I have had to accommodate diet for varying medical conditions.

My mother prepared at least two variations on the meal each evening. One was for my father, who had ulcers along with then unknown IBS (irritable bowel syndrome) and reflux disease. Since next to nothing was actually known about these digestive issues, his diet was bland; picture a hospital tray prepared with a bit of my mother’s finesse. For the rest of us, the meal was usually a bit more inspired, and certainly better seasoned. Today, many people need food prepared for specific dietary concerns, more than ever before.

I have learned the hard way, several times over. When my beautiful daughter was diagnosed with Type 1 Diabetes at the grand old age of eleven, the whole family was thrown into a tizzy. During her week in the hospital, all we managed to learn was how to give practice shots to oranges. (And not very well, at that.) Our first post-diagnosis grocery trip took hours, as my husband and I studied nutrition labels in horror. What in heaven’s name had we been eating up to then? I was so grateful at that point that I not only knew how to cook, my bachelor’s degree had included concentrated study in the science of food and nutrition. Because now, each and every gram of carbohydrate had to be accounted for to figure the exact dose of insulin, and there were limits to the grams of carb that could be eaten at each meal. Let’s see, there’s 13 grams of carb in a cup of milk, 24 grams in ¼ cup of flour… Uh, yeah. We stockpiled cookbooks and magazines in which the carb counts were already included. If you made changes to the recipe, the carbs had to be re-calculated…

Fast forward to now. While conditions like IBS and reflux disease supposedly don’t have a basis in genetics, I have followed in the old man’s footsteps with both, and my unfortunate adult son is well on the way to following mine. I have spent years trying to decipher what might explain my digestive issues and what I should and should not be eating. Be careful for what you ask! My new gastroenterologist pointed me in the direction of the FODMAP elimination diet, which made more than clear that several classes of carbs were culprits. So I am back to cooking for specific dietary needs, now for myself.

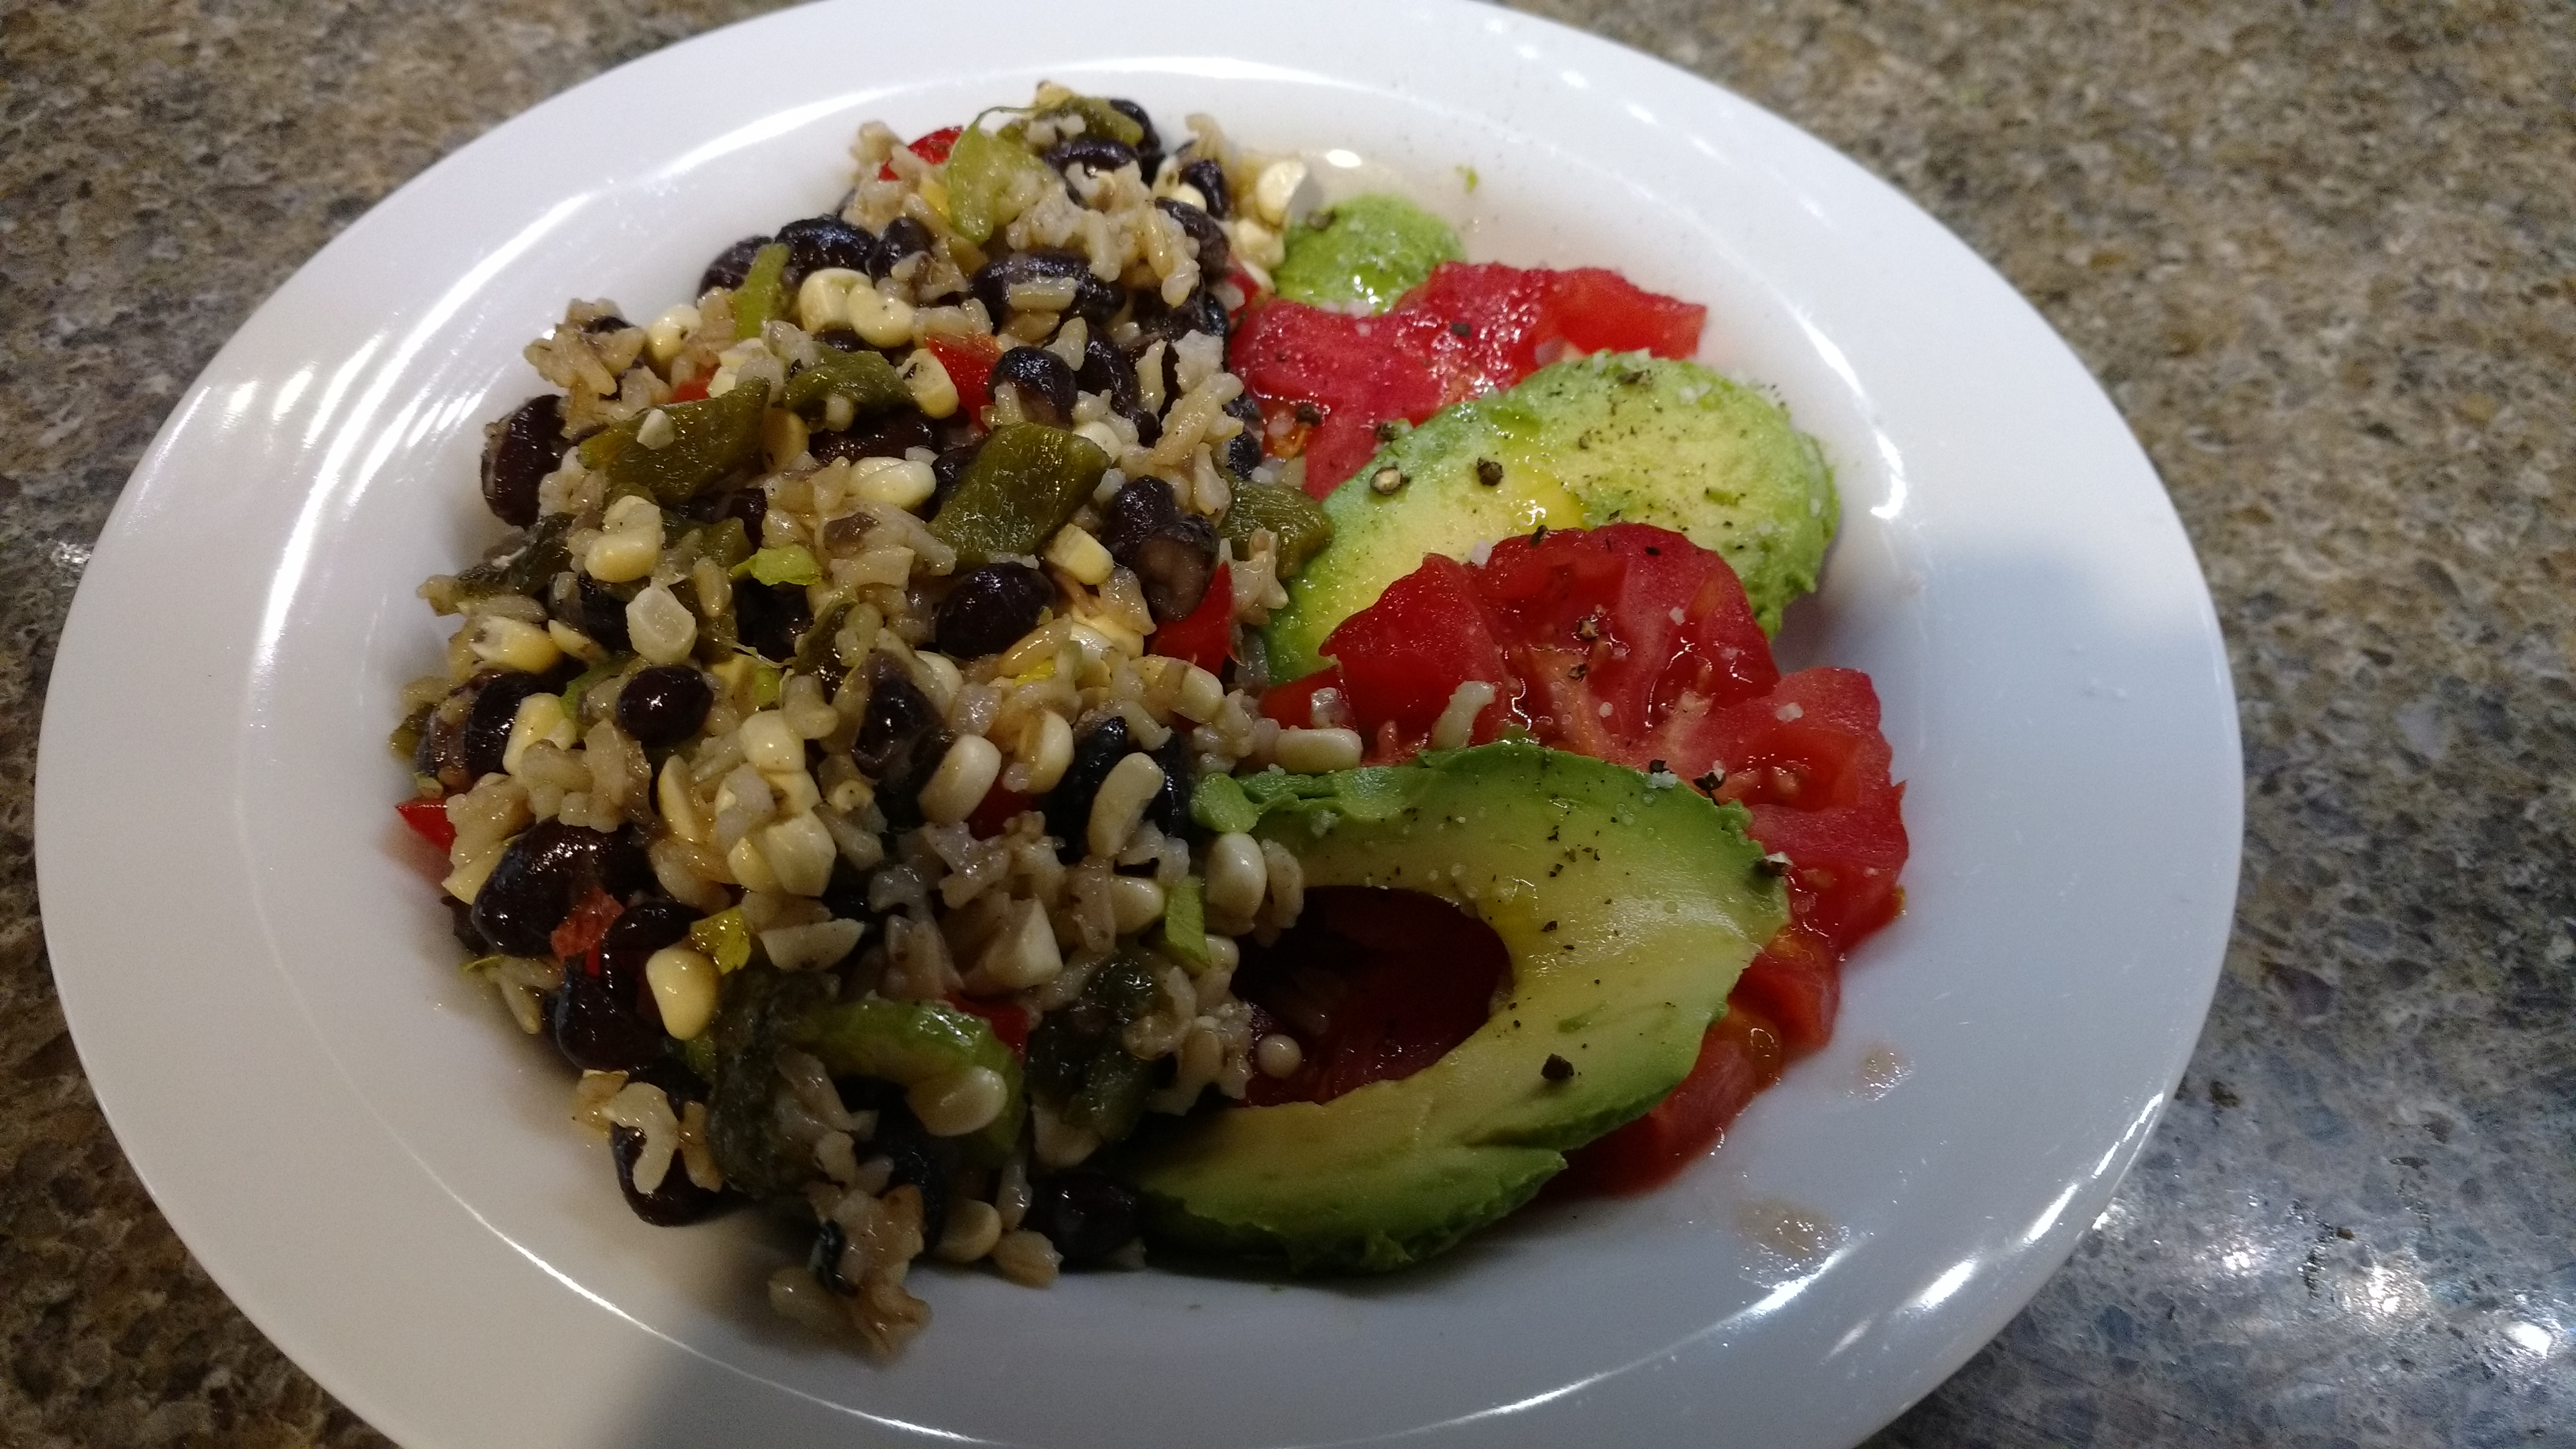
Enter this salad. A recipe for kidney bean and rice salad has long been a favorite of my husband. But beans? Hard to digest. And garlic as the major seasoning? Can’t digest that either. Yes, you heard that right. I can use garlic infused oil, but no cloves of garlic. Compensating for the loss of that strong a flavor basically meant starting over. Time to play with the food…     A Mexican flavor profile has the potency to substitute for the garlic heavy French one. Sprouting powerfully improves both the digestibility and available nutrition of beans, and I receive easy-to-sprout fresh black beans in my CSA box.* Black beans and corn in tandem are delicious. Add in some roasted poblanos, diced serranos, and avocado. Dinner is done and everyone can eat it. And thankfully, there are no hospital trays in sight!

Mexican Rice and Black Bean Salad

Prep Time30 minutes
Cook Time45 minutes
Total Time1 hour 15 minutes
Course: Entree Salad
Servings: 4 -6 servings

Ingredients

  • 1-½ cups cooked brown rice
  • 2 cups cooked black beans from dry beans or canned
  • 2 ears of corn stripped from the cob (can use canned or frozen)
  • 1 roasted poblano pepper chopped
  • ¼ cup diced red bell pepper
  • 1 tablespoon diced Serrano pepper
  • ¼ cup sliced celery
  • 1 scallion thinly sliced
  • Dressing
  • 2 tablespoons garlic infused oil can substitute fresh diced garlic clove and olive oil
  • 1- tablespoon lime juice
  • 2 teaspoons orange juice
  • pinch each of salt pepper, cumin and oregano
  • Avocado and tomato for serving

Instructions

  • Combine all ingredients through scallions in a large mixing bowl. Whisk together the dressing ingredients, toss with the salad and chill. Serve on plates with sliced tomato and avocado.


*I start with the freshest dry beans I can find. The beans I get in my CSA box are always fresh and sprout easily. I also have had good performance from Rancho Gordo beans, available online at  https://www.ranchogordo.com/ 

Using a quart jar with a sprouting jar strainer lid, soak the beans for 8 hours, then strain the water. Rinse and strain the beans 3-4 times a day until small white plant sprouts appear. Cook as usual.

Mediterranean Cobb Salad

Mediterranean Cobb Salad

Mediterranean Cobb SaladOn the farm, my mom and I participated in a bizarre thrice-daily ritual, typically gathering a specified list of ingredients, measuring and combining in proportional amounts, and applying heat or refrigeration. We called it…COOKING.

Mind you, growing up, there was not an abundance of choice. We lived on a FARM. There was a paucity of nearby restaurant options and truth be told, my mother was quite picky about where she would eat outside the home. She knew we could eat better at home than in most restaurants at that time. She’d probably still be correct in that assumption were she sitting here today.

During the years of my career, we ate more home cooked meals using real ingredients than many families of the time. While I must admit to feeding my family the occasional frozen item, none of them were met with much enthusiasm. It was more fun to buy them than to eat them; they offered such promise while still in the box, but seldom delivered on the taste buds. Nevertheless, when my grown and fully employed son comes for dinner, we have a new ritual. He raves about the meal, I state that it was easy to prepare; he reminds me that, given the available time after work, “easy” is pouring milk on cereal… (There is hope for him, as he recently acquired an Instant Pot!)

Cooking, and/or the lack thereof, has been a topic of great concern in recent times. The trend of allowing others to prepare one’s meals is trumpeted either with alarm or delight. One can choose to eat out, order in, purchase previously processed food, order meal kits etc., etc. The list can go on ad finitum because the options are limitless. “Cooking” is much simpler than it used to be. Being the foodie that I am, I find the study of this phenomenon fascinating.

I first viewed the idea of delivered meal kits as an odd concept, but they facilitate people feeling that they are cooking themselves and their families a good meal, and their detailed instructions may actually help people learn to cook. They also encourage folks to try new ingredients and flavors. (One of these delivery services has even published a cookbook! That’s coming full circle!) The downsides are cost, along with perhaps allowing users to think that all meals need to look like a restaurant plate.

Other ways being used to encourage people to cook include preparing “bowls.” Grain bowls. Buddha bowls. The “recipes” offer up lists of simply prepared ingredients, placed in little piles atop a bowl of grain or greens and topped with a dressing or sauce. No measuring, flexible substitution of ingredients, simple to prepare ahead.

Then there are the “sheet pan suppers.” A list of ingredients including vegetables and proteins are combined on a large sheet pan and oven roasted together. I can go for this as long as raw meats are separated from the other ingredients, each to their own side of the pan, please. Because many recipes just jumble them together, don’t you know. Makes the home economist in me shudder.

To be truthful, I was one of those kids who didn’t like the different dishes being served to touch one another on the plate. I can still hear my mother tell me that it all ends up together in the end…
But today, in the end, I’m grateful that cooking is simply routine for me.

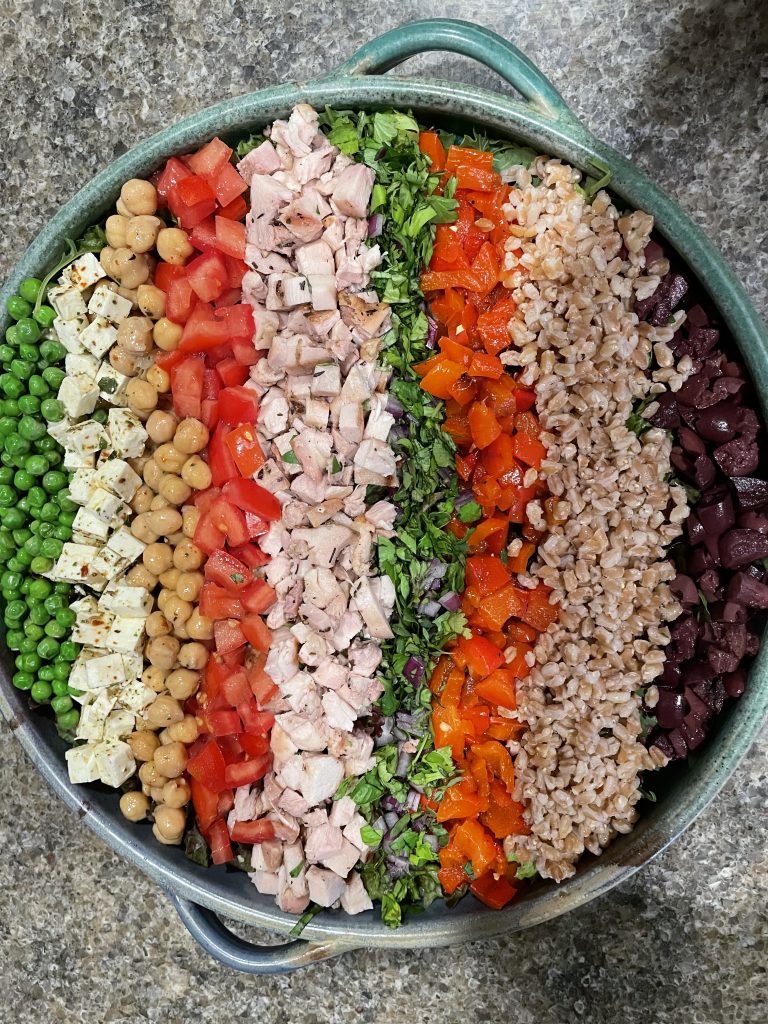
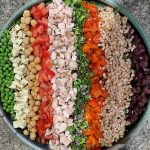
There is, however, one simple dish I prepare in the heat of the Tucson summer that fits the easy cooking bill. Like the “bowl,” it combines various single ingredients on a bed of lettuce with dressing. In other words, it’s a SALAD. And the ingredients are neatly separated into lovely colorful stripes. My Mediterranean Cobb Salad is both easy to prepare and beautiful on the plate. Is it cooking? Maybe…

Mediterranean Cobb Salad

Prep Time30 minutes
Total Time30 minutes
Course: Salad
Servings: 4 servings

Ingredients

  • Salad greens of choice
  • Diced roasted pepper green or red
  • Diced roast chicken
  • Diced Kalamata olives
  • Whole cooked chickpeas marinated in the dressing if desired
  • Diced green onions and parsley
  • Cooked farro or other grain of choice
  • Diced fresh mozzarella feta is a good substitute
  • Frozen peas, thawed
  • Diced tomato
  • ¼ cup quality olive oil
  • 2 tablespoons lemon juice
  • ½ teaspoon grated lemon zest
  • ½ teaspoon salt
  • ½ teaspoon each of thyme and oregano
  • pinch of freshly ground pepper
  • 1 teaspoon prepared Dijon mustard

Instructions

  • Prepare the dressing by whisking the olive oil, lemon juice, zest, salt, mustard and seasonings together. Clean and tear the salad greens into small bite size pieces and use to line the serving platter. Amounts of remaining ingredients are flexible, depending on the number of people being served. To serve four, use ¾ to 1 cup of each item. Spoon each ingredient onto the platter in a neat line, being sure to alternate colors. When ready to serve, drizzle with dressing.

Notes

  • Nutrition:
  • Calories: 492
  • Total Fat: 20.9 g
  • Sat Fat:        3.7 g
  • Cholesterol: 34 mg
  • Sodium:  265 mg
  • Total Carb: 43.2 g
  • Fiber: 13.8 g
  • Total sugars: 10.6 g
  • Protein: 22.1 g

Put An Egg On It

I have to wonder what they were thinking. Perhaps they were ahead of their time, transitioning the diversified family farm to an egg farm. My mother was a stay-at-home mom after years of being employed. Perhaps she was bored, or they wanted to supplement my dad’s income. Who knows? Whatever the reason, the pullets arrived and we began to produce eggs. Y’know how a few chickens in the backyard is a charming idea? Two thousand chickens, not so much… and that’s a small number when compared to today’s egg production facilities.

Egg farming facilities tend to get a bad rap these days, but many of the high production practices of today weren’t even imagined when my folks decided to narrow their farm focus to egg production. Our chickens were housed in a huge old airy tobacco barn, well ventilated with a high roof and lit with long windows.   The dirt floor provided plenty of room to roam along with insects to supplement their feed. Rows of roosting boxes lined with hay allowed them to nest comfortably. No cages and no oddly bred birds unable to hold up their own weight. These birds lived in the high rent district in comparison to the chickens of today.

The egg business also ensured that our own supply of eggs and chicken were never in short supply. Not too surprising that many of our meals were centered on eggs: eggs baked in nests of buttery bread crumbs, waffles and eggs, creamed hard cooked eggs with dried beef, etc. etc. The chickens, however, were the old biddies, who having outlived their ability to produce eggs, required stewing to be tender. My mother and eventually I became masters at producing chicken dinners from long and slow simmered geriatric hens.

The family favorite was what my mother called “pot pie.” Pot pie was not a deep dish of meat and vegetables with a crust, though. It was more of a stew, with squares of chewy homemade noodle dough, carrots, celery and hearty chunks of chicken all afloat in a bowl of very rich chicken broth. It often included little eggs, basically yolks, from the hen’s egg sac. It was true homespun comfort food. I’ve learned in the past several years that it is actually an Amish and/or Pennsylvania Dutch recipe, as are several of my family’s traditional foods.

I had not made this delicious richness in decades. It was lost along with the robust hens that actually taste like chicken. The bland birds available in the supermarket just wouldn’t make this dish. But in recent years I have once again been able to find authentic well-raised hens, at my local community supported agriculture. Better yet, the birds are not the geriatric types. We manage a number of meals from one of these birds, first roasting the whole chicken for dinner, reserving pieces of meat for the stew. Followed by slicing meat for sandwiches. When the carcass is the only remainder, it is stewed along with aromatic vegetables to make the flavorful broth needed for the pot pie. This recipe begs for a cold lazy day. Don’t wait as long as I have to try it.

Chicken Pot Pie

Prep Time45 minutes
Cook Time20 minutes
Total Time1 hour 5 minutes
Course: Entree
Servings: 4 servings

Ingredients

  • 8 cups of high quality chicken broth preferably made from your own chicken
  • ¾ - teaspoon each of thyme rosemary, and tarragon
  • 4 large carrots scrubbed and sliced ¼-inch thick
  • 4 ribs of celery washed and sliced ¼-inch thick
  • Salt and pepper to taste
  • 3 cups cubed or pulled chunks of chicken
  • Dough
  • 2 cups flour I use my usual blend of sprouted and spelt, but all purpose is fine, too
  • ½ teaspoon salt
  • 2 lumps of shortening or butter the size of a walnut (about 3 tablespoons)
  • 1 egg
  • ½ cup hot milk

Instructions

  • Bring the broth to a boil in a large soup pot and season with the herbs. Add the carrots and celery and reduce to low. Cover the pot and simmer the vegetables while preparing the dough.
  • Combine the flour and salt, then cut in the shortening until the texture resembles grains of rice. Stir in the egg and hot milk, then turn out onto a lightly floured surface. Divide the dough in half. Roll each half very thin, approximately 1/8-inch in thickness. Cut into 1 to 1 1/2 –inch squares.
  • Bring the broth mixture back to a boil, and drop the pot pie squares in slowly. Once all are in the broth, stir to ensure the squares don’t stick together, then reduce the heat to a strong simmer. Cook 20 minutes, or until the pot pie dumplings are tender. Add the chunks of chicken and heat through. Taste for seasoning, adding salt and pepper as needed.