Homemade Applesauce

recipe image
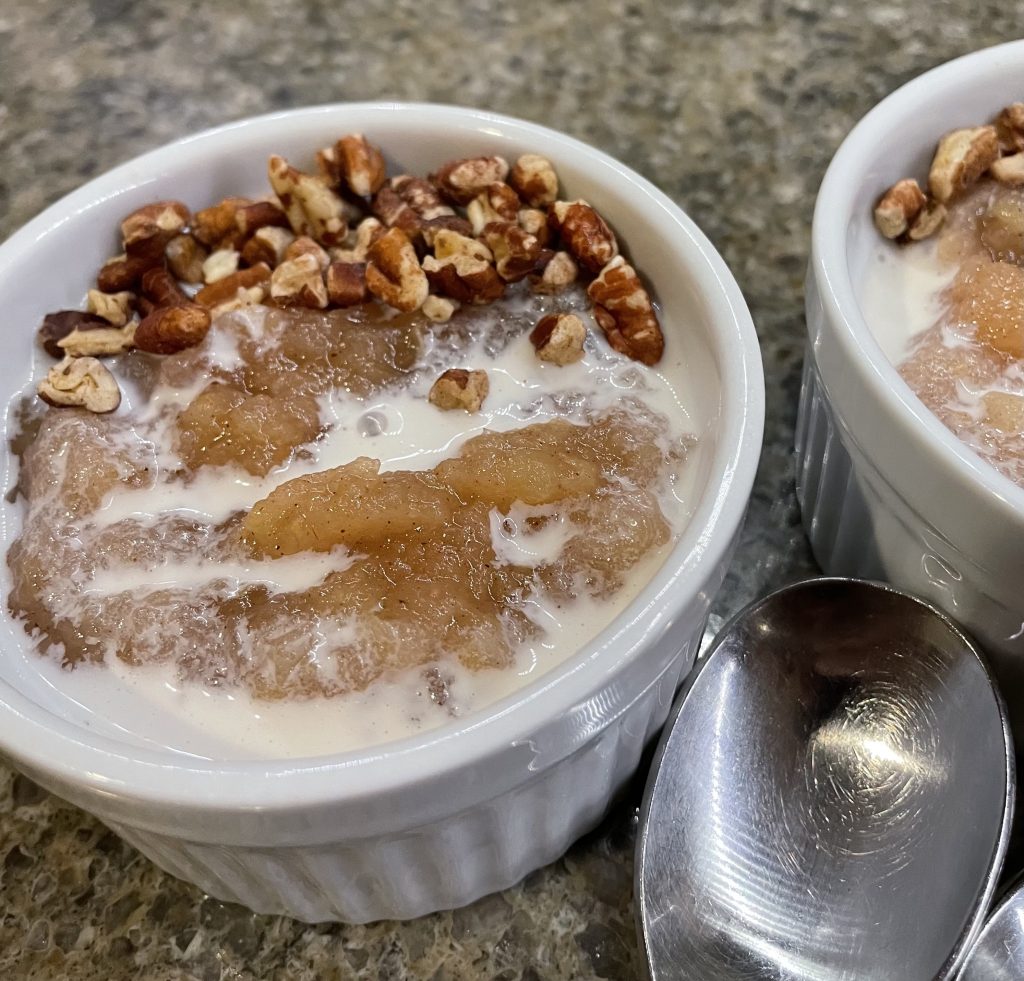
Applesauce with cream and chopped nuts

Early fall meant applesauce, an all-day epic endeavor.  It was the final hot, steamy preservation project of the year, thankfully. Mom was quite particular about her applesauce, made with yellow transparent apples. Don’t bother suggesting any other variety to her, it was yellow transparent or bust.  Fortunately, my Dad’s cousin Fran had a large grove of yellow transparent apple trees, or it would have been bust.  Fran was delighted to see us, for those trees produced more than they could possibly use.  

The transparent was the palest of green/yellow apple with a crisp white interior. High in acidity, these apples were decidedly not for eating raw, but made incredible applesauce. Mom had a vintage applesauce strainer with a long wooden pestle. The apples were washed, cut into pieces and cooked down to a creamy consistency in a bit of water. Once soft, they were reamed through the strainer, pressing all the pulp through, the peels and seeds left behind. The hot applesauce had to be sweetened just so, after which it was cooled. Packed into plastic bags and cardboard cartons, we filled the freezer, for it was one of our main sources of fruit in the winter. Mom’s favorite way of serving her applesauce was partially thawed, leaving it icy cold with frozen bits of sweetness. It was delicious.

Once off the farm, serving applesauce left me to the mercy of the grocery store…   

It obviously was someone’s job to search for the worst possible apple varieties, because while the label said “applesauce,” that stuff was decidedly mediocre. That’s actually giving it more credit that it was due… Its consumption was resigned to the years in which we were starting solid foods to our babies. Poor kids!

One of our babies grew enough to attend kindergarten at the local public school. Where his inspired teacher made applesauce with the kids, after which they wrote about the experience. By popular demand she sent the recipe with the students to make at home. Her name is withheld to protect the innocent, but the recipe was titled Mrs. _______’s Lumpy-Bumpy Applesauce. This sauce was absolutely nothing like Mom’s, yet it was absolutely yummy. Chunky rather than smooth, but well balanced and full of flavor, with no transparent apples in sight. 

Turns out the key is using a mix of several different varieties of apple. Since each combination is unique, it’s important to adjust the amount of sweetening to taste. I like to cook the apples with the peel, then strain it in my food mill, which keeps the lumpy bumpy consistency and provides a beautiful pink color, though if peeled the whole straining process can be skipped. Depth of flavor develops with the addition of cinnamon, citrus and a dollop of yes, brandy. Which I suppose you could omit, if you really need to. But I wouldn’t… While this applesauce is delicious on its own, drizzling with a spoonful of cream and a sprinkle of toasted nuts puts it in dessert territory.  Mom wouldn’t recognize it, I suppose, but she might still like it…

Sometimes I need to remind myself. Homemade is best. 

recipe image
Print Recipe
5 from 1 vote

Homemade Applesauce

Sweet-tart applesauce with notes of cinnamon and brandy.
Prep Time1 hour
Total Time1 hour
Course: Breakfast, Dessert, Side Dish, Snack
Cuisine: American
Keyword: apples
Servings: 6

Ingredients

  • 4 large apples  I like a mix of Gala, Fuji and Pink Lady
  • 3/4 tsp cinnamon
  • 1 tbsp brandy
  • 1 medium lemon, juice and zest
  • 1/2 tsp vanilla
  • 2-4 tbsp honey
  • 1/4 cup cream optional
  • 1/4 cup nuts, toasted and chopped optional

Instructions

  • Wash, quarter and core the apples. Cut the quarters into several pieces and place into a large saucepan with ½ cup water. Bring to a boil, cover and reduce heat to simmer. Cook the apples for 15-20 minutes, until soft. Allow to cool slightly.
     
  • Turn the apples and liquid into a reamer or food mill, turning until the pulp is strained through and peel is left behind. Return the apple puree to the saucepan and add the cinnamon, brandy, lemon juice and zest, and vanilla. Begin with 2 tablespoons of honey, stir and taste. If the sauce is too tart, continue to add honey and taste until desired level of sweetness is reached
  • To serve as dessert, drizzle each serving with the optional cream. Sprinkle with chopped nuts.

Notes

To skip the straining step, simply peel and core the apples prior to cooking.

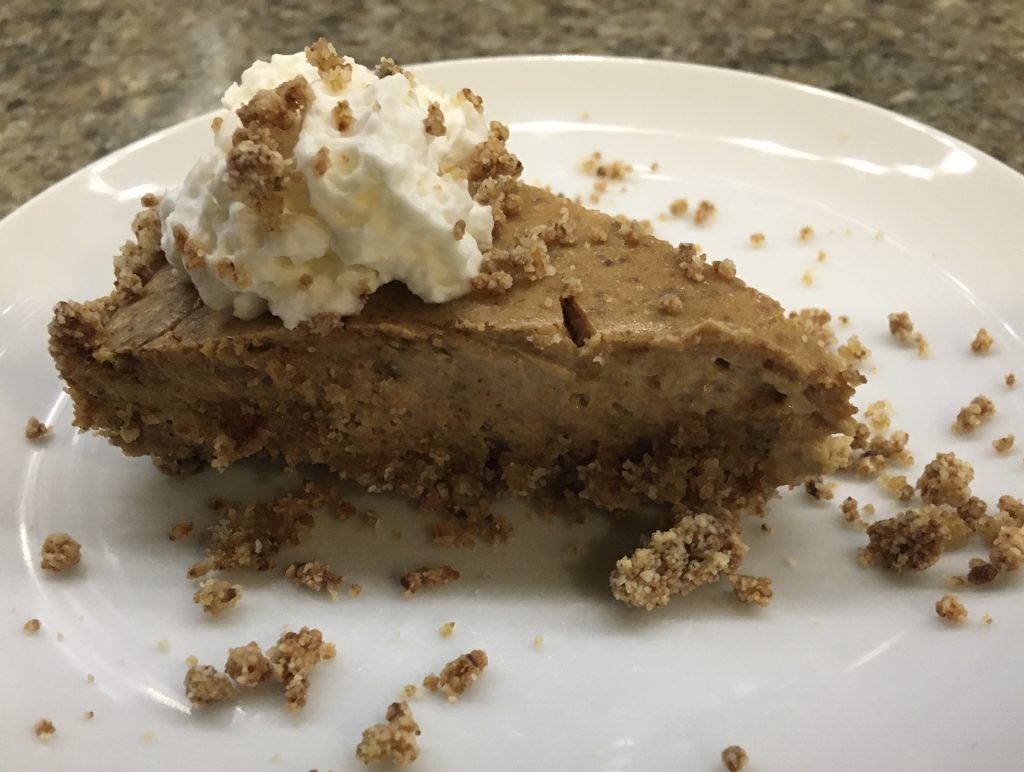
Shoofly Cheesecake

Shoofly Cheesecake

Sooo… I was asked to develop a recipe for Shoofly Cheesecake quite some time ago, for a birthday celebration. The cheesecake also had to be relatively diabetic friendly. Good thing birthdays are annual events, so the cheesecake might get a second shot at being the birthday dessert. I actually got right on it, and only needed several kitchen test sessions to produce a delicious cheesecake. So why the delay? I’d love to give you a fabulous excuse… you know, I got a great job, had a unique travel opportunity, or Covid!!! Because Covid can excuse just about anything these days, right? But the truth is I lost the recipe notes. What, you didn’t quite catch that? I’ll repeat it. I lost the recipe notes. Ok, I LOST THE RECIPE NOTES. But miraculously they presented themselves several weeks ago, hiding under a pile of papers on the bookshelf… 

Shoofly pie, for the uninitiated, is a layered pie with molasses on the bottom and brown sugar streusel on the top. It’s a Pennsylvania Dutch specialty, apparently a takeoff of the British treacle tart, made with the staple ingredients available to the American settlers at the time. This pie was another example of our having a “family recipe” with its origins in the Amish community. My maternal grandmother was of German ancestry, so who knows? She might have had a few secrets… Mom made shoofly pie often, and we all enjoyed its sweet molasses goodness.  But to be honest, shoofly cheesecake was not a mash up I would have dreamed up on my own. Which just goes to show that I should think outside the box more often, for this dessert is delicious.

It starts with baking a tin of “shoofly cake.” It’s important to use the type of pan specified in the recipe, else one might make “shoofly goo.” Don’t ask me how I know this.  A portion of the shoofly cake is added to almond meal to create a crumb crust, which is quite delicious all on its own. However, I don’t recommend too much tasting if you actually wish to end up with a cheesecake. Don’t ask me how I know this, either. From there, a basic lightened up cheesecake mixture is made in the food processor, with the remaining shoofly mixture folded in. Bake! And the reward is a delicious rich tasting cheesecake marbled with the sweet, golden flavor of molasses. 

With the recipe neatly transcribed in my folder of blog recipes, I know it won’t get lost again. And I do hope that the birthday girl actually gets to try it on her next birthday. I’ll be making it for just about any occasion, and hope that you’ll try it, too!

Shoofly Cheesecake

Rich, creamy cheesecake with the golden flavor of molasses.
Prep Time30 minutes
Cook Time40 minutes
Total Time1 hour 10 minutes
Course: Dessert
Cuisine: American, Amish
Keyword: Molasses, Shoofly
Servings: 8

Ingredients

Shoofly Cake

  • 1/3 c white whole wheat flour
  • 1/4 c brown sugar, packed
  • 1/2 tsp cinnamon
  • 2 1/2 Tbsp butter
  • 2 Tbsp dark molasses
  • 1/4 c boiling water
  • 1/2 tsp vanilla extract
  • scant 1/4 tsp baking soda
  • 1/2 tsp vinegar

Crust

  • 1 1/4 c almond meal/flour
  • 1 Tbsp butter
  • Pinch salt

Filling

  • 8 oz Neufchatel cheese
  • 2 Tbsp brown sugar
  • 2 Tbsp white whole wheat flour
  • 1 1/2 tsp cornstarch
  • 1/2 tsp vanilla extract
  • Pinch salt
  • 3 Tbsp Greek yogurt
  • 1 large egg
  • 1/4 c milk

Instructions

  • Preheat the oven to 400 degrees F.

Shoofly Cake

  • Combine the 1/3 cup flour, 1/4 cup brown sugar, and cinnamon in the work bowl of food processor. Add the butter and pulse to fine crumbs. Alternately, cut in using a pastry blender. Spread this mix in an 8-inch pie pan or other shallow baking pan. Mix the molasses, boiling water, vanilla and baking soda. Add the vinegar, which will cause the mixture to foam. Quickly pour over the crumb mixture in the pie pan and dsitribute evenly. Bake for 5-7 minutes, or until the cake on top is set. Watch carefully, as it will burn easily. Remove and cool slightly. Reduce the oven temperature to 325 degrees F.

Crust

  • Pour the almond meal and salt into the work bowl of food processor, pulse to combine, then pulse the 1 tablespoon of butter to very fine crumbs. Scoop one quarter of the baked shoofly cake into the food processor and process to crumbs. Butter a 9-inch pie pan, then press the crumb mixture in firmly. Bake at 325 degrees F. for 15 minutes. Remove and cool slightly. Reduce the oven temperature to 300 degrees F.

Filling

  • Combine all ingredients in workbowl of food processor and process to combine. Alternately, mix well in a large mixing bowl. Scoop the remainder of the shoofly cake into the work bowl and pulse to distribute throughout the filling mixture. If mixing by hand, fold the shoofly cake into the filling until it is distributed well. Pour the filling into the crust and bake at 300 degrees for 35-40 minutes, till set in the center. Remove to cooling rack. Cool, then chill for several hours before slicing.

Notes

Prepared as written, one 1/8 slice of cheesecake is approximately 24 grams of carbohydrate.

Citrus Almond Cookies

Citrus Almond Cookies

Back in the day, when we could eat in restaurants, we often wished for just a small sweet after the meal. Not a huge piece of cake, not a wedge of pie, just a single chocolate or a small cookie to go with our coffee. Of course, we don’t drink coffee after dinner any more either… But that little bit of sweetness, without breaking the calorie bank, is still what I’m after. That’s what Italian cookies were made for.

I baked many a cookie in my time on the farm, and since, as well. American cookies tend to be big, buttery, chocolaty and very sweet. Which was precisely what I wanted as a kid. But as I got older, something else was in order. And I discovered that something in the Old North End of Boston, a community where Italian immigrants had settled in the early 20th century. I was amazed at the lines of colorful laundry strung across the street from second story apartments, with women hanging out the windows to chat with neighbors.  The shops, cafes and bakeries, many operated by generations of Italian families, beckoned us to get a biscotti and cappuccino to rest our feet and spirits as we hiked around, exploring the history of the Revolutionary War. 

The bakeries were my favorite of course, with their tempting, colorful displays of cookies. Italian cookies were a new experience, from crunchy biscotti, dunked into one’s coffee to soft nut paste cookies, studded with pine nuts. Layered almond flour cookies. Meringue amoretti. Almond macaroons. These cookies were firmer, denser and chewier than my usual cookie, as well as less sweet. With less sugar, the intense flavors of citrus, almond and anise shine. To this day I never pass up a chance to duck into an Italian bakery. 

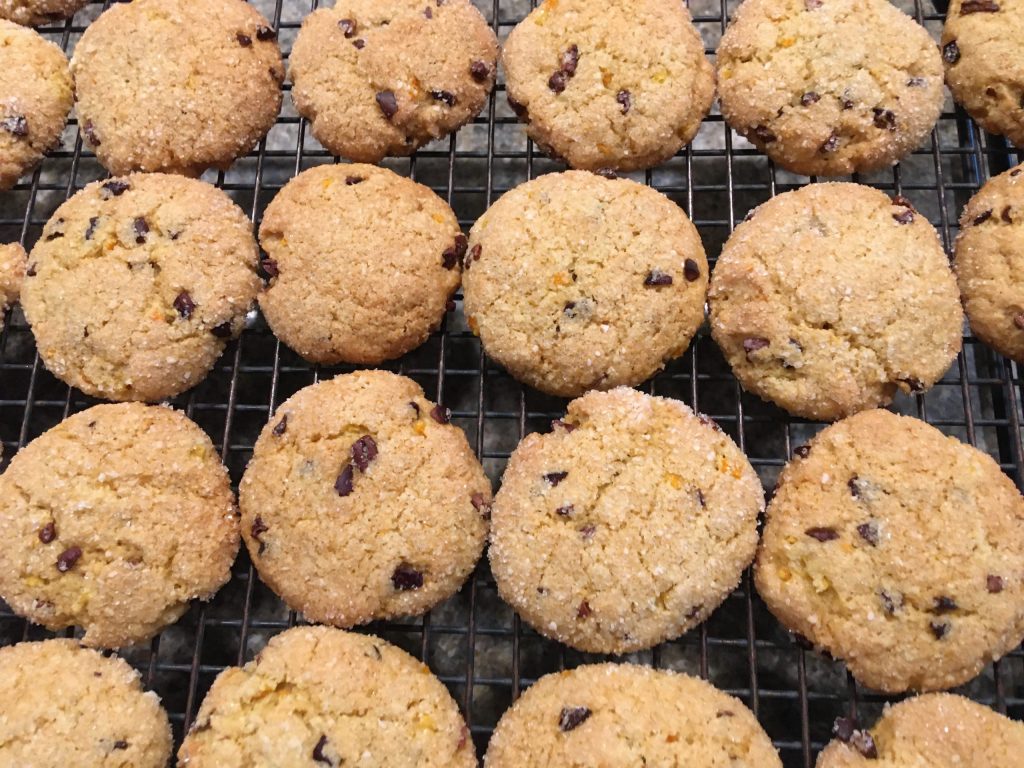
I took up baking such cookies about the same time as baking Italian style breads. I still bake cookies often to accompany our lunchtime cappuccino, and this recipe is a favorite. It’s made with oil rather than butter; substituting applesauce for part of the oil not only cuts the fat, it makes them ultra chewy. The citrus flavor sparkles, with soft notes of almond in the background. Crisp outer shell with a chewy middle. A faint whiff of chocolate from the cocoa nibs. You’ll have to excuse me, I need to make a cappuccino, grab a cookie and go relax on the patio…

Citrus Almond Cookies

Crisp, yet chewy, citrus cookie with notes of almond and cocoa.
Prep Time30 minutes
Cook Time15 minutes
Total Time45 minutes
Course: Dessert
Cuisine: Italian
Keyword: almond, citrus
Servings: 40 cookies

Ingredients

  • 2 tblsp finely diced orange and lemon peel zested in strips from the fruit, then diced
  • 1 cup sugar, divided
  • 1 3/4 cups almond flour, divided
  • 1 cup white whole wheat flour
  • 1/2 tsp salt
  • 1/2 tsp baking soda
  • 1/3 cup olive oil
  • 1/4 cup applesauce
  • 1 egg
  • 1/4 tsp vanilla Fiori de Sicilia, if available
  • 1/2 tsp almond extract
  • 1/3 cup cocoa nibs

Instructions

  • Preheat the oven to 350 degrees F. and line 2 cookie sheets with parchment paper.
    Combine the diced citrus peel with 2/3 cup of the sugar and set aside.
  • In a large bowl, mix together 1 1/2 cups of the almond flour, flour, salt, baking soda and cocoa nibs.
  • In a small bowl, whisk together the olive oil, applesauce, egg and extracts. Blend well, then mix in the reserved sugar mixture.
  • Stir the liquid ingredients into the dry ingredients in the large bowl and mix well. Combine the remaining sugar and almond flour in a small bowl. Scoop the cookies by rounded teaspoonful, and roll in the almond flour and sugar mix. Roll between your hands into balls, then place on the prepared sheet and flatten slightly with your fingers or the bottom of a glass.
  • Bake 12-15 minutes, until lightly browned and firm. Remove to a cooling rack.

Nut Butter Baked Apples

Nut Butter Baked Apples

Peanut butter was a major bone of contention in my childhood on the farm. Mom insisted on buying  “natural” peanut butter, with its runny oil sitting atop the dry mass of peanut goo.  The requisite stirring to combine the two inevitably caused oil to overflow the jar. Even worse, my peanut butter sandwiches were on dark brown whole wheat bread…sigh. Meanwhile my peers brought fluffy sweetened peanut butter sandwiched with plentiful spreads of jam on slices of pristine white bread. Did my sandwich appear to bother any of them? Well, no. They might have been a little curious about it, but leave it to me to subject my person to self-made peer pressure…

Sadly, once again Mom was right. Turns out choosy moms actually choose natural unsweetened nut butter. The fluffy nut butter miraculously occurred because the carbon molecules in the runny stuff were bombarded with hydrogen atoms, resulting in a hydrogenated product. Which, as we learned decades later, results in the killer trans fat. Not to mention the added sugar… Amazing how these discoveries occur after years of consumption have already stiffened our arteries. Except for me, of course, because I didn’t have trans fats in my peanut butter. Not to worry though, I had plenty of saturated fat from other sources on my journey to adulthood. My arteries are undoubtedly just as stiff as others of my generation, I suspect. 

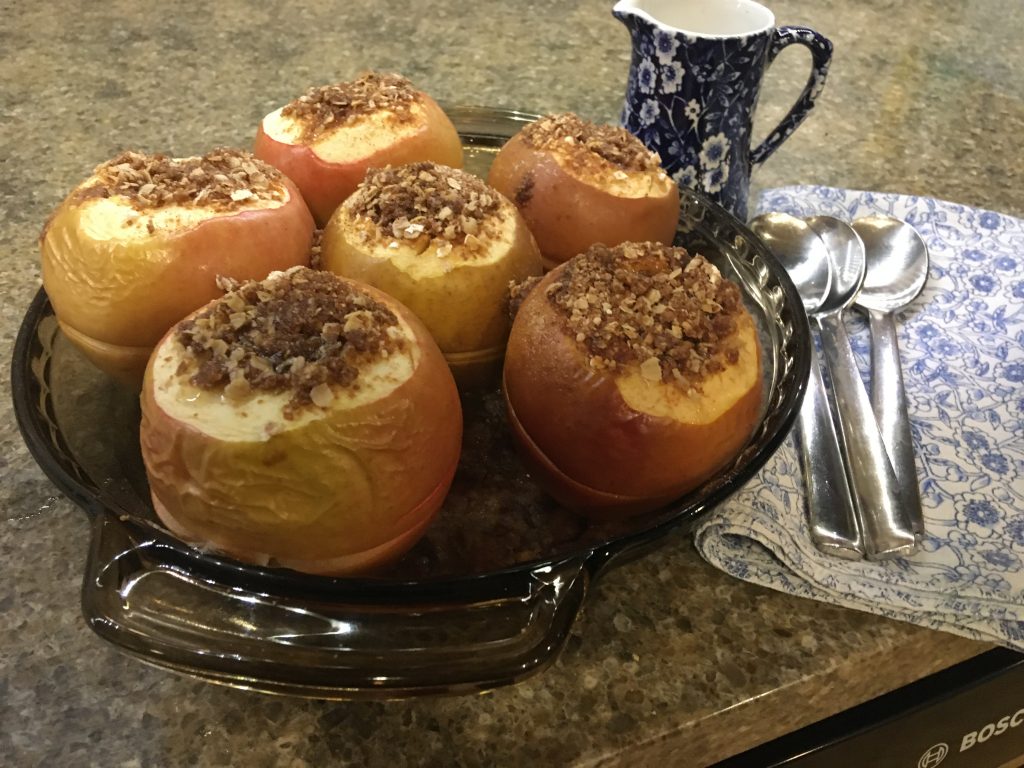
Mom did not make peanut butter sandwiches all that often. While I poke fun at her propensity for health food, I suspect deep down that she had a bit of a sweet tooth. We had “healthy” desserts pretty regularly. As such, PB was more likely to pop up in a wheat germ studded cookie or in her delicious baked apples. I like to serve desserts like this when the meal seems a little on the light side. A baked apple stuffed with nut butter is actually a pretty good mix of high fiber complex carb, protein and fat. It helps to fill you up. They are also a convenient dessert that can be baked ahead and refrigerated until reheated for serving.  Her recipe for baked apples is one that she held in her head; I have no written record of how she made them, so I’m flying a bit on the blind side in trying to recreate it. 

First, there’s the matter of the apples themselves. Google “best apples for baking” and you’ll get a laundry list of apple varieties from everyone and their brother. About the only thing these apple people seem to agree on is that Granny Smiths do not make great baked apples. Mom’s apples were soft, a cross between firm flesh and applesauce. She typically used Romes or Jonathons, neither of which is available at my local grocery. Meaning that I’ve been baking many apples of various varieties, and today I hit it with Empires. The apples were cored and the top rim peeled, then the cavity was filled with peanut butter. I’ve topped them off with a basic streusel for a touch of sweetness. She probably fit wheat germ in there somewhere. Since I don’t routinely have wheat germ on hand in my kitchen, I’ve thrown a bit of flax meal into the streusel. Must maintain the authenticity! 

Baked slowly to perfection, they are juicy and sweet with just a touch of richness. Baked apples are an old-fashioned, homey dessert perfect for late fall and winter. Bake some apples and let them warm you up.

Nut Butter Baked Apples

Sweet, juicy baked apple stuffed with nut butter and streusel.
Prep Time20 minutes
Cook Time45 minutes
Total Time1 hour 5 minutes
Course: Dessert
Cuisine: American
Servings: 4 people

Ingredients

  • 4 whole apples Empires, Jonathons, Romes preferred
  • 3 tbsp nut butter I used almond butter
  • 1 tsp cinnamon, divided
  • 1 tbsp flour
  • 1 tbsp sugar
  • 2 tsp flax meal optional
  • 2 tsp butter
  • 1 cup apple juice or water

Instructions

  • Pre-heat the oven to 350° F. Have a 9-inch pie plate or baking dish ready. 
  • Use a small paring knife or apple coring tool to remove the cores of the apples, leaving the bottoms intact. Try to remove the seeds. Peel away a strip around the top of the cavity of each apple. Sprinkle the cavities with 1/2 tsp. cinnamon. Stuff the cavities with the nut butter, splitting evenly. 
     
  • Combine the flour, sugar, flax meal, and remaining cinnamon, then rub the butter in to make streusel. Spoon the streusel over the nut butter to fill the cavities to the top. Sprinkle with cinnamon. Place the filled apples into the pie plate. Pour the apple juice or water around the base of the apples and bake for 45 minutes to 1 hour, or until a knife slides easily into the apples. Cool slightly and serve with shipped cream or ice cream.  

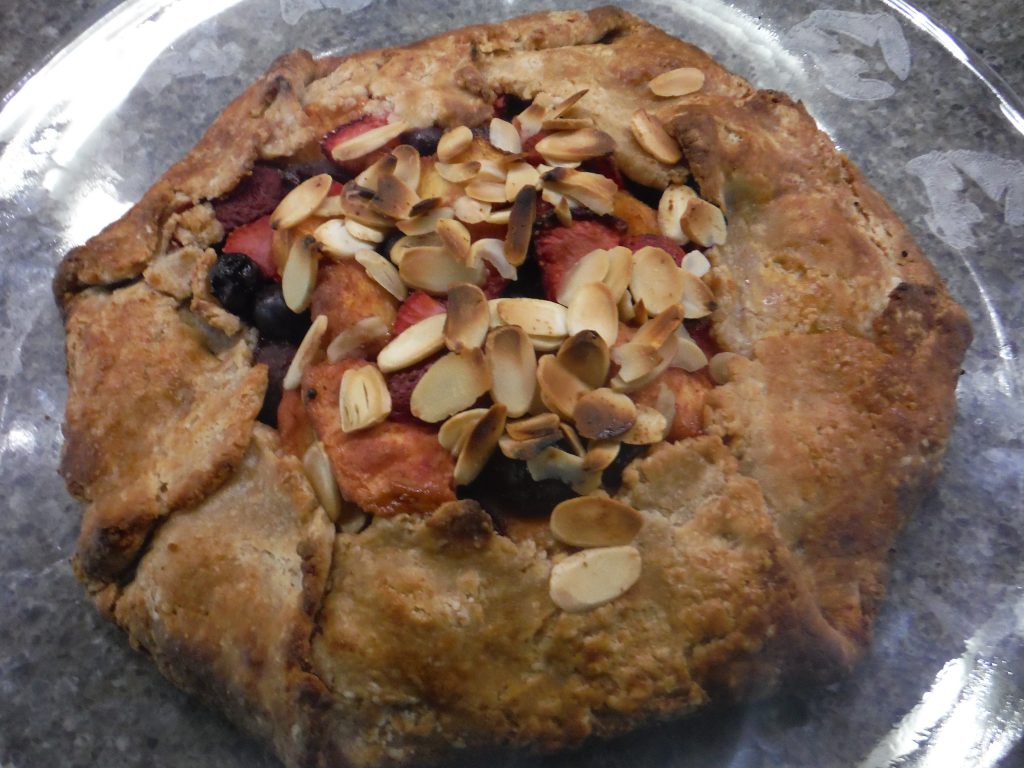
Mixed Summer Fruit Crostata

2020 continues to be challenging. While my waistline argues with my taste buds daily, I’m afraid it’s time for more comfort food. You were warned…

Mom was a pie girl. You know how some folks bake cakes, or brownies, or cobblers? Mom baked pies. Pumpkin, lemon meringue, lemon sponge, fresh glazed strawberry, shoo fly, old fashioned cream… the requisite wheat germ was added to the pie dough, but by and large, the pies from her kitchen were delicious and highly prized by a kid who loved sweets. There might have been a few surreptitious visits to the kitchen when there was leftover pie… until suddenly, there was no pie…

There was one pie, though, baked on the grayest of Ohio’s wintry overcast days that captured the essence of summer sun. This was Mom’s mixed fruit pie. She prepared and froze her chosen fruits in the summer, because that was when they were fresh, ripe and at their personal best. Her mix did not vary, consisting of pineapple, peaches, strawberries and Bing cherries. Mixed with sugar, flour and a hefty slug of Jamaican rum, then frozen in pie sized portions. I think she believed these pies to have restorative power. She would make an annual announcement, with great regret, when the last of the fruit mix was made into pie. There would be no more until the following summer.

Life in southern Arizona is all about never ending sun, so I don’t try to freeze summer in a bag. Besides which my freezer is already overflowing with citrus products from our grove of citrus trees. But I do make my version of Mom’s fruit pie right about now, when peaches and cherries are beautifully ripe and plentiful. My fruit mix emphasizes whatever summer fruits are best at the moment, but typically includes peaches, berries of various sorts, and Bing cherries. A tiny bit of sugar and spice, with a hefty slug of bourbon. It’s a mighty fine pie, if I do say so. 

And what makes it even better? Baking it into an easy to shape and bake crostata. A crostata is an Italian style free form tart, like a pie without the pie pan. Just roll out the dough into a rough circle, pile the filling in the center, and fold the dough up around the edges before baking. Simple enough for a family dessert, rustic and special enough for company as well. And, of course, you can always choose to use the pie pan if you are so inclined; just use a double crust pie dough. 

Warning: do not try to bake this pie with commercially frozen fruit. It doesn’t have the sweetness or juiciness of fresh ripe fruit. Of course, I know this because I’ve tried it… It has been a banner year for beautifully ripe fresh summer fruit, peaches in particular. In fact, given the fateful turn of events thus far this year, fresh summer fruit might be one of the very few redeeming events. Gotta find the bright spots where they exist, however small they may be. I recommend that you rush out and purchase the fruit for this pie while it is still available. It might disappear tomorrow, because that’s just how 2020 rolls, don’t you know? 

Print Recipe
5 from 1 vote

Mixed Summer Fruit Crostata

Flaky, sweet and spicy tart of classic summer fruit.
Prep Time1 hour
Cook Time30 minutes
Total Time1 hour 30 minutes
Course: Dessert
Cuisine: American
Keyword: flaky, fruit, rustic, sweet and smoky
Servings: 8

Ingredients

  • 1 recipe pie dough, for a single crust pie
  • 2 lb mixed fresh summer fruit  ex. peaches, berries, bing cherries
  • 1 tbsp bourbon
  • 1/2 tsp cinnamon
  • 1 tbsp sugar
  • 2 tbsp flour
  • 1 tbsp almond flour
  • 1/2 tsp lemon zest
  • Coarse sugar for sprinkling
  • 1/4 cup slivered almonds  optional

Instructions

  • Preheat the oven to 400° F. Line a round rimmed pizza pan with parchment paper and set aside. 
  • Pit, peel and slice peaches. Pit and halve cherries. Thickly slice strawberries and leave other types of berries whole. Combine the prepared fruit in a large bowl. Stir in the bourbon. Mix the sugar, cinnamon, flours and almond zest together, then stir through the fruit mixture. 
  • Roll the pie dough to a rough circle, approximately 14 inches in diameter. Transfer the dough to the lined pizza pan.  Mound the fruit filling into the center, leaving a 2- to 3-inch border around the edges. Sprinkle the almonds over the fruit, if using. Fold the dough up over the fruit, pleating around the edges. Brush dough with water and sprinkle with coarse sugar. Bake 25-30 minutes, till fruit is tender and bubbly, and crust is browned. 

Slow Baked Forbidden Rice Pudding

Slow Baked Forbidden Rice Pudding

Y’know, had my parents just explained that my farm childhood was excellent preparation for upcoming viral pandemics, I might have been less whiny about the whole social distancing thing. Then again, knowing myself, maybe not…

Physical distancing is by choice part and parcel of farm life.  While we had neighbors, they were a quarter to a half-mile away. One saw them quickly if help was required, such as clearing one’s drive of snow; after which they disappeared back to their own little appropriately distanced domains. Respect for physical distance was part of the farm ethos. 

While I did not appreciate the social isolation of farm living, it did offer some important lessons. For example, you come to understand that things don’t always go your way; that sometimes you conform to the rules because it’s for the well being of your compatriots.  Learning to entertain oneself with activities and hobbies is a valuable skill.  Etc. etc. All of which fit neatly into my current life as a healthy person, following social distancing directives, to try and keep us all healthy. 

What farm life did not offer was much in the way of handling the anxiety that moved in with the coronavirus. My life has simply never included disruptions like fear of exposure and product shortages. It has been chock full of the privilege of security… in fact, this experience has offered me a wider view of my parents’ reasoning in choosing farm life. Both of them survivors of World Wars and the Great Depression, farm life probably offered the security of knowing they could provide for their basic needs in emergencies. Mom, in fact, used to say that the day would come when we would need the farm.  While she did not live to see this particular need, she is probably saying, “I told you so,” from her heavenly perch.

Let’s be clear-no great personal sacrifices are occurring here. I’m simply staying at home, in the comfort of my desert abode. I leave the house to procure food supplies and once a week, to pick up and deliver the day’s excess bread from a local bakery to our church’s food pantry.  Well, and for the occasional take-out meal; have to support those local restaurants! I am indeed fortunate to have a comfortable home in which to shelter, along with adequate food. But the anxiety does creep in…

Cue the comfort food.  Turns out that I have failed to understand, much less to appreciate, the concept of comfort food. You know the culprits: the creamy, the fatty, the starchy, or most probably some miraculous combination thereof.  I associate these foods with cold weather, or with the occasional case of down-in-the-dumps. And while I enjoy them in reasonable portions, comfort food is typically not health food. But at the moment these foods are more than just indulgences; they represent security, even if for only the minutes spent on the tongue. “Minute on the lips, lifetime on the hips” might not matter so much when one is simply attempting to survive. 

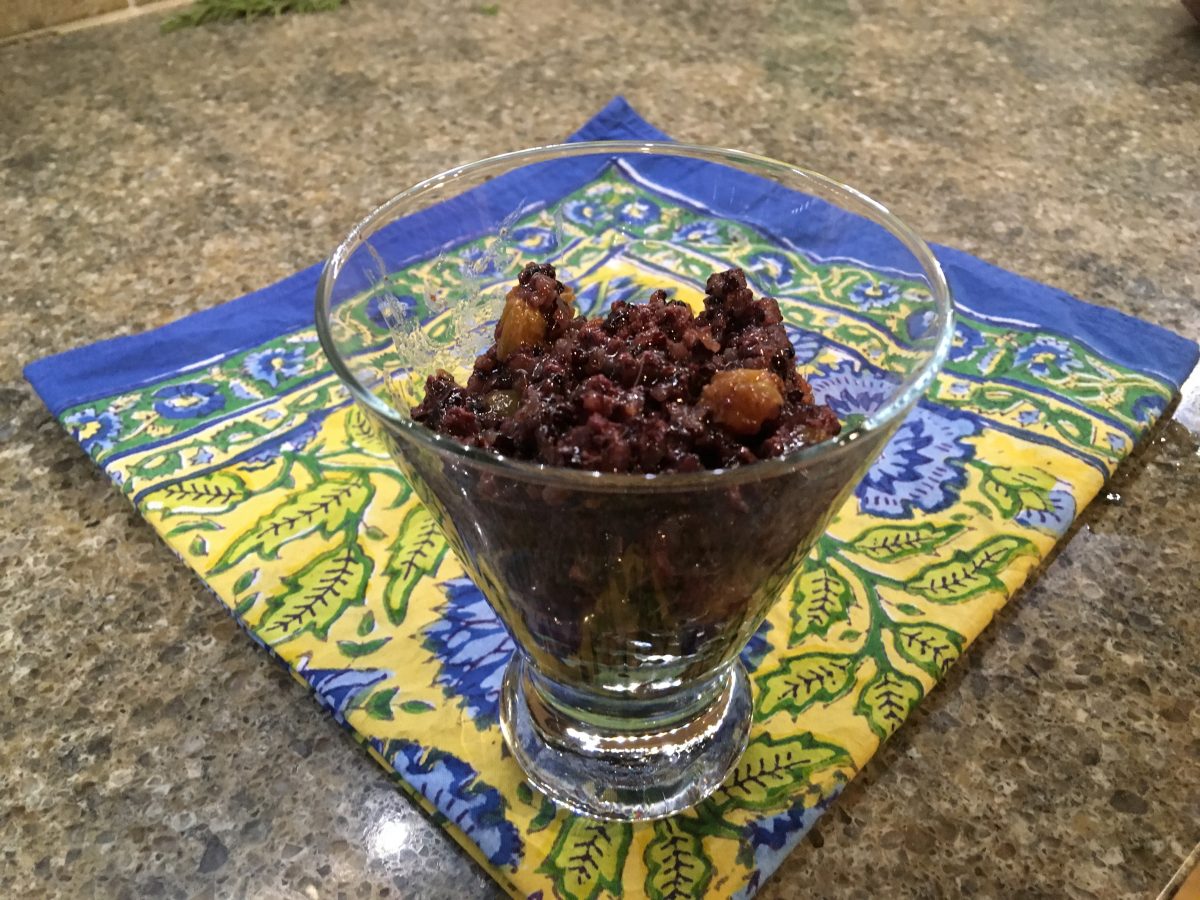
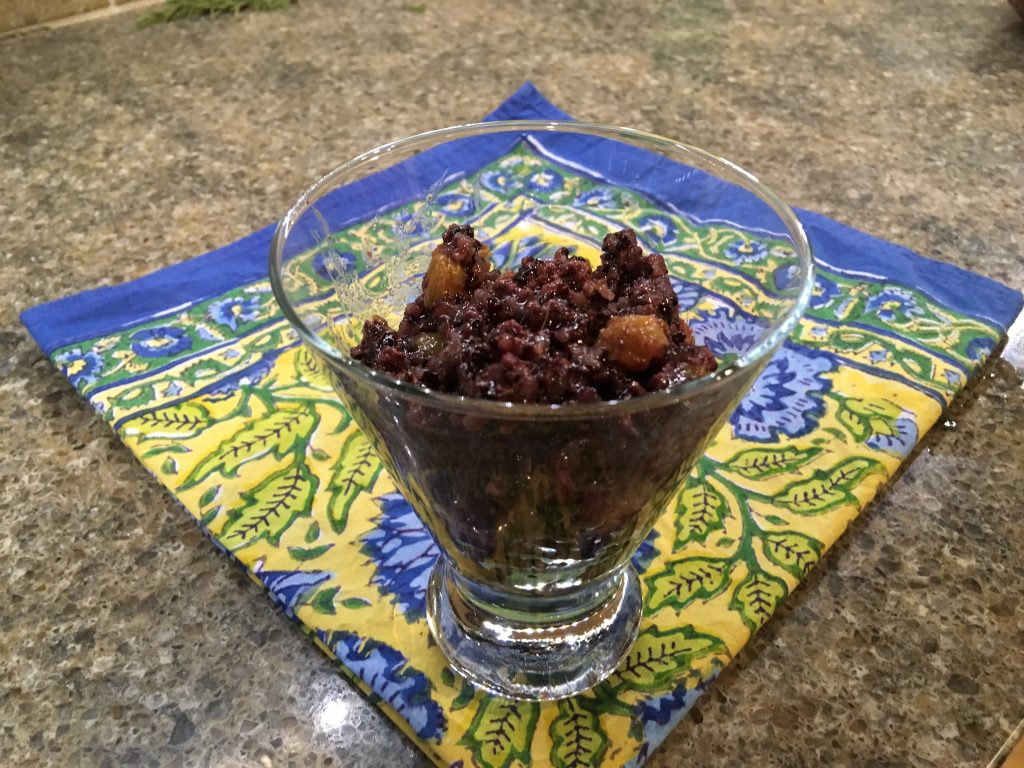
Mom’s slow baked rice pudding was just such a dish for me.  Long, slow baking at a low temperature turns a small amount of rice into delicious creamy pudding. The surface of the milk caramelizes, which gets stirred into the mixture repeatedly as it bakes. Mom used white rice, the variety available at the time. I’ve used forbidden black rice because it has a luscious earthy, yet sweet flavor with just the right amount of textural bite. It’s higher in protein and lower in both carbs and calories compared to other varieties of rice, while also being high in antioxidants. But mostly, it’s just delicious. Feel free to use whatever kind of rice you like. Mom used straight up dairy milk. I’m using part coconut milk because I like the tropical twist it provides. She usually added raisins, which I’ve done, too, but the black rice version would be great with fresh-diced mango stirred in before serving as well. 

There are those rushing to reopen the life that was, the pre-coronavirus life. They probably have some life lessons to learn, and I can imagine no sterner teacher than a highly contagious, virulent and yes, deadly disease.  Thankfully, my folks offered me knowledge that I hope will result in a slightly softer landing. I’ll just be staying home until some authority I can trust displays the data that says it’s relatively safe to go out and live it up. Of course, it will soon be 105° in the shade here in southern Arizona. I might have to search for a more refreshing comfort food…ice cream, anyone?

Slow Baked Forbidden Rice Pudding

Creamy, lightly sweet black rice pudding with a tropical twist.
Prep Time15 minutes
Cook Time2 hours 30 minutes
Total Time2 hours 45 minutes
Course: Dessert
Cuisine: American
Keyword: black rice
Servings: 9 people

Ingredients

  • 1 13.5 oz can reduced fat coconut milk
  • 2 1/2 cups additional milk or alt-milk I use lactose free milk
  • 1/4 cup sugar
  • 1/3 cup forbidden black rice
  • 1/4 tsp. salt
  • 1/4 tsp. cinnamon
  • 1/8 tsp. nutmeg
  • 2 tsp. fresh orange zest
  • 1 tsp. vanilla extract
  • 1/2 cup golden raisins optional

Instructions

  • Preheat the oven to 325° F. Butter or pan spray a 1-½ quart casserole. Combine all of the ingredients in a bowl, then pour into the prepared casserole dish. Bake, uncovered, stirring frequently, for 2 ½ hours or till rice is tender. It will thicken as it cools.

Notes

The amount of rice used determines the creaminess of the final pudding. As little as 1/4 cup or as much as 1/2 cup can be used, depending on desired consistency.

Creme de Menthe Pistachio Cake

Creme de Menthe Pistachio Cake

In the pre-dawn darkness, I meditate on the colorful glow of this year’s Christmas tree, light and shadows highlighting treasured family ornaments. This early contemplation takes me back to the magic of Christmases on the farm, my descending the steep staircase to find the tree, dripping with old-fashioned lights, antique ornaments, and my mother’s touch, whipped Ivory soap dabbed on the branch tips to resemble snow. Both of my parents loved the Christmas holiday, and I am grateful for the grounding they provided in faith and tradition. And the foods… my mother’s boozy eggnog, almond rolls, cookies, angel cakes.  It was the one time of year when, as Mom echoed a commercial of the moment, “Mr. Cholesterol lives here.”

Christmas season, for all its glories, tends to be the health downfall for just about everyone who exists, but especially for those who must eat restricted diets.

“So, there’s a cake that I really like, but it may be hard to modify. It starts with a cake mix; instant pistachio pudding is mixed in, some chocolate, and Oh! I almost forgot the crème de menthe… and of course, the whipped frosting.”

So goes my now grown daughter’s wish list for a cake that was to be made both gluten-free and diabetic friendly. 

One does not recover from being the mother of a child with Type 1 diabetes….

My mouth calmly talks about how I am certain that this cake can be made, while my thought bubble screams, “OMG! She has eaten this cake??! Sugar on sugar on sugar on fat! Can’t be done, can’t be done, can’t be done…”

All sorts of conditions require special diets. The medical staff talks quietly about “patient compliance,” referencing dietary adherence, to which the individual has almost certainly not been nearly as compliant as they might wish. Who wants his or her endocrinology check up in January? Uh, precisely no one, for those Christmas blood sugar readings are murder! But here’s the deal. People love to eat what they love to eat. And while one might be compliant much of the time, occasions will arise when this is simply down the drain. The holidays tend to be one of those times of year in which adherence to the diet is vastly difficult. So heck with my thought bubble…this cake recipe will be modified and it will be something delicious enough for me to want to eat it as well. 

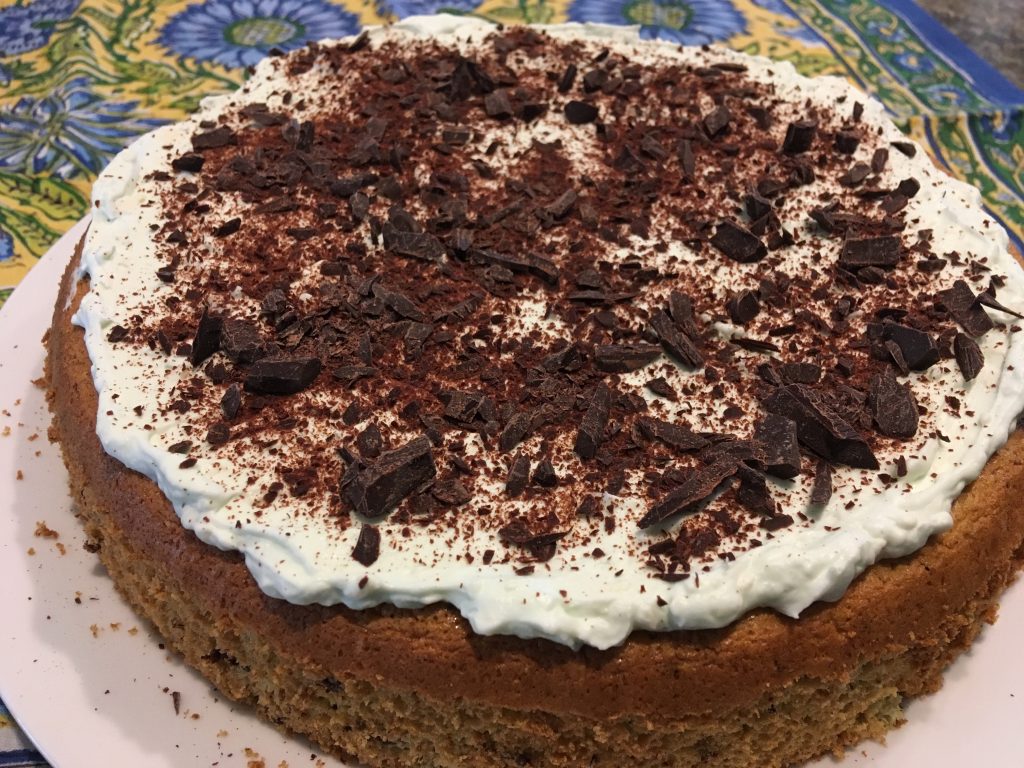
Modifying recipes for particular diets requires compromise… I started with a classic vanilla chiffon cake recipe. Chiffon cake is kissin’cousins with angel food cake, using whipped egg whites for much of its rise and volume. It is less sweet with more tenderness, thanks to the vegetable oil that enriches it; it is inherently a better option for health than a butter cake. Given that this is to be gluten-free, the foundation recipe comes from Alanna Taylor Tobin’s wonderful gluten-free recipe book, The Alternative Baker. (https://bojongourmet.com/cookbook/) Her use of homemade gluten-free flour mixes using whole grains/seeds was the game changer for me when trying to bake gluten-free. Having tried a few tasteless commercially made gluten-free cupcakes using high starch one-to-one flour blends, stocking the flours for her recipes is a no-brainer in my kitchen. There’s no comparison as to taste and texture, and the use of the sticky rice flour means there’s no need for xanthan gum-which is a strong gut irritant for me.  The sugar in the recipe is reduced, along with the amount of liqueur. Pistachio flavor is provided by –Surprise! – real pistachios, and slivered dark chocolate marbled throughout the cake provides great chocolate flavor with less sugar. The frosting? Light cream cheese, whipped cream, and a tiny bit of confectioners’ sugar and flavoring.  

Crème de Menthe Pistachio Cake is a delicious dessert – for anyone; less sugar and all natural ingredients. While you might want to cue those with dietary restrictions, this is not one of those desserts. You know, the ones that everyone else avoids because they are not as tasty or contain artificial sweeteners or gums…. This cake has earned a spot on my holiday dessert table, and I’ve served it to all on many an occasion.  I might add that if you prefer a gluten-full cake, using wheat flour, these bake up beautifully as well; see the notes at the bottom of the recipe for the flour substitution. So to those with diabetes, Celiac’s and/or gluten sensitivity, to their mothers, and to everyone else: enjoy the holidays and have a piece of cake. 

Crème de Menthe Pistachio Cake

Chiffon cake flavored with creme de menthe, pistachios and chocolate with whipped frosting.
Prep Time1 hour
Cook Time30 minutes
Total Time1 hour 30 minutes
Course: Dessert
Cuisine: American
Keyword: Gluten Free
Servings: 8

Ingredients

  • 5 Egg Whites
  • 2 tbsp sugar
  • 1/4 tsp cream of tartar
  • 1/3 cup pistachio nuts toasted
  • 1/3 cup sugar divided
  • 6 tbsp sweet white rice flour
  • 6 tbsp millet flour
  • 6 tbsp gluten-free oat flour
  • 1 1/4 tsp baking powder
  • 1/2 tsp fine sea salt
  • 1/4 cup neutral vegetable oil I use avacado
  • 6 tbsp water
  • 3 egg yolks
  • 2 tbsp creme de menthe
  • 1 tsp vanilla
  • 2 oz dark chocolate, shaved, divided
  • 2 tsp additional creme de menthe
  • 1/4 cup Neufchatel cheese softened
  • 1 tsp creme de menthe
  • 2 tbsp confectioner's sugar
  • 1/2 tsp vanilla
  • 1/2 cup whipping cream

Instructions

  • Preheat the oven to 325 degrees F. Line an ungreased 9-inch round cake pan on the bottom with parchment paper. Do not grease the pan. 
     
  • In the clean dry bowl of your mixer, use the whip attachment at medium-high speed to beat the egg whites and cream of tartar to soft peaks. Gradually add the 2 tbsp. sugar while continuing to whip, until the whites are glossy and just hold a firm peak, approximately 1-3 minutes. Use a spatula to scoop the meringue into another bowl and set aside. 
  • In a food processor, grind the pistachios together with 2 tablespoons of the sugar until almost a meal and set aside. In a small bowl, whisk together the flours, baking powder and salt.  
     
  • In the mixer bowl, beat the oil, water, egg yolks, crème de menthe and vanilla till well combined. Gradually add the remaining sugar and beat until mixture thickens slightly. Blend in the pistachio-sugar meal. With mixer on low speed, gradually add the dry ingredients to the wet, until very smooth. 
     
  • Use a rubber spatula to fold one-third of the meringue into the batter to lighten it, then gently fold in the remaining whites until no streaks remain. Gently fold in 1 ½ oz. of the shaved chocolate. Pour into the prepared pan and smooth the top to even the batter. Bake until golden, springs back to the touch and a toothpick comes out clean, about 30-35 minutes. Cool completely, then loosen the edges with a butter knife and turn the cake out onto the rack. Peel off the parchment paper. Brush the top of the cake with the additional 2 teaspoons crème de menthe; allow soaking into the cake.
     
  • Whip together the cream cheese, crème de menthe, confectioner’s sugar and vanilla till smooth.  Add the cream and whip at high speed until soft peaks form. 
     
  • To assemble the cake, place the cake layer on desired plate. Frost the top with the whipped topping, then sprinkle with the reserved ½ oz. of shaved chocolate. 

Notes

-Cake can be prepared with wheat flour by substituting 1 cup plus 2 tbsp whole wheat pastry or all purpose flour for the gluten free flours.
-Meringue powder can be used for 2 of the egg whites if one wants to use just 3 eggs
-1/8 of cake equal to 32 grams of carbohydrate; 1/10 of cake equal to 26 grams carbohydrate

Food Processor Carrot Cake

Food Processor Carrot Cake

It’s September. The obvious topic for the month in our family is…

Carrot Cake!

“Seriously?” you might ask. Yes, for real.

Mom did make desserts in the farm days. She was partial to pies, cream puffs and a French delicacy known as floating island-mounds of poached meringue floating in a sea of crème anglaise. The latter two sweets made great use of eggs, one might note. When she made a cake, it was usually angel food, a partnership between her and Duncan Hines.  Followed inevitably by my grandmother bemoaning the hours of her cake mixless youth, spent beating all of those egg whites by hand. And while I loved baking cakes, it was one of those situations where the process was more fun than the product…

There was, however, always a cake on the table for family birthday parties. I remember requesting marble cake as a kid; later Mom made me big luscious coconut cakes with lemon filling, fluffy frosting and toasted coconut sprinkles. You know someone loves you when she tackles a whole fresh coconut for your birthday! Other popular choices included chocolate or Boston cream pie, which is actually cake.  These were feathery, tender sponges, with butter or fluffy frosting.

When my husband joined the family, we discovered that his birthday cake of choice was…uh… carrot cake. No one in our kitchen had ever made a carrot cake-neither feathery nor fluffy! And while “carrots” had endowed it with a “health glow,” the typical carrot cake was actually fat and sugar laden as well. It fell to me to make the carrot cake each September-I was the one who married him, after all. My first try was dense and heavy, too many raisins and nuts, too much oil and sugar; a bit like fruitcake, without the saving grace of bourbon.  (Actually, in retrospect, I should have tried that.)  And the frosting? Sugar with a side of cream cheese. Need I say, it was not a popular cake with the fam, and each September I tried to fine-tune it. Using some whole grain flour; cutting the oil and sugar; fewer raisins and nuts; adding pineapple! While the family thought the pineapple was an improvement, the birthday boy nixed it. Pineapple did NOT belong in his carrot cake. In other words, there’s been a load of carrot pressed through the grater in search of a carrot cake recipe we could all happily eat.

I had settled recently on a recipe of my own devising, made with apple butter, when I opened my weekly Food 52 email missive and saw a link to “Donna Hay’s Food Processor Carrot Cake.” Now, while I had never heard of Donna Hay, I impulsively decided that if she was making carrot cake in the food processor, she could seriously become my new BFF.  No grating! No chopping!  Donna Hay, as it happens, appears to be an Australian one woman Food Network, having produced too many cookbooks, television shows and magazines to count.  And she evidently knows her way around carrot cake. If Food 52 finds her trustworthy, I figured I could, as well.

Not to say that I didn’t tweak the recipe, of course. The final cut here is a cross between Ms. Hay’s (https://www.donnahay.com.au/recipes/food-processor-carrot-cake) and my own recipe. Reduced sugar, whole sprouted and ancient grain flours, raisins (they just have to be there.) Chopped in the food processor, though, the smaller pieces distribute more evenly through the cake. I also added some almond milk, because the batter was simply too thick. Chalk it up to hard won carrot cake intuition developed from decades of struggling with this cake, I simply knew it needed more liquid.  Ms. Hay’s frosting was so lightly sweetened that it actually tasted like cream cheese rather than a bag of confectioners sugar; I added a touch of butter and citrus peel for additional flavor. The resulting cake was moist and light- did you catch that? Light! And tasted precisely like carrot cake was probably always supposed to.

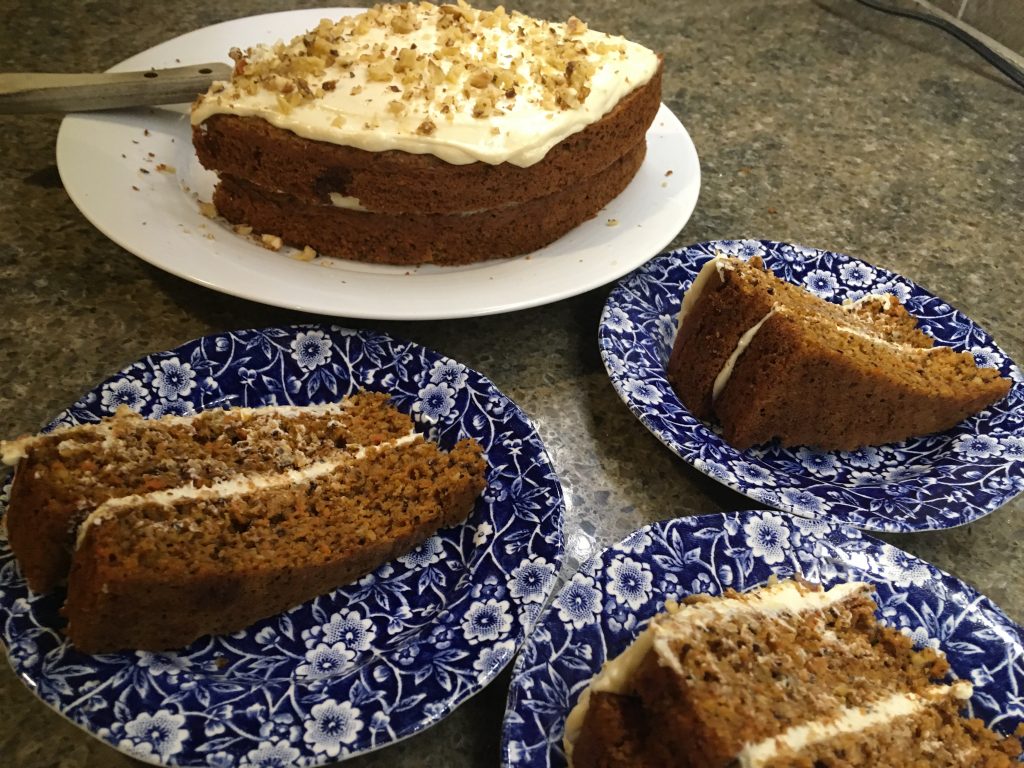
Living in Arizona, we are down to three local family members celebrating birthdays and don’t need a huge full size cake. So the recipe as written here is based on half the original. Donna (see, we’re on a first name basis now!) bakes a full size cake in a deep springform pan, while I make a single 9-inch layer. I typically cut the layer into halves and stack them with frosting between and on top, resulting in half of a typical double layer American style cake.  A full sized two-layer cake can be make by doubling the recipe.

September no longer intimidates me with thoughts of carrot cake, and it’s a real shame my mom will never get the chance to try this new and improved offering. If only it hadn’t taken me 35 years to figure the darn thing out…

Food Processor Carrot Cake

Easy to prepare moist and spicy carrot cake with low sugar cream cheese frosting.
Prep Time15 minutes
Cook Time30 minutes
Total Time45 minutes
Course: Dessert
Cuisine: American
Servings: 8 people
Author: Adapted from Donna Hay

Ingredients

  • 2 large carrots cut into 1-inch pieces
  • 1/4 cup walnut pieces
  • 1/2 cup brown sugar packed
  • 1/4 cup raisins
  • 1 1/2 cups whole wheat pastry flour can substitute half white whole wheat, half all purpose
  • 1/2 tsp baking powder
  • 1/2 tsp baking soda
  • 1 tsp cinnamon
  • 1/2 tsp salt
  • 1/4 cup vegetable oil I use avacado
  • 2 tbsp Greek yogurt
  • 1 large egg
  • 1 tsp vanilla extract
  • 1/2 cup almond milk milk of choice can be substituted

Cream Cheese Frosting

  • 4 oz cream cheese I use Neufchatel
  • 2 tbsp fresh ricotta or cottage cheese I use lactose free cottage cheese
  • 1 tbsp butter softened
  • 3 tbsp confectioner's sugar
  • 1/2 tsp vanilla extract
  • 1/2 tsp grated lemon zest

Instructions

  •    Preheat the oven to 325° F. Coat a 9-inch round cake pan with non-stick spray and line the bottom with a parchment paper round.
  •   Combine the carrots and nut pieces in the food processor and process until finely chopped. 
  •  Add the remainder of the ingredients and process, scraping the work bowl as needed, until a well combined batter forms. This should take only seconds.
  • Pour the batter into the prepared cake pan and bake for 25-30 minutes or until a toothpick inserted in the center comes out clean.  The top of the cake should spring back when pressed.
  •     Cool the cake on a rack, still in the pan. Turn out when cool and peel away the parchment paper.
  • To make the frosting, combine the cream cheese, fresh cheese, sugar, zest and vanilla in the food processor. Process until well mixed and creamy. 
  • The cake can be frosted and eaten as a single layer, or cut into two half circles and stacked with frosting to make a two-layer cake. Refrigerate leftovers.
     

Flex Flour Almond Ginger Cookies


Anyone who’s anybody these days has a wheat story…
I have always considered myself a baker. As a child I loved sweets, which were so charmingly and convincingly advertised, even then, on my favorite kids’ shows. I am certainly a testament to the effects of such ads on children, as I desperately wanted to race out and buy bread that would make me strong twelve ways along with a myriad of other food like things that promised life fulfillment. Just one box of toaster pastries! Please! Given my mother’s strong health food bent and my farm upbringing, there was little hope for any of these desires…

However, I found that one way to get the sweet stuff in my mother’s health food haven was to bake myself. Mom still kept on eye on it, and there were limits to how much I might eat at one time, but still… and of course not all baked items are sweet. But I have always found the science of scooping, pouring, mixing, and portioning ingredients relaxing, almost soothing. While we eat a variety at breakfast, there are always choices of baked goods in the freezer.

All well and good, until some point in the recent past, denial gradually crept into my postprandial thoughts. Denial of what? Of the worsening digestive symptoms I was suffering. The denial ended upon the first visit to my new gastroenterologist in Tucson. Yes, I had suffered for years with reflux. No, a number of my symptoms were not indicated by reflux. And when I told him that I had been diagnosed with IBS thirty some years ago, but hadn’t paid much attention? Because, y’know, it was one of those woo-woo diagnoses that no one understood much about? He didn’t know, and gave me one of those withering looks they must teach in medical school because, as he told me, we have a much better idea of what to do about it now…

Therein followed a celiac test, (negative) followed by eight weeks of dietary elimination trials. Please don’t let it be gluten, I prayed. I rather suspect that God has an ironic sense of humor, because it wasn’t gluten; lactose and a number of oligosaccharides were the problems, and yes, today’s wheat is an oligosaccharide. I almost thought I heard heavenly giggling when the verdict was pronounced. Sooo, I have been on a voyage of discovery for almost two years now, in terms of what I can eat and how much of it I can eat. And yes, baking has been fraught with peril.

Thankfully, a few things were clear immediately. I had no problem with wheat products that had undergone a long, slow fermentation process, like artisan sourdough bread. Why? Because the process of fermentation breaks down the oligosaccharides before they hit my gut. I’ve been a dedicated sourdough baker for years, and in fact, this might have masked the problem to some extent. But what about scones? Muffins? What about COOKIES?

Following innumerable kitchen science experiments, I discovered I could tolerate sprouted wheat along with the ancient wheats like emmer, Kamut, einkorn and spelt. Ancient wheats are inherently less genetically complex, which changes both the nature and concentration of components that are hard to digest. They are possibly better for more than just folk with digestive issues. The good news is that these flours are whole grain. The bad news is that they produce a baked product that is, well, shall we say… rustic? I also quite reluctantly began playing with (OMG) gluten free baking. Thanks to Alana Taylor Tobin’s insightful book, The Alternative Baker, I discovered that these items can actually taste good and contain more nutrition than their white flour counterparts when whole GF flours are allowed to express themselves rather than be forced to imitate wheat flour products.

Several weeks ago a light bulb went off. I could bake the best of both worlds by combining ancient wheats with gluten free flours. In essence, they might be thought of as “reduced gluten” baked goods. They offer the characteristics of baked goods made with all-purpose flour, yet are whole grain and easier to digest. Please note that they are not appropriate for those with wheat allergy or Celiac’s because they do contain gluten, but the recipes I am developing may be easier on the digestive system for some people displaying wheat sensitivity. I should probably patent this concept before the food processors get their grubby hands on it…

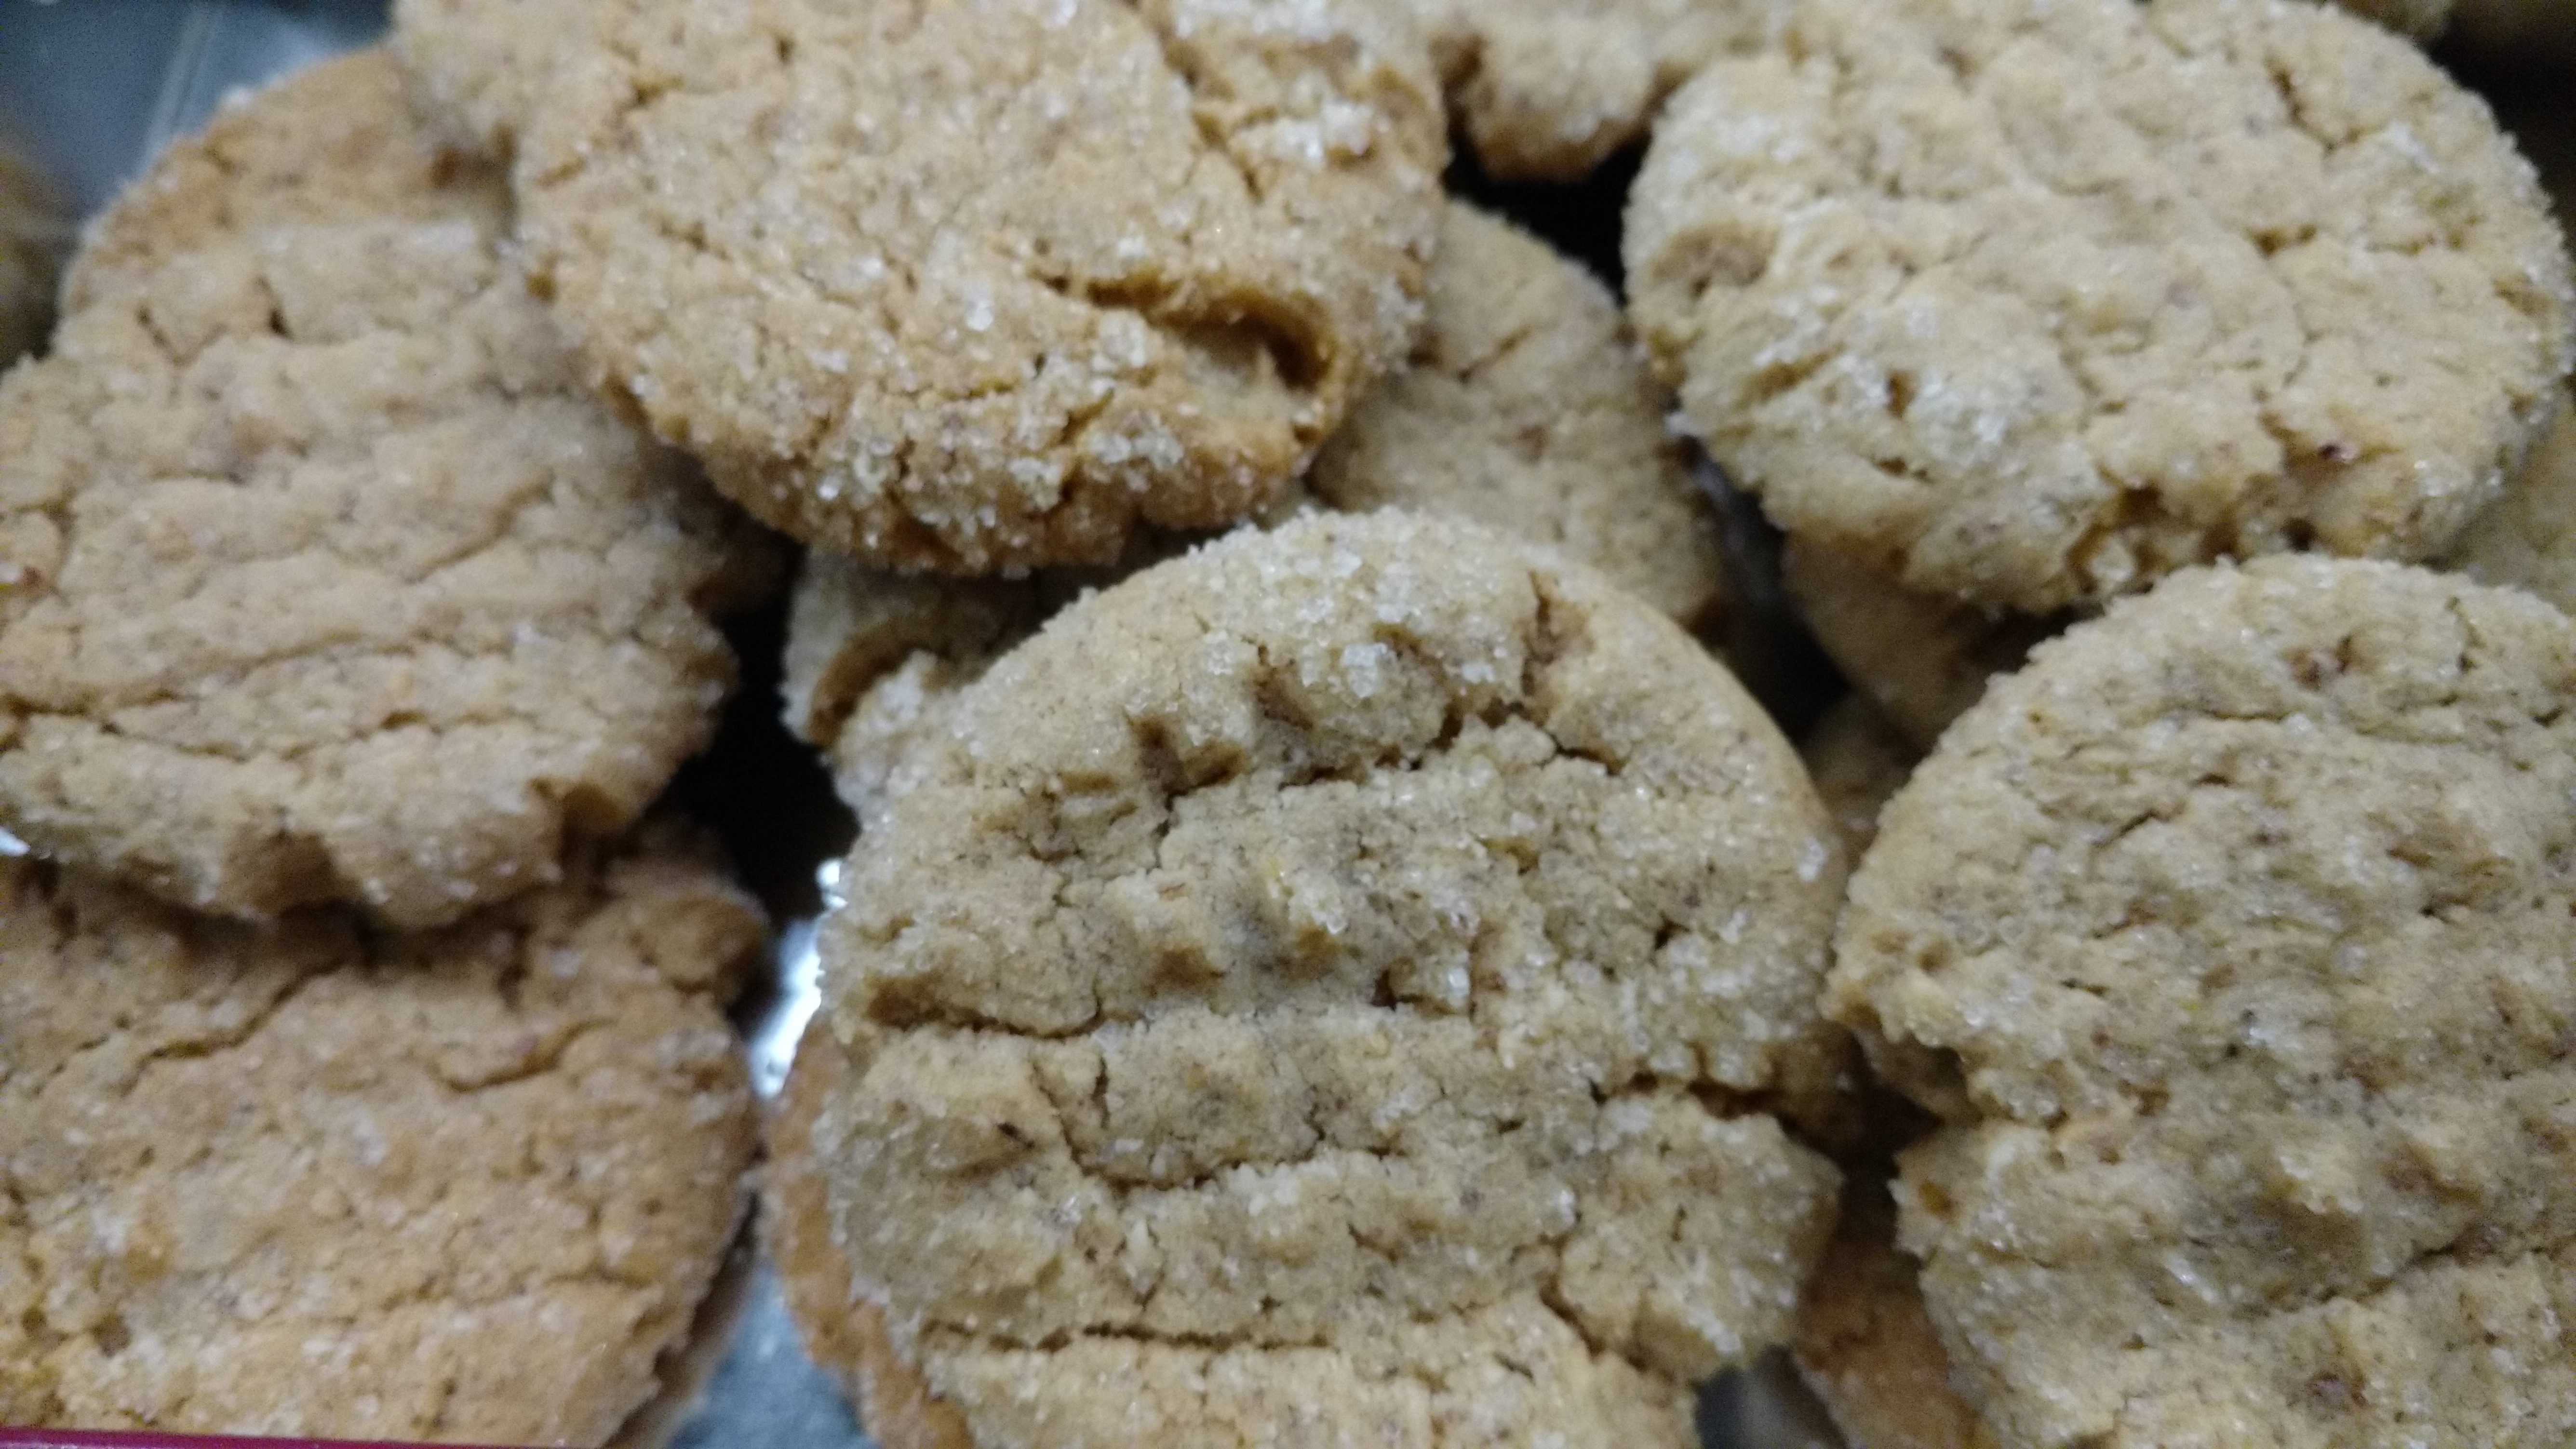
And with that, I give you my recipe for Flex Flour Almond Butter Ginger Cookies. Why flex flour? Because you can use various flours or combinations thereof to suit your particular needs. That could be plain old all-purpose, a gluten free flour blend, or some mixture of whole grain ancient and gluten free flours such as what I’ve used.

No one should have to live without a cookie every now and then.

Flex Flour Almond Ginger Cookies

Prep Time15 minutes
Cook Time12 minutes
Total Time27 minutes
Course: Dessert
Servings: 4 dozen

Ingredients

  • 6 tablespoons butter
  • 2/3- cup sugar
  • 1 egg
  • 2 tablespoons flax meal
  • 1- teaspoon vanilla
  • ½ cup almond butter
  • a total of 1 ¾-cup flour I used 1 cup einkorn/emmer, ¼ cup almond, ¼ cup millet, ¼ cup oat
  • ½ teaspoon baking soda
  • ¼ teaspoon salt
  • 1 tablespoon chopped candied ginger
  • Additional 2 tablespoons almond flour mixed with 1-tablespoon sugar

Instructions

  • Preheat the oven to 350° F. Line 2 baking sheets with parchment paper, or lightly grease and flour.
  • Cream the butter and sugar together until light. Beat in the flax meal, vanilla and almond butter. Mix the dry ingredients thoroughly, then mix lightly into the butter mixture until well blended. Fold in the chopped ginger. Scoop into 1-inch balls and roll into balls between your palms. Roll each cookie in the almond flour/sugar mixture and place on the baking sheet. Use a fork to flatten each cookie, making a crisscross design.
  • Bake each pan of cookies for 10-12 minutes, or until set and golden brown. Remove to a rack to cool.


Fig Frozen Yogurt

We interrupt the planned posting about citrus, part two, to bring you a post about a currently fresher fruit known as…

FIGS.

Seasonal foods were the rule on the farm; if you wanted to eat, they were what showed up on your plate. Out of season it had better be cellared, canned or frozen, because the selection at the grocery was slim by today’s standards. I have to admit that my mother, the adventurous cook, did go a bit hog wild when a selection of more international ingredients began showing up in the produce bin, but for the most part we happily ate what we produced or found locally.
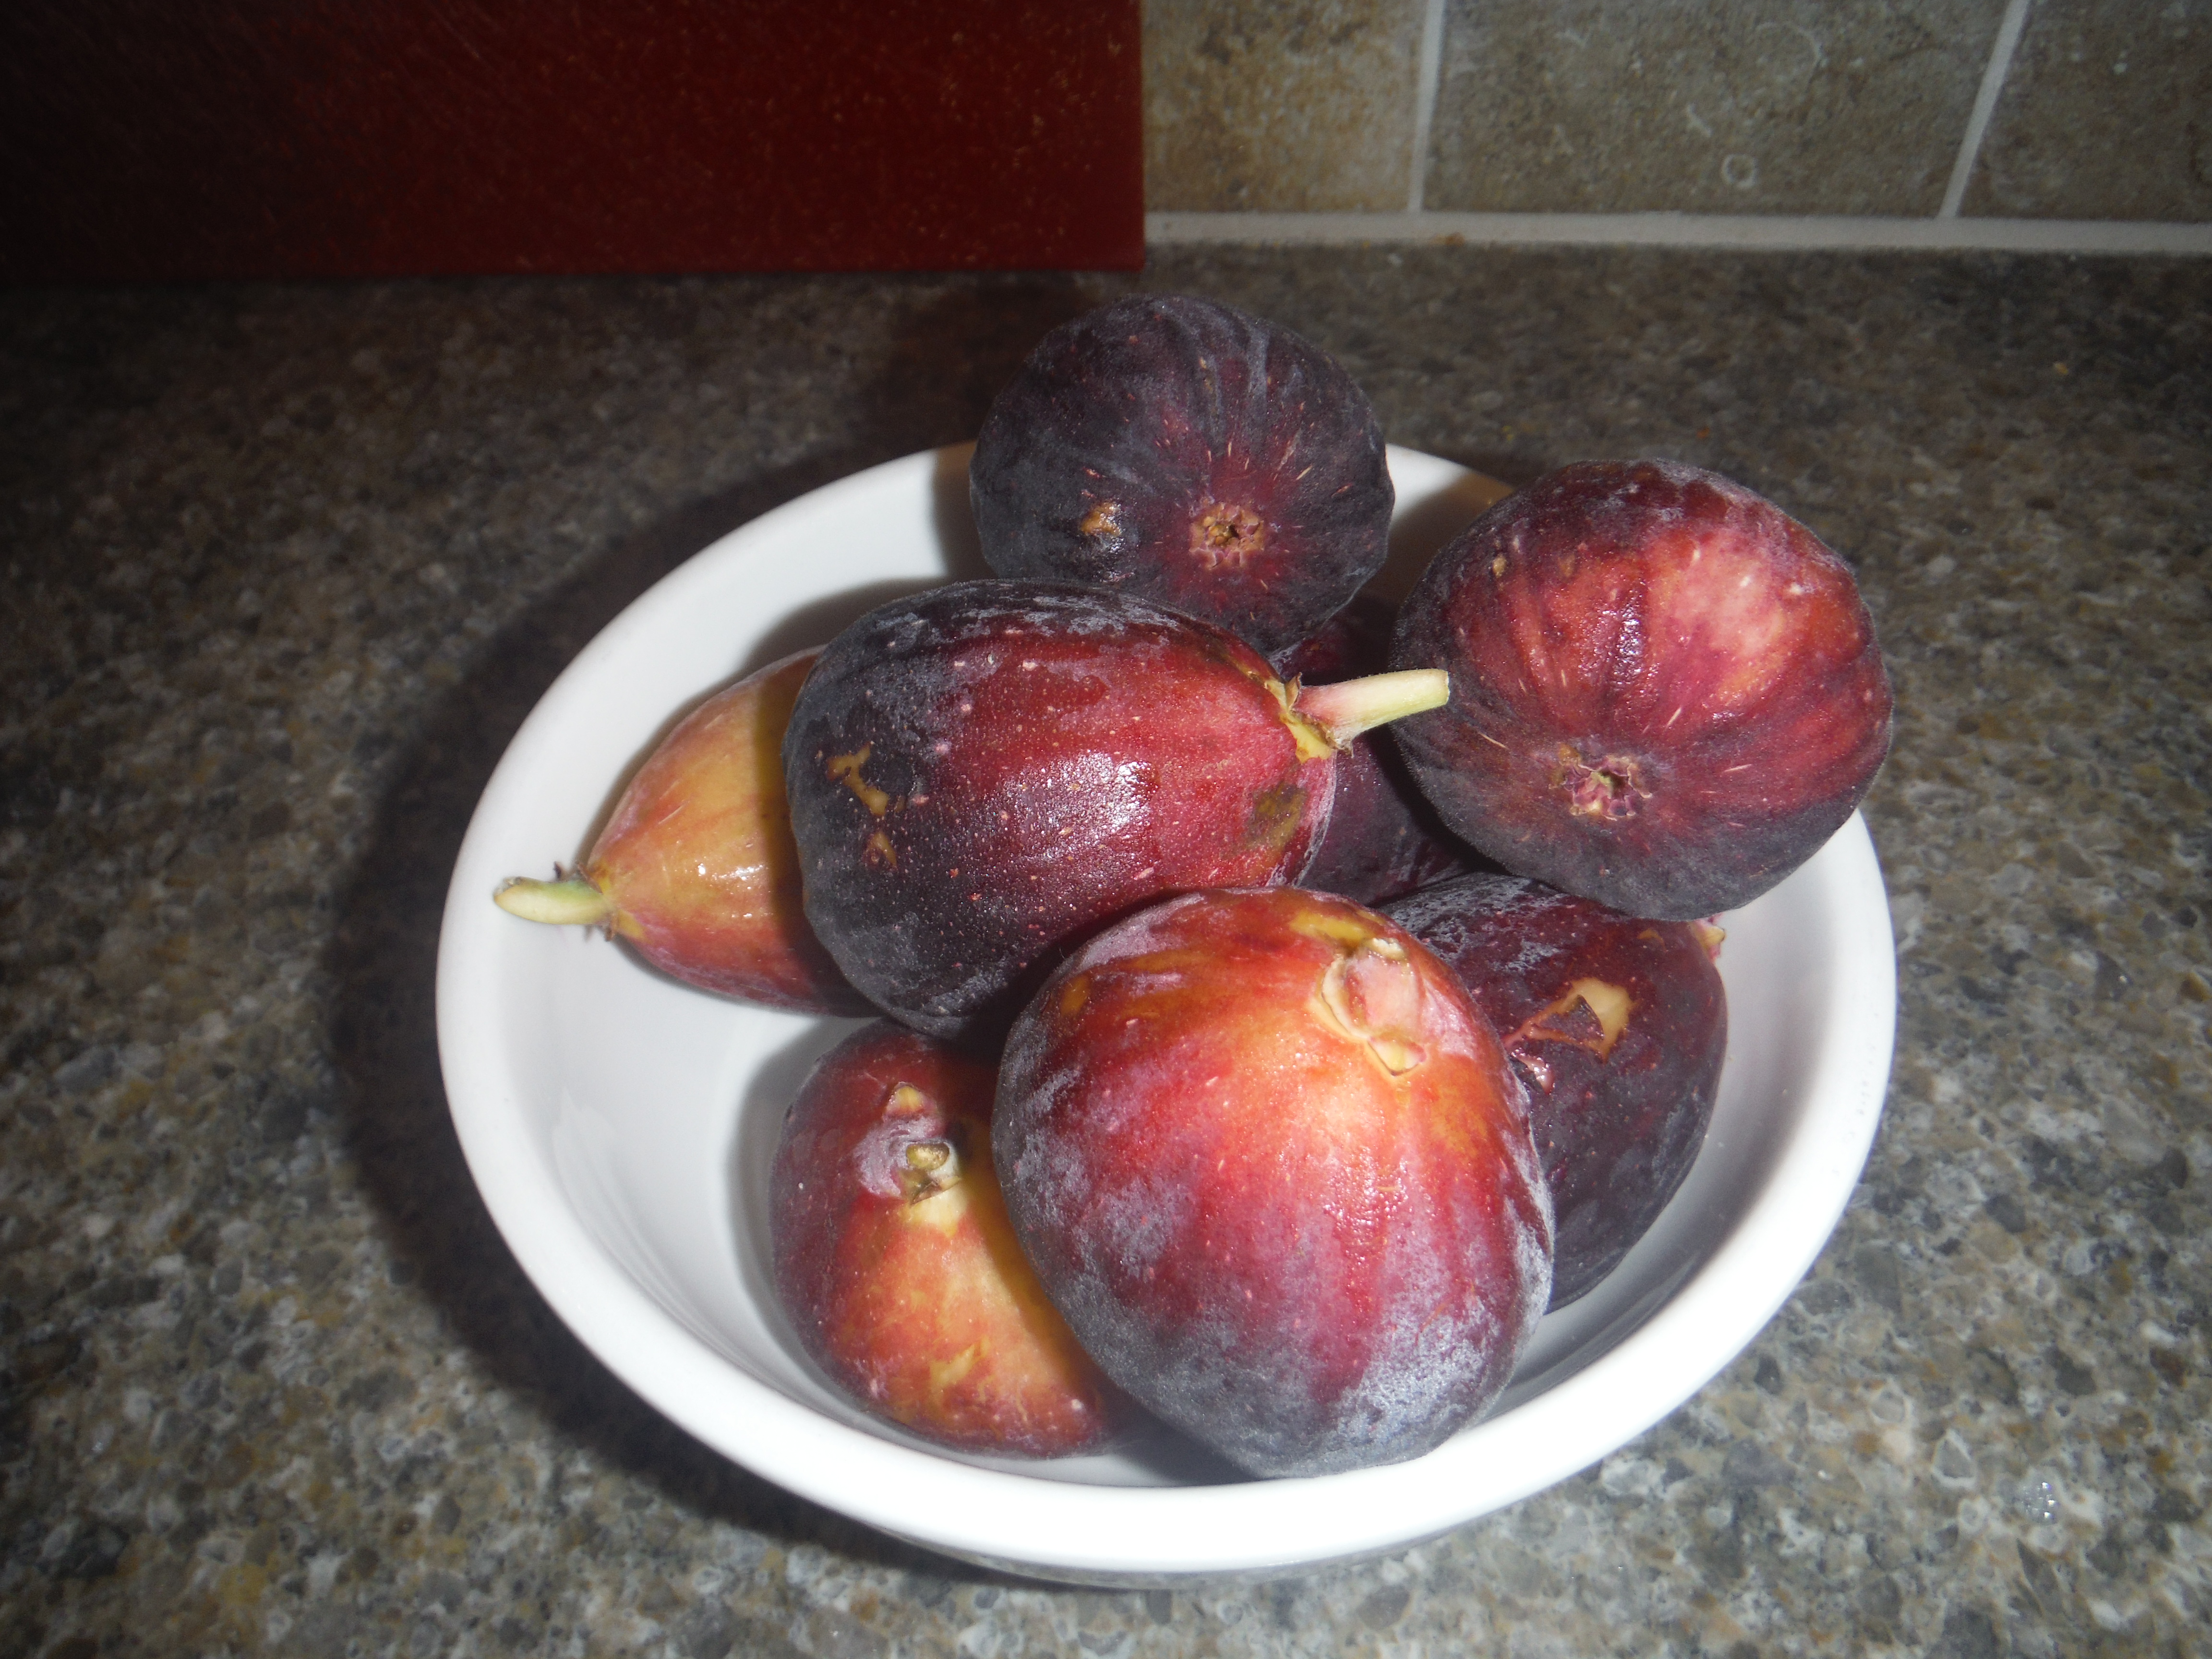
I continue to prioritize purchase of foods produced locally. However, a few years ago a small carton of tiny, pear shaped purple fruit beckoned to me at the store. “Hey, come ‘ere,” it whispered. “Remember those highly seductive recipes in which I am the star ingredient? You know you want to take me home…” Gosh darn it, that fruit was totally persuasive and ultimately won the argument. Thus was born my relationship with fresh figs.

I doubt that either of my parents ever tried a fresh fig. Given that figs grow in Mediterranean climates we certainly didn’t grow them on the farm, and they seldom made an appearance at our local grocery, if ever. In our world, figs were these dark, gooey, sticky, seedy things that somehow inexplicably lived between two layers of thin cookie pastry, found occasionally in the school lunchbox.

I simply refuse to believe that fresh figs are in any way related to those dried figs I knew from my childhood. Fresh figs are juicy and lush, with a sumptuous texture and flavor that somehow combines berries, honey and port. If you have never tried one, put that experience on your bucket list because you are missing out. Alas, once tried I wanted figs all the time, but most weeks those fickle fruits were nowhere to be found. Just like a fruit to draw me in then just… disappear from the bin.

So when contemplating a move to the desert southwest, the obvious priorities were things like climate, housing, transition to a new community, etc., etc. But if I’m honest, there was a tiny niggling thought deep in my mind that figs are local seasonal fruit in southern Arizona. Perhaps I could have a FIG TREE growing inconspicuously somewhere…Fast-forwarding to now, I am happy to report that really fresh organic figs are for sale every week in season at the farmer’s market. Even better, we met a neighbor with a fig tree that produces more than he could possibly use. Could we help him out? Yeah, we could probably do that.

We typically eat figs out of hand as fresh unprocessed fruit. I serve them for dessert with a scoop of ricotta or Greek yogurt, a drizzle of honey and a few chopped pistachios-YUM. It’s just possible that I might have wrapped them in bacon and baked ‘til  crisp one time, but that certainly sounds unhealthy doesn’t it? We won’t go any further into detail about that!

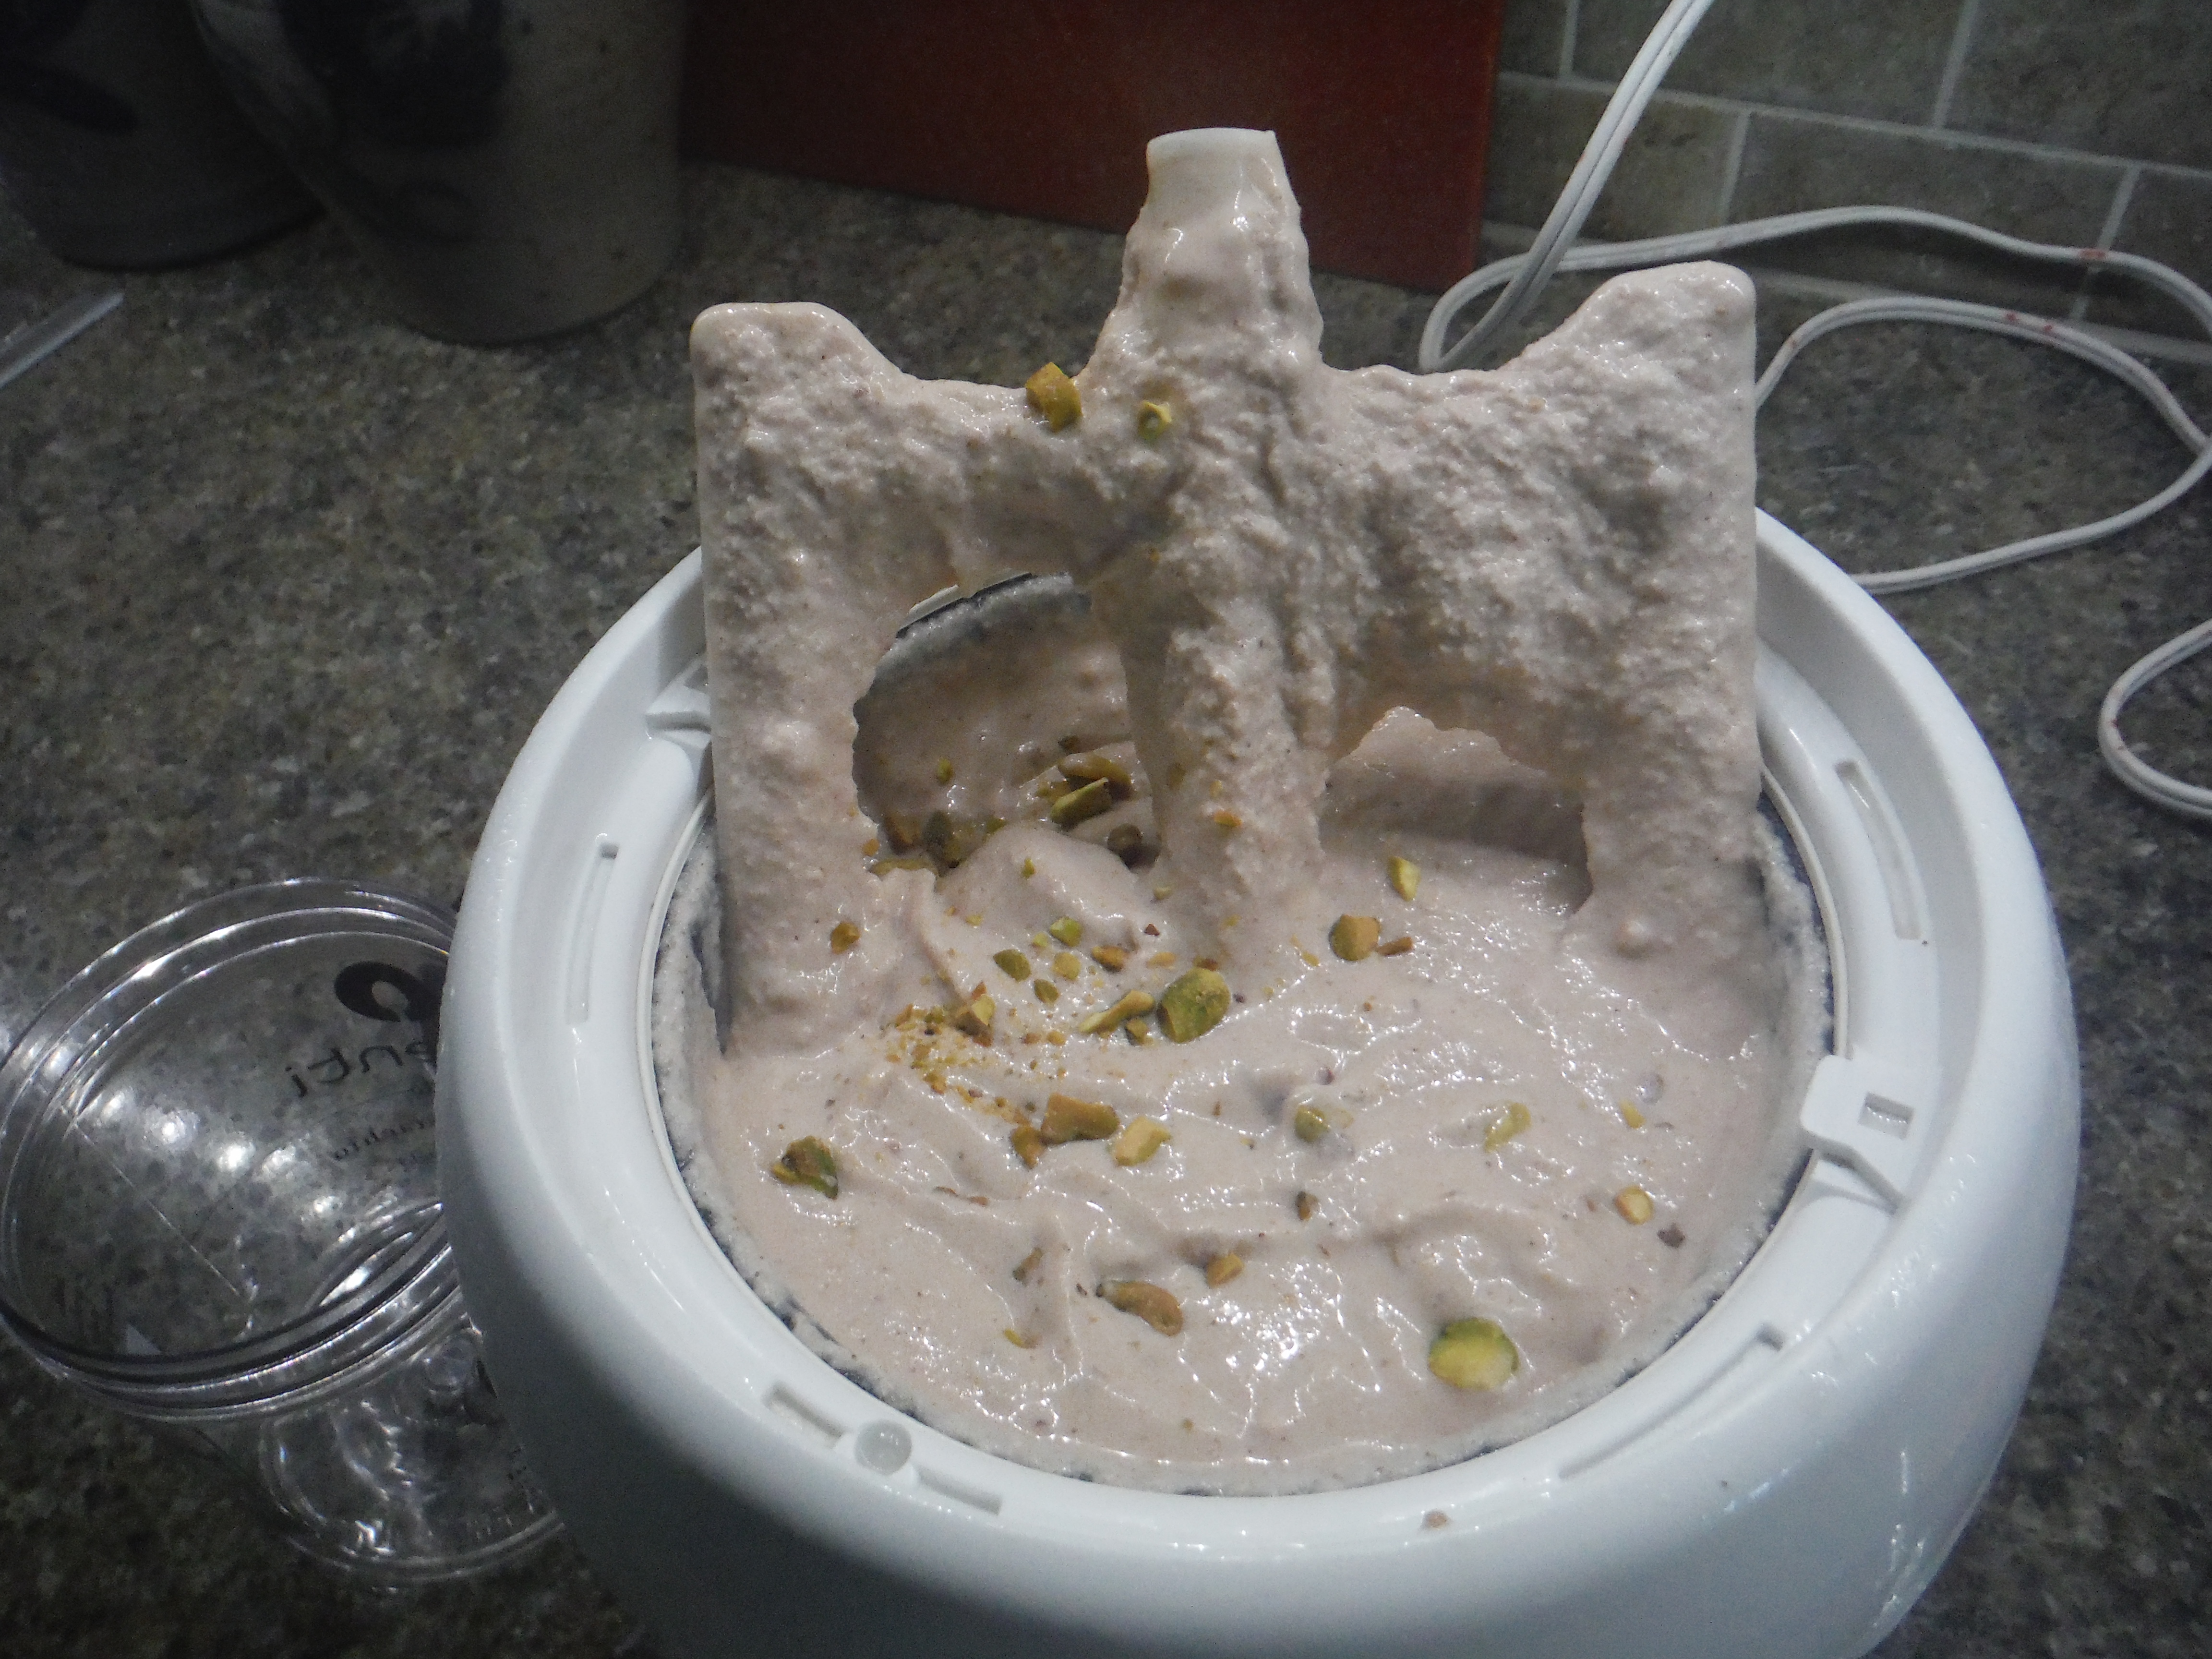
But here we are in high fig season and we have them coming out our ears. I am not going to turn these figs into their evil alias by drying them, so finally decide to turn them into creamy frozen yogurt. This fro-yo makes that elusive flavor combination available whenever I want by simply walking to the freezer. My mom would like that, along with the ease of my tabletop ice cream freezer!

Now in case the fickle fig is not to be found in your locale, other fruits make delicious frozen yogurt, too. Strawberries could easily stand in for the figs with no changes to the recipe. Peaches would be delicious as well; omit the cinnamon and balsamic vinegar, and add a few drops of almond extract. Whatever the fruit you choose, this frozen yogurt should definitely be part of your summer eating.


Big Fig Flavor

Prep Time20 minutes
Total Time20 minutes
Course: Dessert
Servings: 3 pints

Ingredients

  • 8 large figs stemmed
  • ½ cup sugar
  • 2 cups plain full-fat Greek yogurt
  • 2 cups plain full-fat yogurt
  • ¼ cup honey
  • ½ teaspoon cinnamon
  • 2 teaspoons vanilla
  • 2 teaspoons good quality balsamic vinegar
  • 1 teaspoon lemon juice
  • ½ cup chopped toasted pistachio nuts

Instructions

  • Cut the figs into quarters and place in the work bowl of food processor. Pulse to puree. Add the remaining ingredients except the pistachios, and process to blend thoroughly. Freeze in a tabletop ice cream maker by following the directions specific to your freezer. Once frozen, fold in the chopped pistachios and spoon into containers. Cover and place in the refrigerator freezer compartment until solidly frozen, several hours.