Every Day Cinnamon Rolls

Every Day Buckwheat Cinnamon Rolls

We all know that the Pillsbury Doughboy was not particularly welcome in my mom’s farm kitchen…But you know, it was that whole Poppin’ Fresh thing that got to me. Something about cracking the cylinder on the counter’s edge, the roll dough springing out from its tight confinement. The dough, pre-portioned into rolls with their minute perforations. The pre-made icing in its own tiny cup! I am, of course, referring to cinnamon rolls in a tube, one of Big Food’s most ingenious inventions.

My grandmother was probably the one who sneaked the doughboy’s cinnamon rolls into her kitchen for me. (It was at times hard to believe that she was the mother of my nutrition minded mother!) It’s not like we could make a healthier homemade version either; we didn’t make them from scratch at home. TV commercials portrayed the perfect family sitting down to quick breakfast cinnamon rolls, as though rolls were required to make warm family memories. We certainly had great family breakfasts, just without cinnamon rolls. My kid’s cookbook had a quick cinnamon roll recipe using biscuit dough, rather than yeast dough, which I did make sometimes.  There were also whole wheat versions, but the whole wheat flour available at that time made one dense cinnamon roll!

I was an adult before it occurred to me that I could bake all the darn cinnamon rolls I wanted!  Real yeast-raised authentic cinnamon rolls. They were good, fluffy white dough with buttery, gooey cinnamon filling and a thin layer of icing.  Not great, just good. Not nearly as delicious as one might expect, actually. By the time giant, ooey-gooey cinnamon rolls had invaded the mall, wafting their warm scent of cinnamon right up one’s nose, the jig was up and I was finished. They were over the top. Because after all my childhood longings, cinnamon rolls never quite lived up to all the hype. What? Mom was right yet again? Yep-they were a little too doughy, a touch under baked, too gooey, too white bread and dare I say it? perhaps too sweet… it was hard to justify baking them. 

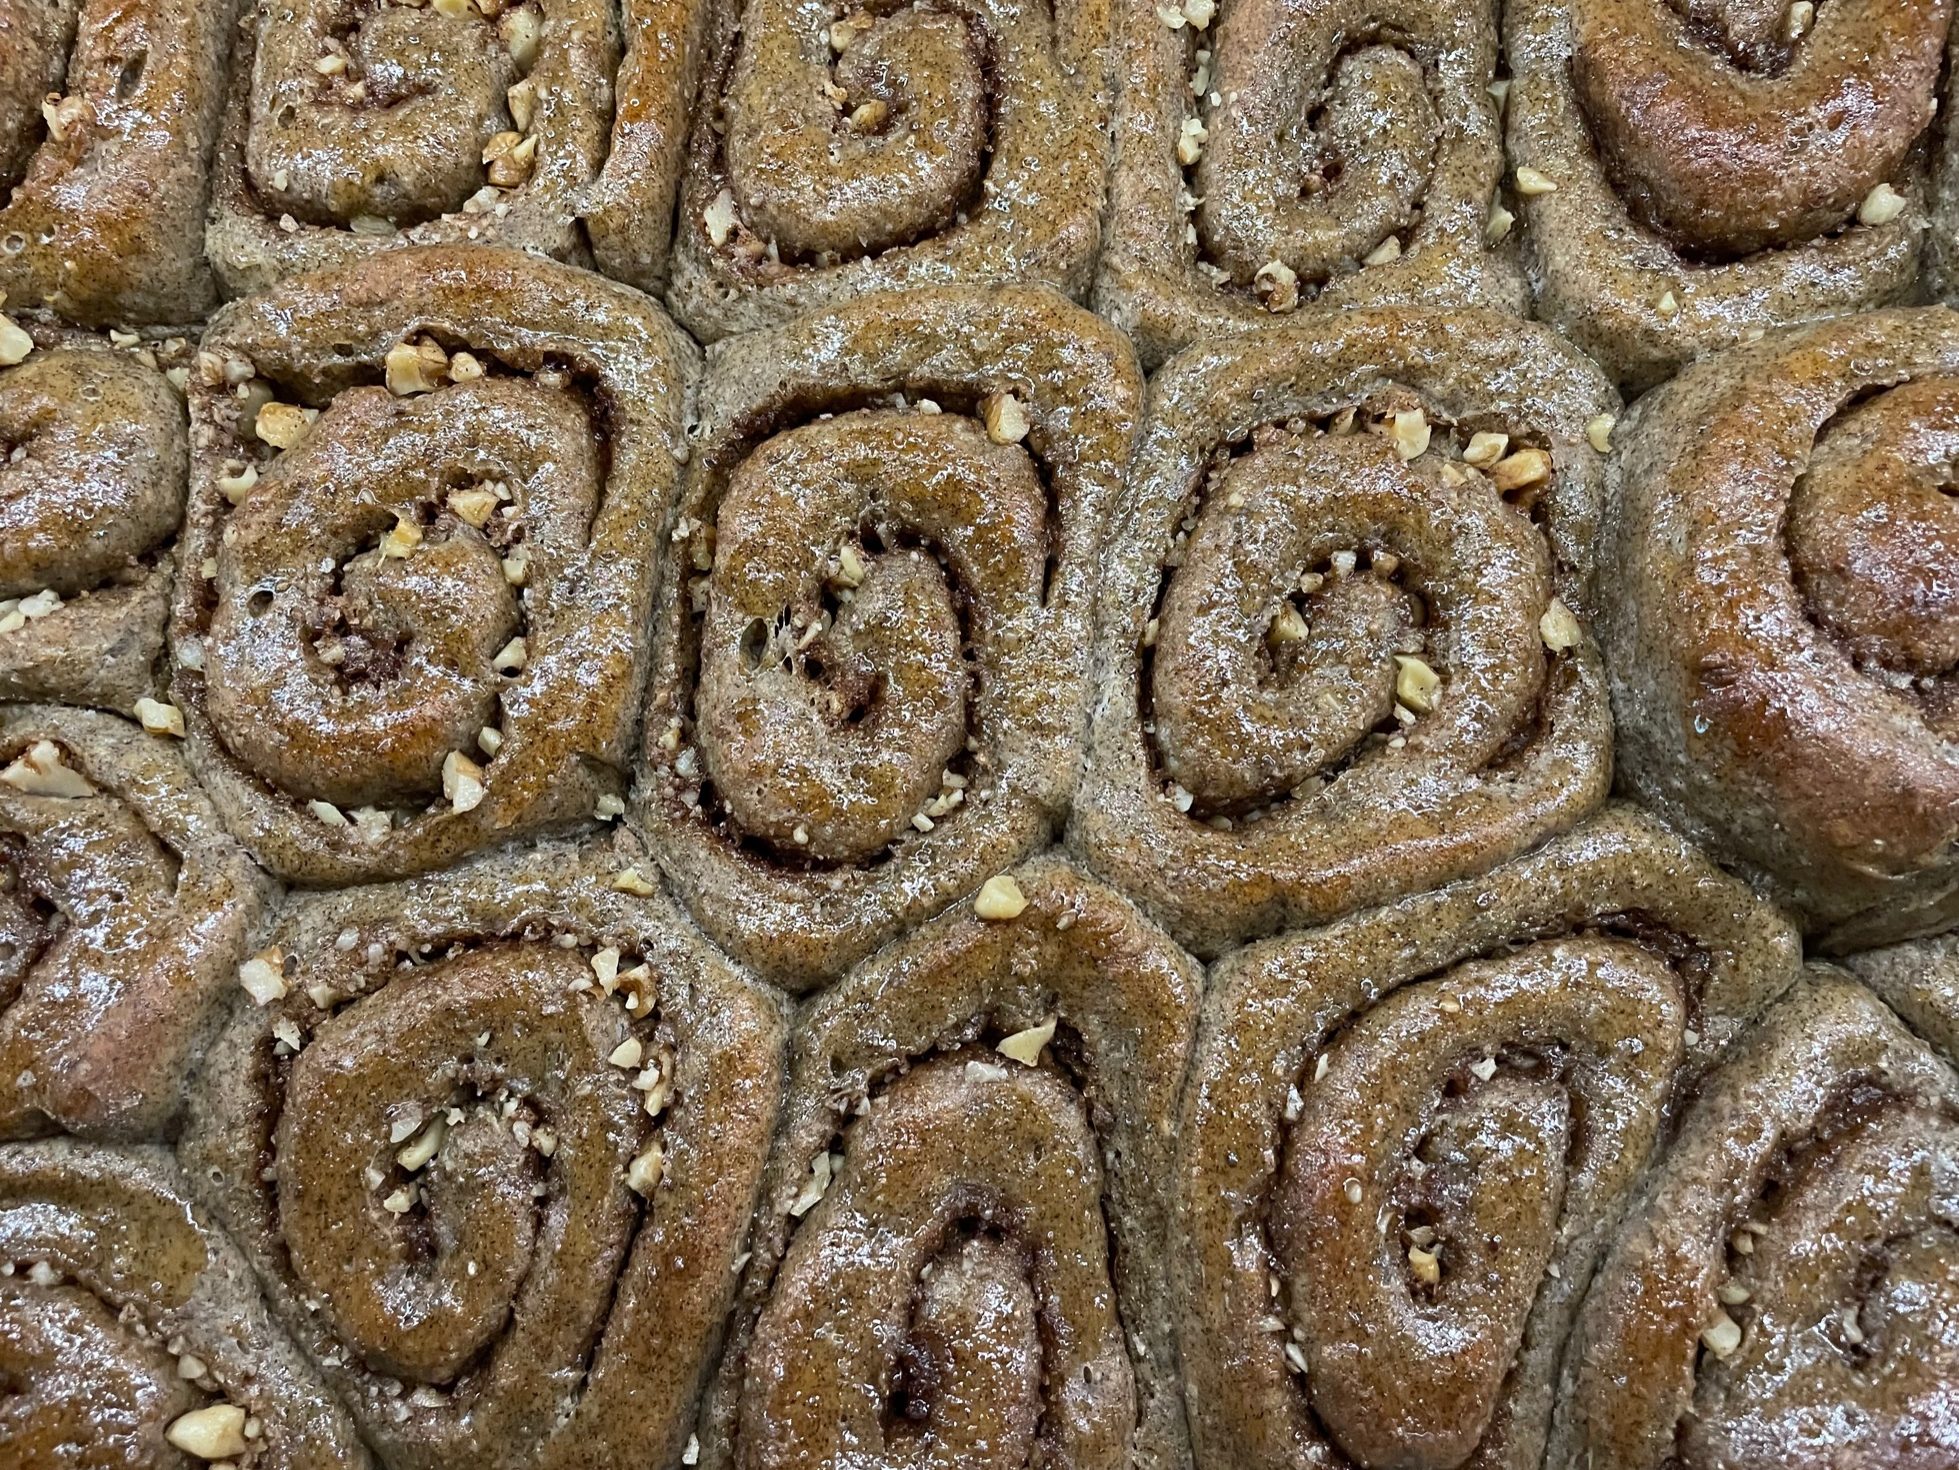
Sooo… a while back I began working on a cinnamon roll recipe with an improved nutrition profile whose consumption didn’t inspire guilt. It’s what I call the every day cinnamon roll, a roll that I can enjoy more often.  A cinnamon roll that while still fluffy has the taste and nutrition of whole grain flours. A cinnamon roll with less saturated fat, more fiber and protein. Let’s be clear: this is still a sweet roll, but offers more taste and nutrition, without concerns about putting it into the breakfast rotation. These rolls melt in my mouth, the classic flavor combo of maple, buckwheat and cinnamon mingling in every bite, with a tiny bit of crunch from the chia seeds. The tannins in the buckwheat balance the sweetness of the maple syrup deliciously. No icing, just a rich drizzle, brushed over the tops, one of the tricks I learned from Mom when baking rolls.  

This is quite honestly the cinnamon roll I’ve always wanted. Do these dare to be different, to challenge cinnamon roll tradition? Well, yes. But they are delectable. My only regret is that they don’t pop out of a tube. 

Every Day Buckwheat Cinnamon Rolls

Fluffy whole grain roll dough swirled with maple, cinnamon and walnuts.
Prep Time3 hours 30 minutes
Cook Time1 hour 19 minutes
Total Time4 hours 49 minutes
Course: Breakfast
Cuisine: American
Keyword: Buckwheat, Cinnamon Roll
Servings: 18 rolls

Ingredients

Dough

  • 1 cup water
  • 2 tbsp. chia seeds
  • 2 1/4 tsp. instant yeast
  • 1 1/2 cups white whole wheat flour whole wheat pastry flour is desireable.
  • 1 cup buckwheat flour
  • 1 1/4 cups un-cleached all-purpose flour
  • 1 1/2 tsp. cinnamon
  • 1 tsp. salt
  • 1/2 tsp. grated orange zest
  • 1 lge. egg
  • 1/4 cup real maple syrup
  • 1 1/2 tsp. vanilla extract
  • 1/2 cup whole milk yogurt not Greek yogurt
  • 1/4 cup neutral vegetable oil I use avacado oil

Filling

  • 1/4 cup butter softened
  • 1/4 cup brown sugar
  • 1 tsp. cinnamon
  • 1/2 cup walnuts finely chopped

Glaze

  • 1 tbsp. milk
  • 2 tsp. butter
  • 2 tsp. real maple syrup

Instructions

  • Stir the chia seeds into the water and set aside to soften. 
  • In large stand mixer bowl, combine the instant yeast with the flours, then stir in the cinnamon, salt and orange zest. 
  • To the dry ingredients add the chia seed gel, egg, maple syrup, vanilla extract, yogurt and oil. Using the paddle attachment, mix thoroughly on low speed. The dough will be soft. Scrape down the sides of the bowl and switch to the dough hook attachment. Knead the dough at medium low for three minutes. 
  • Turn out onto a lightly floured surface and knead by hand for several minutes until very smooth. Place dough in a bowl sprayed with pan spray. Spray the top of the dough to prevent drying.  Cover and set aside to rise for 1 to 1-½ hours, until dough has almost doubled in size. Rising time will vary with the temperature of the room.
  • While dough rises, combine the ¼ cup butter with brown sugar and 1 teaspoon cinnamon for the filling. 
  • When dough has risen, scoop onto lightly floured surface. Lightly deflate and let rest for 10 minutes. Preheat the oven to 375° F. and lightly grease a 9×13-inch baking pan. Roll the dough evenly into an 18”x12” rectangle. Spread with the prepared filling, to within ½-inch of the edges.  Sprinkle evenly with walnuts. Roll into a log from the long side.  Slice into 18 rolls.  Place the rolls in the prepared baking pan. Flatten slightly with fingers and cover loosely with a dry kitchen towel. Set aside to rise for 1 to 1-½ hours, until puffy and light. 
  • Bake in preheated oven for 15-20 minutes. While rolls bake, combine and heat the milk, butter and syrup, just to melt the butter. When browned and fully baked, remove the rolls and immediately brush with the glaze. Remove to cooling rack. 

Burst of Cinnamon Blueberry Muffins

Burst of Cinnamon Blueberry Muffins

I am one of the rare ones who, given adequate time, enjoys grocery shopping. But… following multiple warnings about Corona-virus variants, I gave up a month ago and began having my groceries delivered, at least until I am vaccinated and build some immunity. On my appointed “shopping” morning, as “my shopper” begins to collect my grocery items, my phone begins pinging. The store is out of those on-sale blueberries I ordered; would I like frozen berries instead? 

Wait a minute. Blueberries in February? Well, yeah, this farm girl is pretty spoiled with the rich variety of fruit grown next door in California and down south an hour or so in Mexico. With a stretch it’s local-ish, but most certainly not in season… We had to settle for apples, pears and citrus for the week, which took me back to winters on the farm. 

Fresh fruit was a summer luxury. Mom would visit the local fruit farm to pick amazingly delicious strawberries, which she made into her yummy strawberry glaze pie and strawberry shortcake. A few survived for fresh consumption, then freezing took the remainder. A few peaches and Bing cherries might be sprinkled in as the summer rolled on, but with very brief seasons. Come late summer we’d be making applesauce for the winter. And then would come an endless parade of canned fruit. I was mightily grateful when canning in light syrup made its debut. Blueberries would have been either canned or frozen, neither of which lived in our pantry or freezer, in any season!  

Now though, I just happen to have a few blueberries left from last week, enough to make blueberry muffins. My most favorite blueberry muffin recipe was in a 2005 issue of Cooking Light magazine, which highlighted Maine blueberries. The recipe was actually a contest winner from a local girl, lightened by the test kitchens at the magazine. While the magazine no longer exists , their lightened version was popular and is still available on a number of sites. (https://www.food.com/recipe/cooking-lights-blueberry-cinnamon-burst-muffins-170250) But even the lighter version was a bit cupcakey, which in those days was just fine by me… what I loved about it was that the cinnamon rich streusel was folded into the batter before baking, rather than being sprinkled on top. And the sugar, of course… don’t forget the sugar.

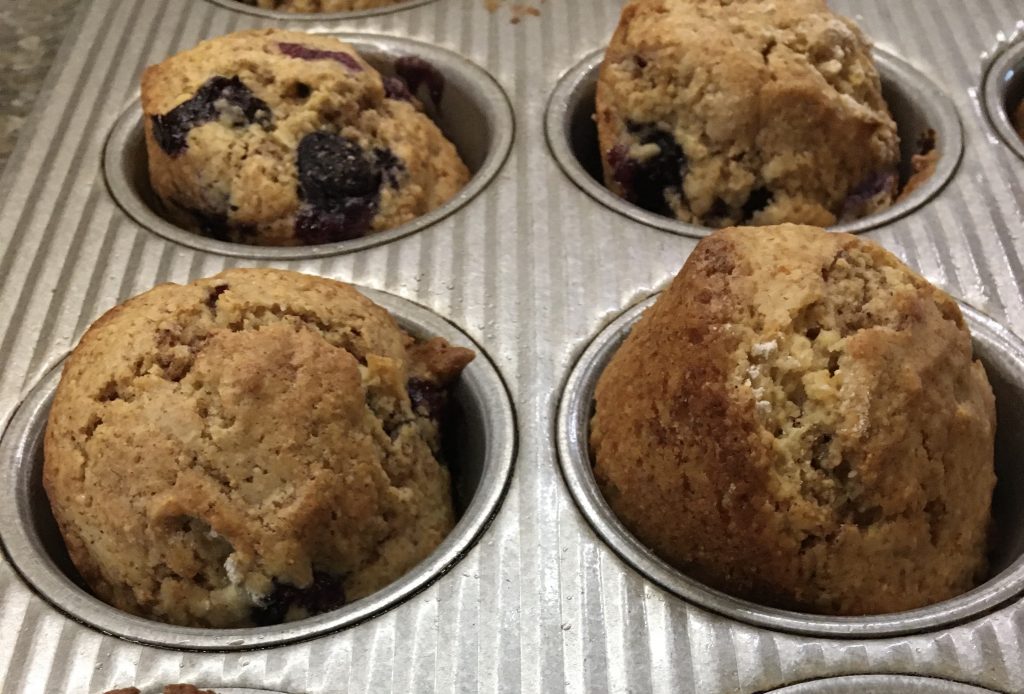
Rather doubtfully, I decided to try a second lightened-up version that I could comfortably eat. Start by switching the white flour for white whole wheat. Use butter only in a reduced amount of streusel, with vegetable oil subbed in for the batter. Oh! And don’t forget to cut the amount of sugar in half. I took them out of the oven with great trepidation, but they were perfect. Tender, moist and full of the cinnamon bursts for which they were named.  We’ll be finishing the batch for breakfast tomorrow morning. Next time I have blueberries left at the end of the week, I’ll make them again. No matter the season. 

Burst of Cinnamon Blueberry Muffins

Moist and tender blueberry muffins, marbled with cinnamon streusel.
Prep Time30 minutes
Cook Time15 minutes
Total Time45 minutes
Course: Bread, Breakfast, Quick Bread
Cuisine: American
Keyword: blueberry, cinnamon, muffin
Servings: 12

Ingredients

  • 2 tbsp white whole wheat flour
  • 2 tbsp sugar
  • 2 tsp cinnamon
  • 5 tsp butter
  • 1/3 cup sugar
  • 1/4 cup oil I use avacado oil.
  • 1 large egg, beaten
  • 1 2/3 cup white whole wheat flour
  • 3 tsp baking powder
  • 1/4 tsp salt
  • 2/3 cup almond milk milk of choice
  • 1 cup blueberries fresh or frozen

Instructions

  • Preheat the oven to 375 degrees F. LIghtly grease a 12-cup muffin tin or coat with cooking spray.
  • Combine the 2 tbsp flour, 2 tbsp sugar and the cinnamon in a small bowl. Cut in the butter with a pastry blender, or rub in with your fingers. Set aside.
  • In a large mixing bowl, combine the 1/3 cup sugar, oil and beaten egg.
    In separate bowl, combine the flour, baking powder, and salt.
  • Add the dry ingredients to the wet ingredients in 3 additions, alternating with almond milk to make a smooth batter. Fold in the reserved streusel and blueberries.
    Portion evenly into the prepared muffin tin. Bake for 15-18 minutes, until firm and lightly browned. Cool for several minutes, then loosen and tilt up in the muffin cups to allow steam to escape. Serve warm.

Cinnamon Walnut Scones

Cinnamon Walnut Scones

Bland food was pretty abundant in my youth. Actually, I suppose it still is… and I even know folks who prefer it to the well spiced and flavorful. (Yes, you know who you are out there.) Mom had a spice drawer, which for the time was amazingly adventurous. We’re talking cardamom level adventurous! It was cooking with her that taught me which herbs and spices to use for which dish, and eventually the creativity to switch them out for other combinations. My own taste preferences tend toward the herby and highly spiced. In fact, my theory is that one can gather a great deal about a person by checking out what is in their spice cabinet.

I have two spice drawers, because they won’t all fit into just one. Yep, I’m one of those people who panics when the Herbs de Provence, hot curry powder or Za’atar bottle is empty…

But by far, the most used spice in my kitchen is plain old cinnamon.  I suspect most Americans have at least a jar of cinnamon, even if it’s the only spice jar in the cabinet. I buy the giant size at Costco, because one does not want to run out of cinnamon. According to my Flavor Bible, cinnamon has a flavor profile that can be bitter or sweet, and highly aromatic. Its volume is LOUD, and one little teaspoon has as many antioxidants as half cup of blueberries. It’s botanically related to both the bay leaf and the avocado! Who knew?

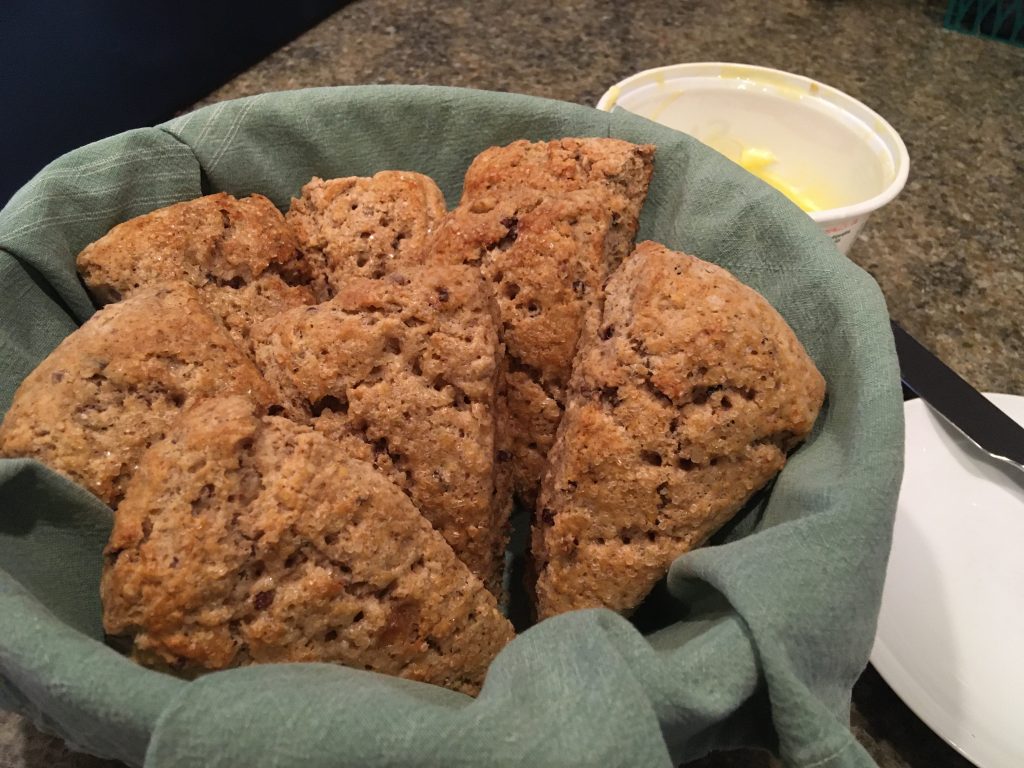
What I do know is that cinnamon enhances the flavor of scones.  We are again in the season when blessedly cool mornings encourage both baking and the eating of breakfast in our screened Arizona room. These cinnamon rich scones, complemented by cocoa nibs, vanilla and walnuts, develop deep flavor as they bake to buttery crispness. They take their place at the table aside a dish of yogurt or an over easy egg, and fresh fruit. Cut smaller, they make a delicious pairing with an afternoon cup of tea.

I don’t typically find that a hard sell on scones is required when the lovely aromas of wheat, cinnamon and walnuts waft through my kitchen. 

I doubt you will, either. Make some scones.

Cinnamon Walnut Scones

Rich, warmly spiced scones with cinnamon, walnuts and cocoa nibs.
Prep Time30 minutes
Cook Time15 minutes
Total Time45 minutes
Course: Bread, Breakfast, Snack
Keyword: cinnamon, scones
Servings: 8

Ingredients

  • 2 c. white whole wheat flour
  • 3 tsp. baking powder
  • 2 Tbsp. brown sugar
  • 1 tsp. cinnamon
  • ½ finely chopped walnuts
  • 6 Tbsp. cold butter
  • 2 Tbsp. cocoa nibs
  • 1 egg
  • 2/3 c. buttermilk or soured milk plus extra for brushing
  • 1 tsp. vanilla
  • coarse sugar

Instructions

  • Lightly grease a baking sheet or line with parchment paper. Preheat the oven to 400° F. 
     
  • Measure flour through walnuts into a food processor or, if mixing by hand, a large bowl and blend thoroughly. Cut the cold butter into the flour mix until the size of rice grains. Stir in the cocoa nibs. Blend the egg, milk and vanilla, then stir into the dry ingredients to make a soft dough. Turn out onto a lightly floured surface and knead several times to gather into a ball, then flatten to and 8-inch circle. Cut into 8-10 wedges, depending on the size of scone desired. Move wedges to the baking sheet, then brush with extra milk and sprinkle with coarse sugar. 
  • Bake in the preheated oven for about 15 minutes, or until browned and firm. 

Cherry Hazelnut Baked Oats

Cherry Hazelnut Baked Oats

On the farm, the only milk we knew was the white liquid emanating from a cow. In my very early childhood, that milk magically appeared in a little thermal lined box that Mom kept by the front door. Yes, “the milkman” delivered each week, not that we usually saw him.  Mom’s beloved half and half and occasionally cream were tucked into the box, too.  Life on the farm by necessity included a great deal of social distancing, cue the quaint pastoral image … never mind that today, we have every product known to man delivered right to our door!

This was a time in which milk was what farm children drank; three full glasses with meals daily. As an adult of advanced middle age, I now primarily drink water. But I want milk in my cappuccino, and use it regularly in cooking and baking. Lactose, the sugar found in cow’s milk, is not welcomed in any way by my picky digestive system. Lactose free milk is made by breaking the lactose molecule apart, using the digestive enzyme lactase; making it more digestible for many.  While I keep this product in the fridge, I find myself increasingly using what I call “alt-milks” for cooking, smoothies, and hot drinks. “Milk” from oats? From nuts? From coconuts? Yep, all are snugly nestled into my pantry and refrigerator.

As I first played with using alt-milks, I bought them at the grocery store. But I kept reading about these adventurous folks who made their own alt-milk at home. I wasn’t too sure about farm girls making their own milk… sounded a bit too goop-y, if you catch my drift. Farm girls don’t goop. Then Amy Chaplin (http://amychaplin.com/) got hold of me, with her gorgeous photos of mixed and flavored alt-milks.

Next thing you know, I had soaked a cup of almonds and fired up the Vita-Mix. I might add that my husband looked on with great skepticism, as I turned the dial up to warp speed. He was literally gawking; mouth agape, as the nuts and water transformed into frothy white “milk.” “It looks like milk!” he raved. I poured samples into glasses, upon which he commented, “Well, we won’t be buying almond milk at the store anymore.” He was right. This “milk” was thick, rich, and delicious. I’m still not visiting goop, though.

Along with the aforementioned milk, oats and eggs were staples in the farm pantry. A bowl of oatmeal made the occasional appearance at breakfast, and was baked into biscuits and muffins.  The plentiful egg was scrambled, baked, poached and fried. Ms. Chaplin discussed making breakfast bowls by combining whole grains with freshly made, unstrained nut milk, to make the ultimate bowl of porridge.  But my thoughts strayed to baked oats. Bread pudding made frequent appearances for dessert on the farm. But no one thought to make oat pudding. Baked oatmeal is the best cross ever of oatmeal and bread pudding. And thus was born my Cherry Hazelnut Baked Oatmeal.

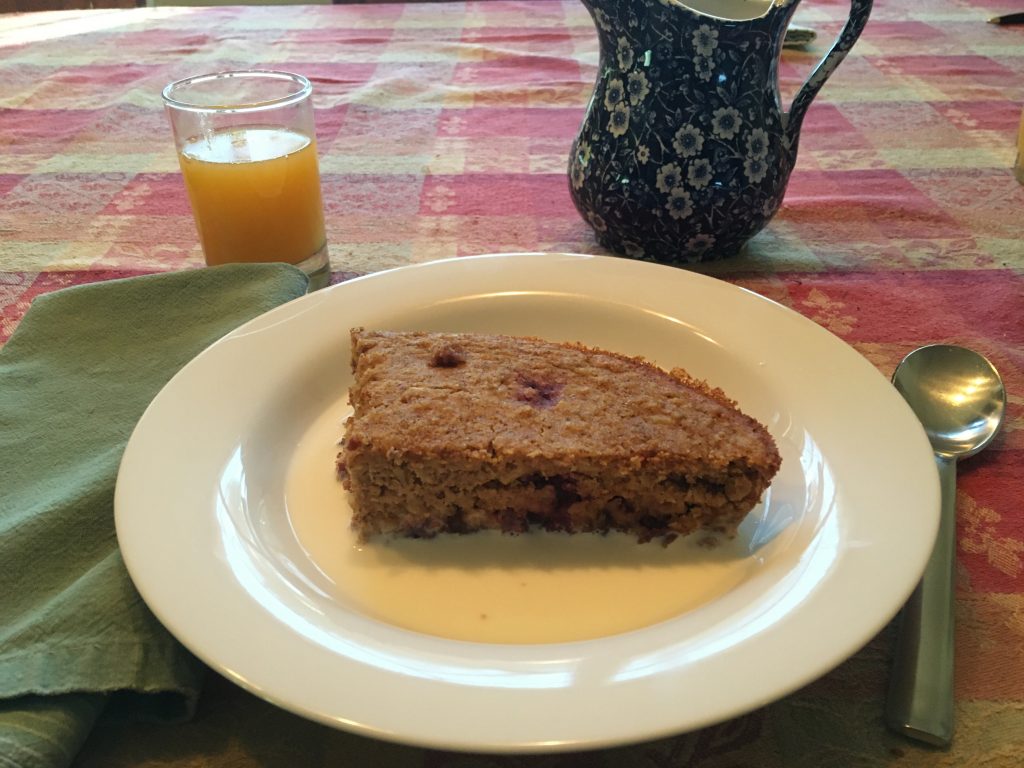
The dish is predominantly prepped in the blender/food processor. Dry ingredients are mixed, nut milk is whizzed up with maple syrup, egg and flavorings. Fruit is pulsed in to chop. Mix it together and bake, for four delicious breakfast servings of a custardy, nutty casserole with a nut and oat topping.  If doubled, the recipe fits well into an 8-inch square pan, for eight servings. Given our small family size, I use a small shallow 3-cup casserole dish that I, um… won in a recipe contest. I make the casserole ahead for convenience, then portion and heat in the microwave at breakfast time. Served in lovely bowls with additional nut milk, it makes me appear almost competent first thing in the morning, despite my rampant brain fog.  Give them a shot- you, too, can appear capable in the morning!

Cherry Hazelnut Baked Oats

Delicious cross between bread pudding and a bowl of oatmeal, with a custardy bottom layer and top layer of oats, nuts and fruit.
Prep Time30 minutes
Cook Time30 minutes
Total Time1 hour
Course: Breakfast
Cuisine: American
Keyword: oats
Servings: 4 people

Ingredients

  • 1/4 cup dried cherries
  • 3/4 cup quartered sweet cherries fresh or frozen
  • 2 Tbsp brandy or orange juice
  • 1 cup old-fashioned rolled oats
  • 2 Tbsp shredded, unsweetened coconut
  • 2 Tbsp ground flax meal
  • 1/2 tsp cinnamon
  • 1/4 tsp salt
  • 1/2 tsp baking powder
  • 1/2 cup hazelnuts covered with water and soaked for several hours
  • 1 1/4 cups water
  • 2 Tbsp maple syrup or honey
  • 1 large egg
  • 1 Tbsp coconut oil or melted butter
  • 1 tsp vanilla extract

Instructions

  • Preheat the oven to 375° F. Oil or use pan spray to coat a three-four cup casserole dish.
     
  • Combine the dried and fresh/frozen cherries with brandy or orange juice. Macerate while completing the next steps.
     
  • Combine oats, coconut, flax, cinnamon, salt and bakingpowder in a large mixing bowl. Drain the soaked nuts and drop into a high-speedblender or food processor. Blend at high speed until the mix appears liquid.Add to the blender the maple syrup, egg, oil or butter, and vanilla. Blend tocombine. Add the fruit to the blender and pulse to chop to the degree desired.Pour the liquid mixture into the large bowl of dry ingredients and stir tocombine. Pour into the prepared casserole dish and bake for 25 to 30 minutes,until set and browned on top. Portion and serve, or refrigerate until ready toserve. If reheating, warm the oats in a low oven (300° F.) or briefly in the microwave. Servewith hot milk.
     

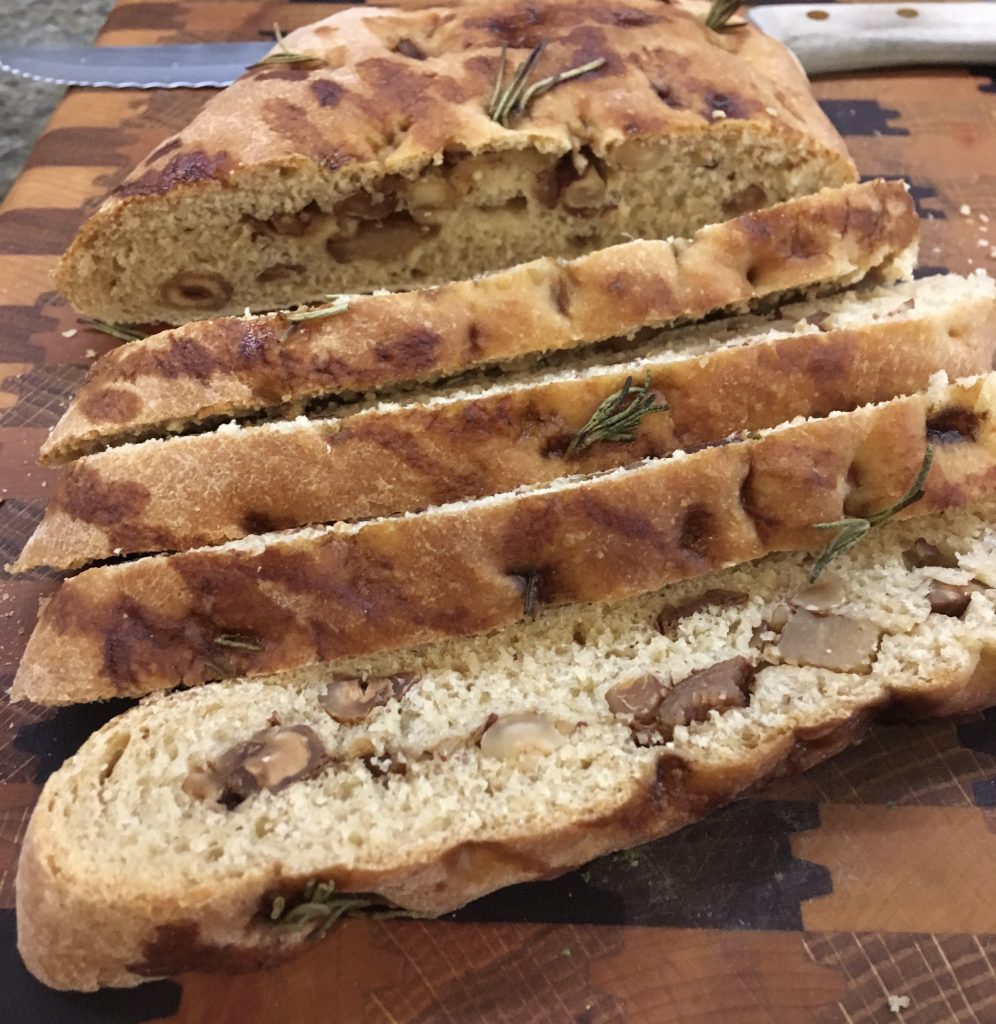
Dried Pear and Hazelnut Focaccia with Balsamic Honey Drizzle

Dried Pear and Hazelnut Focaccia with Balsamic Honey Drizzle

I occasionally enter recipe contests. I know, it’s a little odd. People are inevitably taken aback by the whole idea. I have won everything from kitchen trinkets, like olive oil cruets and butter belles, to fine quality bake ware to cash prize and trip as a finalist at the National Festival of Bread. http://nationalfestivalofbreads.com I enter this one most consistently, as its focus is on bread, using whole food ingredients. It’s also held biannually, so contestants have several years to ponder the whole thing and develop recipe ideas.  

The entrants-of-recipe-contests (ERCs for short) are a fascinating bunch. I got to know a few of the other finalists when baking at the NFOB. Several were bakers like me, having just wandered in with a unique idea, which was selected for the final competition.  Others were Professional ERCs. They had been finalists in many contests, and had the whole routine down to a science. Two had even been finalists in the renowned, granddaddy contest of them all, the Pillsbury Bake-Off. One assured me that if only I was willing to modify my bread recipe to include all processed convenience items, my recipe would be a shoe-in…

Folks quite predictably ask me how I ever got started with contests. Growing up on a farm, one might expect that 4-H would be part of my experience. But no, somehow I joined the Camp Fire Girls. My mom was the group leader, though she had substantial help from another parent couple. She was the consummate artsy/crafty person, making sure that we had meaningful weekly activities at meetings, and that we earned our various patches and beads. The couple that co-led with her handled the great outdoors and camping events. My mom was good at many things, but camping was not one of them… BTW, I have followed in Mom’s footsteps on the whole camping thing. If I’m traveling somewhere, there will be a proper bed at the end of the day and a Starbuck’s within ten minutes drive. Count on it!

My favorite part of being a CFG was the annual county and state fair competitions. These were individual events, and I entered baked goods, beaded work and sewn items. With the farm long gone from our family, I now have what I call my childhood-in-a-suitcase. The case holds favorite things from my growing up on the farm, and among those things are the many ribbons and trophies won in fair competitions.  So perhaps the whole food as competition thing was hard wired into me from an early age. That’s my theory…

Today’s Dried Pear and Hazelnut Focaccia recipe is tweaked from one of my recipes awarded Honorable Mention at the NFOB. Having entered it into a contest, it’s really no longer my recipe, and the original can be found at http://nationalfestivalofbreads.com/recipes/fig-and-walnut-focaccia.

You’ll note that the original included that devious culprit, the dried fig, now avoidable since I live in fresh fig territory! Focaccia is really just a fancy pizza. The directions are quite explicit, which is required for recipe entries. Don’t let that throw you off-this one is easy to make and is quite versatile. It pairs beautifully with cheeses and fresh fruit for an appetizer or even for breakfast.  Made a bit thicker, it can be sliced horizontally for sandwiches. Do try it… just don’t enter it into a contest.

Dried Pear and Hazelnut Focaccia with Balsamic Honey Drizzle

Light, chewy Italian style flatbread, infused with the flavors of pears, hazelnuts and rosemary. Great accompaniment to cheeses and fruits, it's also good for breakfast.
Prep Time3 hours 30 minutes
Cook Time30 minutes
Total Time4 hours
Course: Appetizer, Bread, Breakfast
Cuisine: Italian
Keyword: focaccia
Servings: 8 people

Ingredients

  • 1 cup all-purpose flour
  • 1/2 tsp instant yeast
  • 3/4 cup very warm water
  • 1 1/2 tsp honey, divided
  • 3/4 cup white whole wheat flour I use sprouted whole wheat
  • 1 tbsp olive oil, divided
  • 3/4 tsp salt
  • 1/4 cup coarsely chopped hazelnuts toasted
  • 3 dried pear halves
  • coarsely ground seat salt for the top
  • 1 1/2 tsp chopped fresh rosemary
  • 2 1/2 tsp balsamic vinegar

Instructions

  • Measure all-purpose flour into an electric mixer bowl. Stir in the yeast, then add the very warm water and ½ teaspoon of the honey. Mix by hand to make a sponge. Cover bowl with plastic wrap and set aside in a warm spot to rise for 2 hours. The sponge should be doubled and bubbly.
  • Insert the bowl of sponge into the mixer. Using the paddle attachment, mix in the remaining ¾ cup whole wheat flour, 2 teaspoons of the olive oil and the salt. Mix on low-medium speed for 3-5 minutes, or until the dough climbs the paddle. Switch to the dough hook attachment and knead for 5 minutes. The dough should be very wet, but very smooth. Scrape dough out onto a floured pastry cloth or board. Round into a ball and place in a large deep bowl, which has been coated with pan spray. Spray the top of the dough lightly, then cover. Set aside to rise until doubled, about 1 hour.
  • While the dough rises, preheat the oven to 325 degrees Fahrenheit. Spread the chopped hazelnuts in a single layer on a baking sheet. Toast the nuts for 7-8 minutes or until lightly golden. (Ignore this step if nuts are pre-toasted.) Set aside to cool. Cut each pear half into 6 pieces, and place in a medium sized bowl. Drizzle 2 teaspoons of the balsamic vinegar over the pears, then barely cover with hot water to soften the fruit.
  • Insert a baking rack into the lower third of the oven. If a baking stone is available, place it on the rack, then pre-heat the oven to 425degrees Fahrenheit. Turn the dough out and flatten slightly into a rectangle. Drain the fruit and squeeze out excess liquid. Sprinkle the cooled hazelnuts and pear pieces evenly over the dough. Fold one-third of the dough to the center, then fold the remaining third over the top to enfold all of the nuts and pears.  Transfer the dough to a square of parchment paper. (Transfer to a baking sheet if a baking stone is not available.) Press dough out toward the edges with finger tips, until the rectangle is approximately 7 inches by 5 inches. Brush dough lightly with the remaining teaspoon of olive oil. Cover lightly with a clean tea towel and set aside to rise for 30 minutes.
  • Lightly dimple the risen loaf with the knuckles of one hand. Sprinkle the top of the loaf lightly with coarse sea salt, then chopped rosemary. Combine the remaining honey and balsamic vinegar and drizzle over the surface of the loaf. Slide the loaf with parchment onto the baking stone and bake 25-30 minutes, or until evenly browned and the bottom is brown and firm. Remove to a cooling rack for 15 minutes to cool slightly. Serve while warm.         

Notes

While this dough can be made by hand, it’s a very wet dough. Adding flour to make it more handleable changes the open texture of the crumb. If made by hand, turn it out onto oiled plastic wrap for kneading and prepare to get your hands messy!

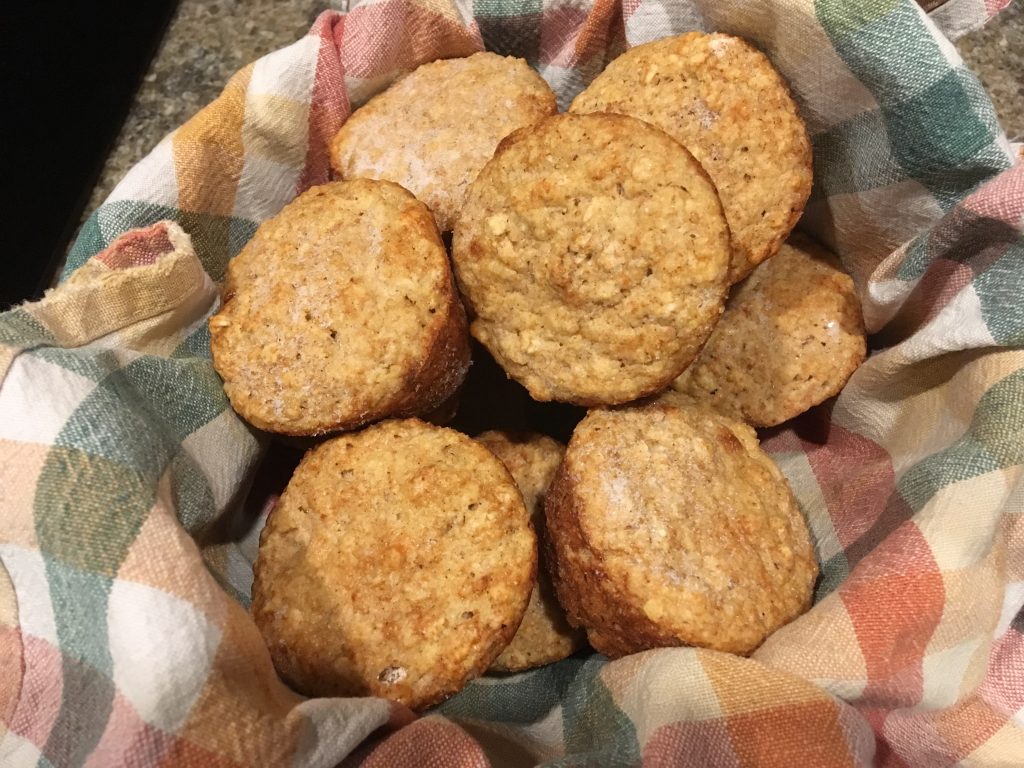
A Good Oatmeal Muffin…

Oatmeal Muffins

I love a good oatmeal muffin. Pebbled top, deep taste of the grain, ever so lightly sweetened, thinly buttered.  I can’t find this muffin outside my own kitchen, however…

because muffins have earned a bad rap. Deservedly so, with the treatment they’ve gotten in the commercial world. From a mix, bakery, grocery, coffee shop-it doesn’t matter; they have basically morphed from tasty little gems into grapefruit sized cakes, sans the frosting. Who needs frosting when streusel is thickly sprinkled atop one’s muffin? Streusel is definitely permissible in store-bought-muffin-world. These muffins, with their mounding tops, call out to those unwary eaters who love a great excuse to indulge in cupcakes for breakfast. In no time at all, these unsuspecting eaters are sporting their own muffin tops! Given my advanced middle age, I need no assistance from mammoth muffins to grow a muffin top…

Meaning the only way to get a muffin worthy of breakfast consumption is to bake it oneself. On the farm, my grandmother viewed newfangled-boxed mixes as a godsend, and fulfilled her role as the great spoiler of her granddaughter by embracing muffin mix. Sweet white flour mix with these little tins of blueberries included in the box. I thought these were pretty darn yummy!  But Mom, keeper of health, knew that muffins were supposed to be breads, not cupcakes, and eaten in balance with other foods at breakfast. She baked several types of muffins, including oatmeal. While her recipe was healthy, I thought the muffins’ texture needed a little um… upgrade, perhaps. In other words, I wanted to keep the health (well, mostly) but compromise a bit to produce a taller, fluffier product. This did not seem, on my part, to be all that difficult a task. Which was wishful thinking, to put it mildly.

We’re not counting how many trials it required to develop this recipe… or how many sad muffins were consumed in the process. Suffice it to say, there have been a few oatmeal muffin fails. Ultimately, I scaled the recipe up, as the amount of batter in Mom’s was quite small for 12 medium muffins. And in this process, increased the proportion of dry and liquid ingredients to the amount of oatmeal, while adding in oat bran. A bit of applesauce moistens the muffins, while keeping the fat in check.  Maple syrup and vanilla pack in the flavor while keeping the added sugar to one teaspoon per muffin.  There are folks for whom it’s just not a muffin without “add-ins.” When baking for myself, I keep the add-ins to a minimum, just walnuts. Raisins are classic additions that don’t break the health bank, but cocoa nibs and/or mini chocolate chips would doubtless be pretty tasty if you’re willing to make additional compromises!

Once made, these breakfast treats crave a well-made cappuccino. Providentially, the house barista steams up a couple of these aromatic cups, overflowing with foam, every morning. The muffins cozy up well to eggs or yogurt and fruit most mornings, too.  A muffin split and sandwiched with a smear of nut butter would certainly not be amiss, for a speedier grab-and-go breakfast. They freeze beautifully.

So wake up, smell the coffee, and have a muffin. Just skip the waistline muffin top!

Oatmeal Muffins

Moist, fluffy, lightly spiced oatmeal muffin
Prep Time30 minutes
Cook Time15 minutes
Total Time45 minutes
Course: Bread, Breakfast
Cuisine: American
Servings: 12
Author: Mary Kay Allen

Ingredients

  • 2/3 cup buttermilk
  • 1/2 cup applesauce
  • 1/4 cup maple syrup
  • 1/4 cup vegetable oil I use avacado
  • 2 large eggs
  • 1/2 tsp vanilla extract
  • 3/4 cup old fashioned rolled oats
  • 1/4 cup oat bran
  • 1 1/4 cups whole wheat pastry flour
  • 2 tsp baking powder
  • 1/2 tsp baking soda
  • 1/2 tsp salt
  • 1/2 tsp cinnamon
  • 1/4 cup chopped walnuts

Instructions

  • Preheat the oven to 400° F. Lightly grease a  standard 12-cup muffin tin and set aside. 
  • In a medium bowl, combine the buttermilk, applesauce, maple syrup, oil, eggs and vanilla. Beat well to thoroughly mix. Stir in the rolled oats and oat bran. Set aside while preparing the dry ingredients.
  • In a large bowl, stir together the flour, baking powder, baking soda, salt, cinnamon and walnuts. Make a well in the center of the dry ingredients, and pour in the wet ingredients. Mix lightly, taking care not to over mix. 
  • Quickly portion the batter evenly between the prepared muffin cups. The batter should be almost to the top of the cup. Bake for 12-15 minutes, until firm when touched and browned around the edges. Let the muffins sit in the cups for several minutes, then loosen the edges and tip up out of the muffin tin to release steam.


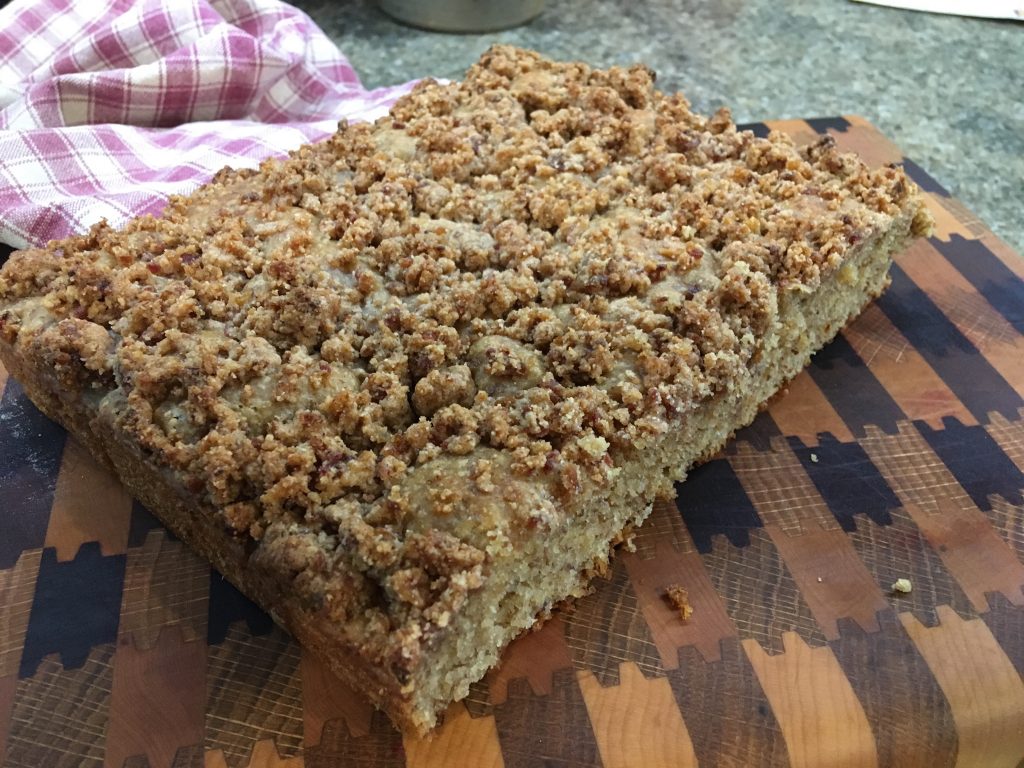
Rich Yeast Coffee Cake with Streusel

Will Pedal for Coffeecake

I spent much of my time as a farm kid cruising the country roads on my bike.

Learning to bike ride on the farm differed a bit from what I observed my peers to be doing in town. They pedaled jauntily down the thoughtfully provided sidewalks, training wheels attached to their two-wheelers. In place of training wheels, I had a dad who was of the “toss ‘em in and let ‘em sink or swim” philosophy. I’m not sure of my mom’s view on the training wheels, but what I do know is that my dad seized the moment when my mom and grandmother went off for one of their ladies’ getaway weekends.

Across our front yard was a ridge with a gradual downhill slope, ending in a row of trees at the bottom. At the top of the ridge, Daddy would prop up my brother’s hand-me-down bike, (yes, a boy’s bike) plop me on the seat, and give me a push. Adrenalin flowed as the bike careened down the slope, with me inevitably steering it into one of the trees. Plop, push, careen, crash. Repeat. Repeat until I could begin to demonstrate some wobbly balance on the bike. This activity was the focus of the weekend, as biking competence was required by the time the ladies returned from their weekend away. When Mom and Grandma got home, Daddy proudly sent me out to the road to demonstrate my hard won biking prowess. Where I shakily pedaled for a moment or two, lost my balance and fell in the ditch. Which was awash with poison ivy. Mom had a cow, rushing me into a hastily run bath to wash off the toxin. Which must have worked like a charm, as I didn’t develop any poison ivy blisters at all. Mom, on the other hand, was covered with blisters within a few hours. Daddy got the last laugh, as it appeared that I had inherited his ability to survive poison ivy exposure with none of the dire consequences.

My biking improved, which was a good thing as I enjoyed my mother’s coffeecake immensely. Every now and again in the summer, Mom would pack up a breakfast picnic of her streusel coffee cake, freshly cooked bacon, orange juice and hot coffee to be eaten at a little brook, perhaps a half mile from our farmhouse. And of course, we got there on our bikes. It was a picturesque spot in which we kids could inhale our breakfast before clambering down to the creek side to explore, leaving Mom some luxurious time for eating and contemplation.

Baking this coffeecake demanded an investment of time and effort. The recipe was based on the Rich Yeast Batter adapted from the Betty Crocker Picture Cookbook, circa 1950 . While Mom probably doctored it up with whole-wheat flour and wheat germ, what impressed me was that she had to beat the finished batter for 100 strokes prior to rising! The streusel with which she topped it provided the sweetness, as the cake itself was richly flavored with yeast and spices, but not much sugar. As so often happens with childhood favorites, this recipe set the bar for my taste in coffee cake.

While I have made a sourdough coffeecake for years, I discovered that I could bake a version of Mom’s with better flavor and nutritional balance, while cutting back on the time investment. She made the whole shebang by rising early in the morning, but my lazy self played with making the batter the night before and baking it in the morning, which worked just fine. No need to lose sleep over rising yeast batter! In characteristic fashion, I changed a few other things, too… like substituting oil for shortening, changing up the flour mix, increasing the spices, adding vanilla, substituting dates for sugar in the streusel…you know, just a few alterations. Amazingly after all that, it tastes just like I remember on the creek side.

Should you make it, you have permission to just eat it at home, no bike ride required.

Rich Yeast Coffee Cake with Streusel

Prep Time30 minutes
Cook Time25 minutes
Total Time55 minutes
Course: Breakfast
Servings: 12 servings
Author: Mary Kay Allen

Ingredients

  • 1-½ cups flour (I used a mix of sprouted wheat spelt, and whole-wheat pastry
  • flour; a blend of white whole wheat and all-purpose would work well)
  • ¼ cup ground flaxseeds/flax meal
  • ¼ cup almond flour
  • ½ teaspoon cinnamon
  • ½ teaspoon salt
  • 2-¼ teaspoons instant yeast
  • 2/3- cup almond or other alt milk
  • ¼ cup brown sugar
  • 1 large egg
  • ¼ cup vegetable oil I use avocado
  • ½ teaspoon vanilla
  • Streusel
  • ¼ cup almond flour
  • ¼ cup flour
  • 1- tablespoon brown sugar
  • 1- teaspoon cinnamon
  • 3 tablespoons butter cut into bits
  • 3 large Medjool dates pitted and chopped
  • 1 to 2 teaspoons water

Instructions

  • The night before, combine the flour, flax meal, almond flour, cinnamon, salt and yeast. Stir to mix well. In a second bowl beat together the almond milk, brown sugar, egg, oil and vanilla, until completely blended. Beat 100 strokes, until the batter smooths out. Cover and let rise for 1 hour. Prepare a 9-inch square baking pan by greasing or spraying thoroughly with cooking spray. At the end of the hour, stir the batter lightly and spread evenly in the baking pan. Cover with saran and refrigerate overnight.
  • In the morning, remove the batter from the refrigerator and allow sitting at room temperature for about 45 minutes. In the meantime, preheat the oven to 350° F. and prepare the streusel. In the work bowl of a food processor, combine the almond flour, flour, brown sugar and cinnamon. Add the butter bits and chopped dates. Pulse to combine, until flaky. Add the water one teaspoon at a time, pulsing after each addition, until the streusel is moist and crumbly.
  • Sprinkle the streusel evenly over the batter and bake for 25-30 minutes. Remove and cool slightly before slicing.

Double Pecan Pancakes

Questions abound when it comes to “diet.” What to eat? When to eat? When not to eat? But the big ones are all about the carbs. There are those who eschew them altogether, eating one of the currently popular low carb diets. For me, carbs are non-negotiable, given that high-protein-low-carb leaves me starving. All day long. My gall bladder turned to Swiss cheese thirty odd years ago and I prefer digesting my food, which is why high-fat-low-carb leaves me nauseated, my stomach full of miserable indigestible fat. No! Not another bite of avocado/coconut oil/nut pie!

Eating a good balance of complex carbs, in combination with fats and protein at each meal, works best for me. I do not eat carbs by their lonesome. The grains still nestle in their little coats of bran, and are soaked prior to cooking. The great majority of baked items are homemade, using sourdough fermentation and whole grain flours. And of course, fruits and vegetables are carbs-at least five servings daily, and yes, I consume the starchy ones too.

But not all carbs are complex… Enter the demon sugar. The sugar industry evidently pulled the wool over our eyes for quite a few years. Of course, we were willing participants; lose the fat and up the sugar in my processed foods of choice? Heck yeah! But the truth about added sugar has popped out of the bag and refuses to be pushed back in, meaning that I’ve had to make some tweaks in my recipes and daily diet, particularly at breakfast.

Yes, hard as it is, I’ve cut back on the added sugar. (My taste buds will still be in recovery when I die.) I also employ a number of techniques to s-l-o-w down the rate at which those carbs enter my bloodstream:

  1. New recipes routinely have the sugar cut or eliminated, and I strive to keep added sugars in my own developed recipes within a range of one to two teaspoons per serving, depending on what I am baking. Can’t really call ‘em “sweet rolls” anymore…
  2. I substitute flaxseed meal for a couple tablespoons of the cereal grains when making steel cut oats or polenta to decrease the carbs and increase the healthy fats. Added hemp or chia seeds provide a protein boost. Pseudo grains like amaranth already have a good carb to protein balance, as well as having complete protein. Note the discussion of porridge? More complex grains, fewer rolls… sigh. And the heaping tablespoon of brown sugar to sweeten those bowls of goodness is gone as well; I do allow myself a single forlorn teaspoon of honey and fresh berries on top.
  3. Emphasize what sweetness there is in a recipe by adding enhancers like vanilla, lemon or orange zest, rum or brandy, and warm spices, like cinnamon.
  4. Plain unsweetened yogurt gets a single teaspoon of lemon curd or honey with chopped pecans. Tartness is good for you.
  5. Muesli/granola is made with half oats/half seeds, nuts, coconut, and flax. Yes, there are granolas made with all seeds, nuts, coconut and flax, but I’m inclined to want to hang onto my teeth, thanks very much.
  6. When I do indulge in one of my now not so sweet rolls, I pair it with an egg.
  7. Real sourdough bread is a slow digesting carb source. The list of ingredients should include nothing more than flour, water and salt, with some indication that there were many hours of fermentation before baking.
  8. I have no problem “borrowing”-well, actually filching-some of the secrets of low carb baking. But instead of trashing all the grain flour, I just substitute nut flour for part of it. As in the pancakes recipe I’m sharing today.

I’ve been making these tweaks for a while now, making me think back to my mom’s approach to sugar in my childhood. Which prompted me to look up what good old Adelle Davis, Mom’s nutrition guru, had to say about sugar:

“Almost every food we eat forms sugar either directly or indirectly during or after digestion…he or she receives all the sugar he or she needs from natural sources. Unfortunately we tend to rely too much on refined sugar to satisfy our hunger since it is absorbed rapidly into the bloodstream and gives a temporary boost to the blood sugar level. However, apart from being used in the body to provide energy it has no other value; it contains neither vitamins nor minerals.”

http://www.adelledavis.org/press/the-great-sugar-debate/

She said this about fifty years ago… Which was why we consumed plain yogurt, whole-wheat toast, bran muffins, NO SODA, etc., etc. on the farm. I am actually quite grateful that I never developed a taste for soda. One full sugar soda has three times my supposed daily allotment of added sugar by today’s standards. An addiction I didn’t develop! Thanks, Mom!

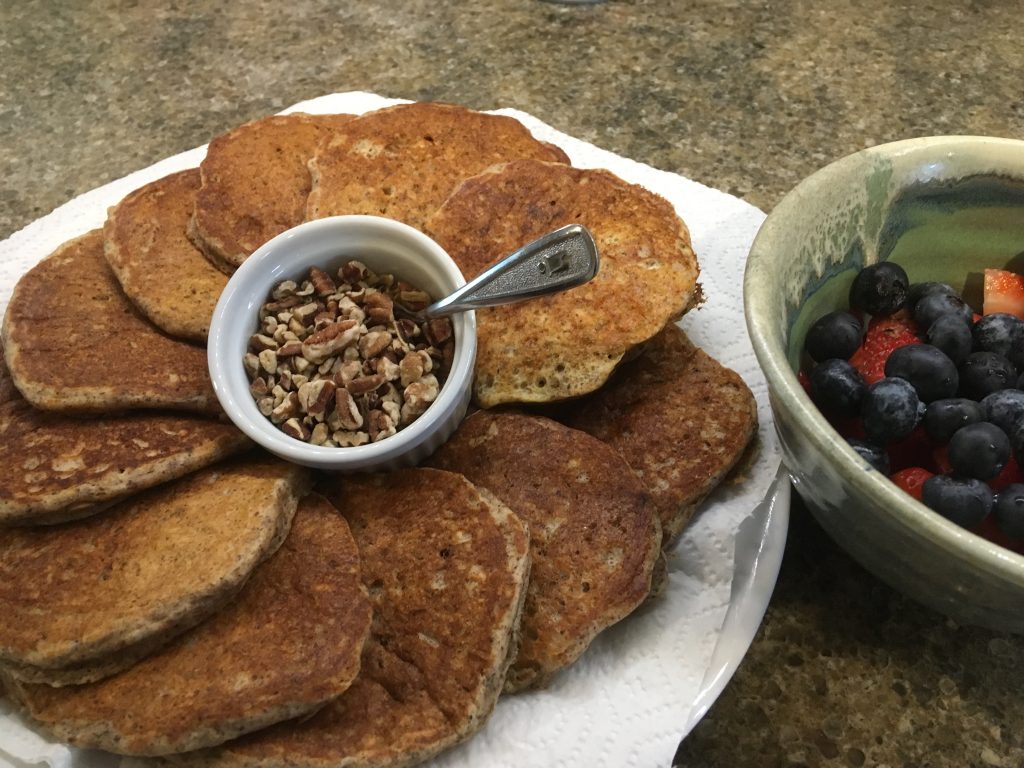
The pancake recipe includes a few of these techniques to slow the digestion of the carbs and keep my stomach happy for the morning. Whole grain flour in combination with nut flour*, and the addition of flax meal and hemp hearts adds healthy fat and protein. The extracts pump up the perception of sweetness. I’m happy to say that these little cakes are fluffy, stack beautifully, (though my personal portion of two pancakes makes a rather pathetic stack) and are jam-packed with pecan flavor. I generally top them with a drizzle of syrup, chopped pecans, and blueberries. If you require them to be more carb virtuous, applesauce and cinnamon with pecans makes a nice topping as well.

These keep my body fueled and contented for an entire morning, no sugar high or mid-morning tummy grumbling allowed!

Print Recipe
5 from 1 vote

Double Pecan Pancakes

Prep Time10 minutes
Cook Time20 minutes
Total Time30 minutes
Course: Quick Bread
Servings: 16 pancakes
Author: Mary Kay Allen

Ingredients

  • 1½- cup buttermilk or sour milk
  • 2 eggs
  • 1- teaspoon vanilla extract
  • ½ teaspoon maple extract optional
  • 1- tablespoon maple syrup
  • 2 tablespoons melted butter or oil
  • 1- cup white whole-wheat flour pastry flour if available
  • ½ cup pecan meal/flour or other nut flour
  • 2 tablespoons flaxseed meal
  • 2 tablespoons hemp hearts
  • 1 ½ teaspoon baking powder
  • ½ teaspoon soda
  • ½ teaspoon salt
  • ½ teaspoon cinnamon
  • Maple syrup or applesauce for topping
  • Chopped pecans for topping

Instructions

  • Pre-heat a griddle to 350° F. or large skillet over medium heat.
  • Combine the buttermilk, eggs, extracts, syrup and butter/oil in a medium bowl and blend together thoroughly. In a large bowl, combine the remaining dry ingredients and mix well. Make a well in the center of the dry ingredients and pour in the wet mixture. Blend gently, not over mixing. It’s okay of there are small lumps in the batter.
  • Lightly grease or coat the griddle with cooking spray. Ladle the batter by ¼-cupful onto the griddle, spacing to allow for spreading. When bubbles appear on the top and the bottoms are nicely browned, flip the pancakes. Bake for several minutes until golden on the bottom, then remove to a platter. Continue until all the batter is baked.


*Pecan meal can be made in the food processor or purchased online, or another type of nut flour can be substituted.


Panettone Morning Buns


So… I was a bread baker wannabe born to a couple of hot roll mix mavens. My grandmother’s delicious “homemade” raisin bread was actually hot roll mix with added sugar and raisins, while my Mom’s “Super Sandwich Bread” was hot roll mix with raisins, grated carrots, sunflower seeds, sharp cheddar and bacon bits. The two of them certainly kept their semi-homemade recipes true to form-Grandma’s was simple sweetness and Mom’s was, in comparison, a health bomb. Not my personal favorite health bomb…

We had a few family recipes passed down from prior generations, but none of them were really bread, even for the holidays. Mom did bake a treasured almond roll for breakfast, which is still our tradition, but it was adapted from a then recent recipe called Starlight Sugar Crisps, still available on many sites online. (https://www.justapinch.com/recipes/dessert/cookies/starlight-sugar-crisps.html ) But I longed for beautiful coffee rings, savarins, braided and swirled breads. I saw it as my job to pick up the cultural bread slack around the place. Armed with my treasured bread book, I made my best attempts at baking complex ethnic breads. Mind you, I had no connection to these ethnicities, no passing-the-skills-down from generation to generation. My family is primarily English and Irish, with a bit of German thrown in (or so I’ve been told), but my ancestors came eons ago, apparently without any prized European bread recipes in hand. Also, what I didn’t know at the time was that my beloved bread book (yes, I still have it!) was written for Americans. Easier methods, more of an American product.

After leaving the farm, I seldom made bread. Busy with college, first jobs, grad school and then my own family, bread was an afterthought. We purchased it at the grocery store like all sensible Americans. A massive metamorphosis occurred when my husband, our two young children, and I took a trip to Italy, where my husband had spent his early childhood years. While commercially produced bread had stolen the market there as well, a small artisan bread movement was underway and I discovered seriously good bread. The kind that one really should be eating if one is eating bread. The kind that takes at least 24 hours from start to finish, using pre-ferments or natural yeast leavens. The kind of bread with a soft but chewy interior laced with holes, all concealed inside a heavenly crisp crust. I overdosed on this stuff for almost three weeks, wondering how I would ever learn to make it at home. Because there was no question, if I couldn’t buy it, I would have to learn to make it. I was not going to waste my calories on lousy factory made bread for even one more day.

Which was not true, of course, because first I had to locate a book that actually took the place of an Italian grandmother. I found such books while still in Italy! Written in Italian… have I mentioned that I don’t read Italian? A bit of research on my part yielded Carol Field’s amazing book, The Italian Baker. (https://www.amazon.com/Italian-Baker-Revised-Countryside-Its…/dp/1607741067)  In English. Mercifully, Carol had completed my journey by spending time in bakeries across Italy, along the way writing a beautiful book, which replaced the Italian grandmother. Country loaves, ciabatta, focaccia, sweet rolls-I learned to make them all. Then, within a few years, the artisan bread movement had arrived in the states, and I could buy such bread locally. But I continued to bake it for special occasions.

These days, being retired, I make the great majority of the bread we consume at about half the cost of the artisanal loaf. I’m mighty glad that artisanal loaf is available though, because every now and again I just want to go out and buy it.

I don’t mess around with my daily bread recipe too much. Sourdough spelt whole wheat. But I am now the proud owner of multiple bread books by well established artisan bakers, and have learned a great deal about the science of bread making. When I play with bread recipes, it may take several attempts, but I know which ingredients to put where for my desired result. I thoroughly enjoy developing my own recipes from classic dough templates. Today’s morning bun is a cross between an English hot cross bun and a Roman bun. Typically eaten around the Lenten/Easter season, the English filled them with raisins and the Romans stuffed them with whipped cream. My version takes a U-turn to intersect with the delectable flavors of panettone, yet another Italian bread. My signature almond paste, fiori di sicilia (orange and vanilla flavoring) and yes, brandy to take it over the top. This is a rich roll, not as sweet as most morning buns, but definitely one of my favorites. You won’t find it, even in a European kitchen, but you can make it in your own!

About the hot roll mix…

When Mom moved into a retirement residence, she no longer had the equipment or ability to bake. But she still liked to eat. And yes, she still loved Super Sandwich Bread. Lucky for me the store still carried that cardboard box of premixed roll ingredients!

Panettone Morning Buns

Prep Time2 hours 30 minutes
Cook Time30 minutes
Total Time3 hours
Course: Bread
Servings: 1 dozen
Author: Mary Kay Allen

Ingredients

  • Sponge:
  • ½ cup warm water
  • 1 envelope 2 ¼ teaspoons instant yeast
  • 2-½ tablespoons sugar
  • 2 eggs plus 1 egg yolk
  • 1 ¼ cups sprouted whole wheat or white whole-wheat flour
  • Dough:
  • 2 ounces almond paste
  • 2 tablespoons brandy
  • ¾ teaspoon fiori de sicilia or ½ teaspoon vanilla plus 1-teaspoon orange zest
  • 1 cup all purpose flour
  • ¼ cup plus 2 tablespoons almond flour
  • ½ teaspoon salt
  • 1/3 cup butter softened and cut into bits
  • 2 tablespoons finely diced candied orange peel
  • ¼ cup tart dried cherries diced
  • 2 tablespoons sugar
  • ¼ cup lightly chopped pine nuts

Instructions

  • Mix all sponge ingredients together thoroughly in large mixer bowl. Cover and let rest for 45 minutes.
  • To the sponge, add the almond paste, brandy, extract, flours and salt. Beat together thoroughly, then add the butter and blend until smooth dough forms. Stir in the candied orange peel and cherries. The dough will be soft. If using a stand mixer, switch to the dough hook and scoop the dough from the bowl edges into the center of the bowl. Knead for 3 minutes. Alternately, scoop the dough out of the bowl onto a lightly floured surface and roll to coat lightly with flour. Knead until dough is smooth. Place in a bowl lightly sprayed with cooking spray, then spray the top of the dough to prevent drying out. Cover and let rise until puffy, 1 to 1 ½ hours.
  • Turn the dough out onto lightly floured surface and pat into a ball. Divide the dough into 12 even pieces and round each into a ball. Combine the remaining sugar with pine nuts. Dip the top of each bun into the nut and sugar mixture. Place on baking sheet either lightly greased or covered with parchment. Cover loosely and allow to rise until puffy, around 1 hour. Preheat oven to 350 degrees F.
  • Bake the buns for 25 to 30 minutes, until lightly browned. Remove to cooling rack.


Honeyed Fig and Pistachio Dutch Baby

It’s summer in Tucson, which means extreme heat, monsoon rains, gorgeous cloud formations and sunsets along with the ever-popular humidity. (Well, the ever-popular part might be debatable.) Oh! And…

Figs!

We all know that I am a fanatical aficionado of fresh figs, given that this is my second post starring the petite plummy fruit. There is nothing debatable about the luscious nature of the fig, full of honey and berry flavors. As mentioned here last July, fresh figs were actually a well-concealed part of my retirement plan, given that midwestern farm types don’t have the climate to grow them. My neighbor’s tree here in the desert southwest yielded mightily once again and I have purchased numerous baskets of them from my local grocer. Plus I’ve been keeping an eye out for a certain vendor at the farmers’ market, as he sells the best local organic figs ever. He didn’t disappoint, showing up for the first time several weeks ago. I really hope the fruity little fellas are good for me, as I tend to overdose on them each summer, as is patently obvious at this point!

And yes, given this fig bounty, four pints of my fig frozen yogurt (July, 2017) were securely nestled into the deepest section of my freezer. Maybe not quite deep enough though, since we couldn’t resist serving it for dessert the day it was made, then for a company dinner and now we are polishing off the third pint because it’s summer…or something. Might have to invest in additional fro-yo before summer fig season is over. I’ve also combined these succulent fruits with Greek yogurt and honey for an ingenious summer dessert and feasted upon them simply as fruit in hand. But their potential has come calling again, as it is so wont to do, for a crisp yet delicate Dutch Baby. I make a delectable buckwheat Dutch baby with blueberries and maple syrup, and a fig variation is on the breakfast menu today.

The Dutch baby was not a breakfast item served on our farm. This is somewhat surprising, given that my mom made both delicate lacy crepes and big beautiful crispy cream puffs. A Dutch baby would appear to be the offspring of these two delights, but alas, I did not discover it until many years later. Actually, one could stuff crepes with fresh figs and ricotta, roll them up and apply a drizzle of honey… oh but wait, I’m supposed to be baking a Dutch baby…

Just in case you are one of the unfortunate folk that don’t have a ready supply of summer figs, it’s good to know that Dutch babies are incredibly tasty with any number of fruits. Fresh juicy peaches with pecans or sweet strawberries with slivered almonds would make great combinations as well. Whatever yummy fruits you happen to have around, I hope you’ll give this Dutch baby a try before summer fruit marches into the sunset for the year.

However, I might point out that two types of figs were available at my local Trader Joe’s this week, so this might be your chance to run out and snag them. Which you should most definitely do, particularly if you have never tried them… but I will warn you, if you become addicted to figs, you might have to alter your retirement plans, too!

Honeyed Fig and Pistachio Dutch Baby

Crisp and delicate cross between a pancake and a cream puff.
Prep Time15 minutes
Cook Time20 minutes
Total Time35 minutes
Course: Breakfast
Servings: 2 servings
Author: Mary Kay Allen

Ingredients

  • ¼ cup toasted unsalted pistachios divided
  • 5 tablespoons flour I used a combination of Sonoran white whole wheat and oat flour; gluten free blend is fine
  • ¼ teaspoon salt
  • ¼ teaspoon cinnamon
  • Pinch of cardamom
  • 2 eggs
  • 1/3- cup milk
  • 1 tablespoon honey divided
  • ½ teaspoon vanilla
  • 1- tablespoon butter
  • ¼ cup Greek yogurt skyr, ricotta or cottage cheese
  • 5 large fresh figs sliced thinly
  • Optional sprinkles bee pollen, chia or poppy seeds

Instructions

  • Place a 9-inch cast iron skillet in the oven and preheat to 425° F.
  • Measure 2 tablespoons of the pistachios into the work bowl of a food processor. Process until a fine meal forms. Add the flours, salt, cinnamon, and cardamom. Process briefly to combine. Add the eggs, milk, 1 teaspoon of the honey and vanilla and process to blend. Allow to sit while the skillet is heating. Remove the hot skillet from the oven and swirl the butter in it till melted to coat the pan surface. Pour in the batter and bake 15-20 minutes, until puffed, brown and set. Chop the remaining 2 tablespoons of pistachios. Cool for several minutes, then place a scoop of the yogurt in the center. Arrange the fig slices around the center. Drizzle with the remaining 2 teaspoons honey and sprinkle with the chopped nuts. Dust with any of the sprinkles if desired.